This flagstone landscape border is a one-day project that’s simple in concept, but really added a lot of character to an Arborvitae line in the front of my house and also set us up to add softer flower bed plantings as well.
What I love about landscaping projects is that they’re hard work, they’re outside – and they allow one to balance precision with creativity. In other words, you get a good work out, you have fun bringing garden ideas you’ve envisioned to life – and you eventually get to treat yourself to a well-earned dinner as well! All good things.
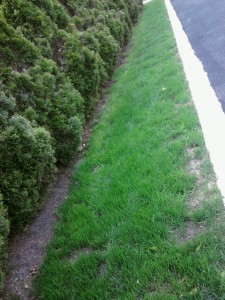
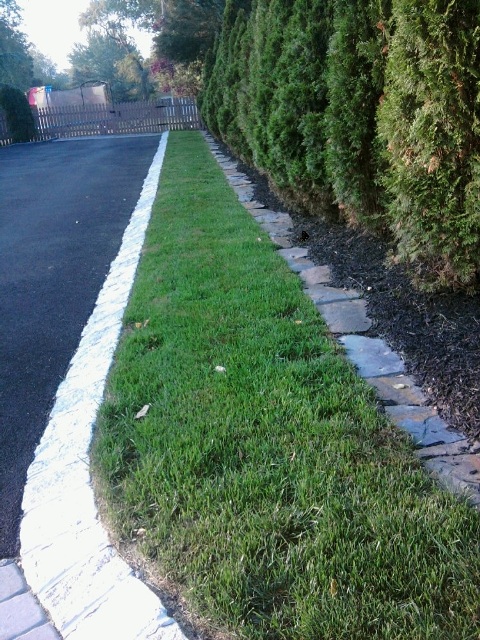
The two photos below show the before and after shots – essentially taking a weak demark from grass to mulch and giving it a much more definitive & crisp boundary. I opted to use colonial flagstone to do this (and you’ll see I specifically chose large/flat pieces) as I wanted to make sure the stones were inherently stable and impervious to lawn mower collisions. I also wanted low profile border as it was close to my driveway Belgian block, and I didn’t want the two “looks” to compete.
As an alternative to the colonial flagstone, another option was to use large Delaware river rock for the landscape edging, perhaps 8-10 inch mini-boulders like these (depending on what’s available in your area). These have a beautiful look as the colors vary and they’re generally smooth, rounded stones, but I thought these would be somewhat less stable for what I wanted to accomplish. It’s surely an alternative to consider, though, depending on your specific goals.
Materials for the Flagstone Landscape Edging Job
I was going to need quite a bit of stone for this job as my border spanned about 85 feet. To be a little conservative, I wanted to make sure I had at least 100 feet of what I started to think of a “high-end” stone, meaning pieces that were large, flat, heavy and mostly rectangular. (Such pieces would also make perfect “stepping stones” for a backyard landscape walkway.)
To find stone like this, you’re most likely going to have to go beyond your local hardware store.
For me, I found my stone at a mulch, gravel and stone distributor that just happens to be close by. In fact, for those of you who happen to live near the Jersey Shore – I’ve been using New Jersey Gravel & Sand for more than a decade for all sorts of stuff like this. It’s a family run business and they’ve been consistently terrific.
Carefully Selecting Your Decorative Stones
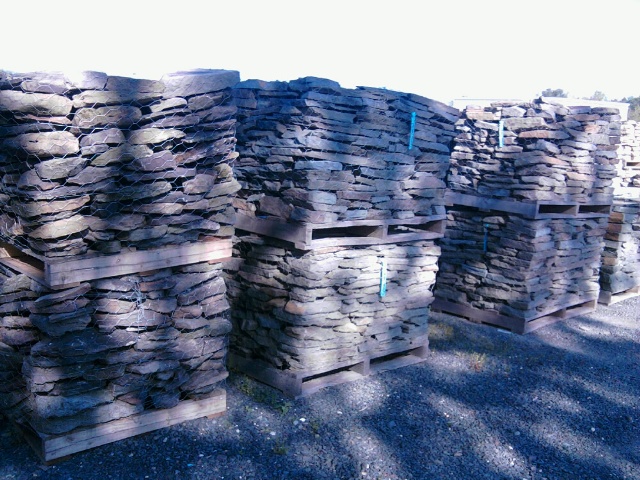
You’re likely going to have two choices – you can buy a pallet of stone, or you can try to assemble what you need from a “miscellaneous” bin you may find at the yard. You can see what a pallet of colonial flagstone looks like in the shot just below where I’m showing six. Be picky if you get a full pallet. What I’ve found is that the larger stones tend to be packed around the edges; they’re the ones you see. In the center of the pallet, you might find smaller stone pieces and fragments, which are good filler when building a stone wall. I wasn’t building a flagstone wall, though, so those larger outside pieces were the ones I wanted. Be picky!
I took the pallet on the bottom in the middle – it looked the best to me.
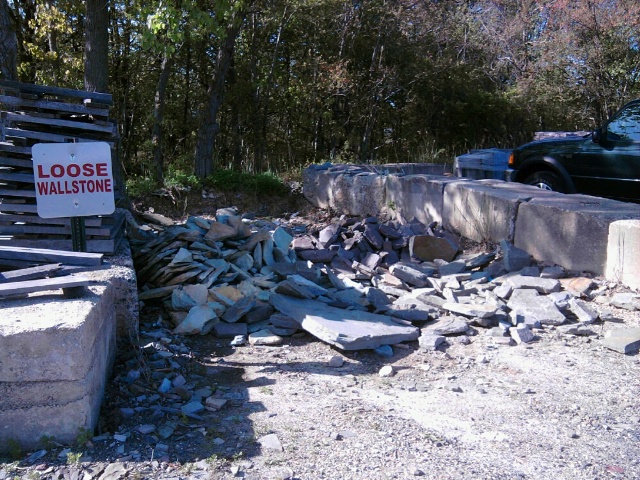
If you’re at a yard with a miscellaneous bin (an area for loose wall stone), you might get lucky and avoid needed to buy a full pallet. It really depends on the size of your job and what happens to be there on the day of your visit. But you can see what such an area might look like…
So, what does it take to get a full pallet of stone back to your house? This can be a bit of challenge in and of itself as well. You can surely arrange for a delivery, but you’ll quite possibly pay a lot for that. The reason is that the trucks used to deliver one pallet are also used to deliver multiple pallets to construction sites, so there may be a higher cost for this than you would expect.
The alternative is to get the pallet of stone home yourself, which is what I did.
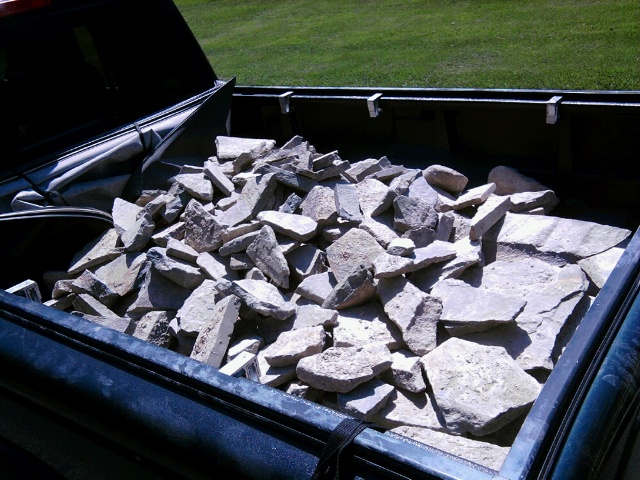
The pallet you see holds about 1.5 tons of stone, which is roughly 3000 pounds. While I have my pick up truck for such tasks, it’s on the small side. And 3000 pounds isn’t a weight I think can be fork lifted into the bed of such a truck without doing some serious damage. If you have a full-sized truck, you may be just fine (check to be sure) – but I ended up breaking up the pallet at the yard and carrying 3 loads home, roughly 1000 pounds each.
Remember – you’re having a day of sunshine and you’re looking for a good work out. And you need to justify that rare steak you’ll be having for dinner tonight. So go slow and easy, being sure to distribute the load as best you can over the bed. And you absolutely must have a good pair of gloves with you. This is fun… well, for about 15 minutes, anyway. After that – not really so much. ;-)
Mulch to Enhance the Landscape Edging
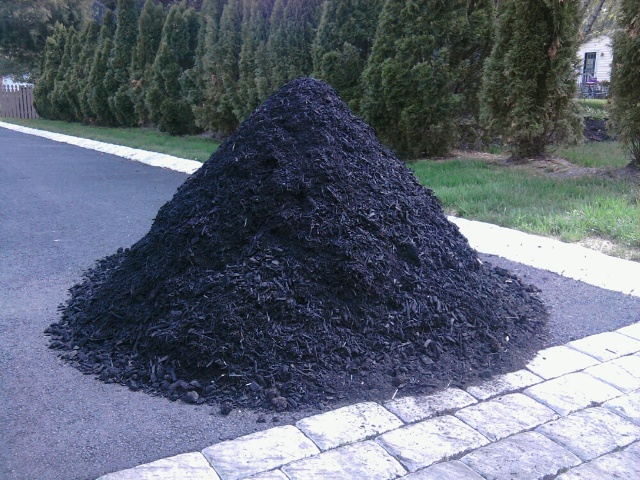
The last thing I needed for my project was about a cubic yard of black dyed mulch which I had leftover from another project. Dyed mulch looks particularly nice and tends to hold the color for several weeks, but it’s somewhat messy to work with. Here again, have those gloves ready.
Preparing the Work Area & Running the Edge Line
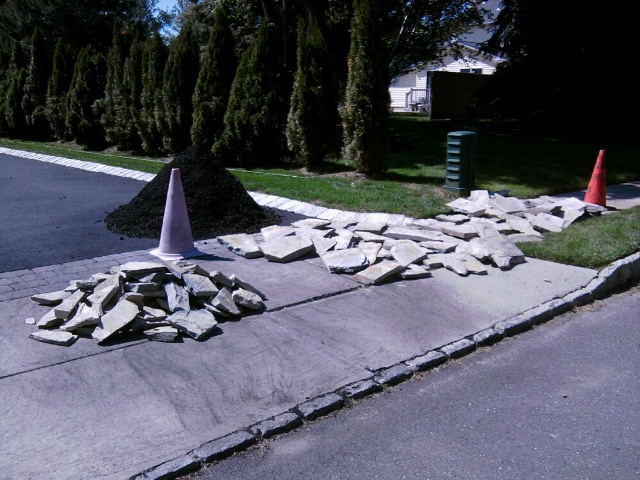
Once the stone is at your home, it’s a good idea to sort the pieces by general size and shape. In my case, you can see how I started this (with my first 1000-pound load) below. I knew the larger pieces were important to me, and I was also looking for some curved chunks for a turn that I was going to have to make. Try your best to spread the “good ones” out so you can see everything as you start working on your landscape border, which will be very much like assembling a jigsaw puzzle. I didn’t care too much about the smaller fragments, which you’ll note I started stacking in a pile on the left.
Now it’s time to create a guide line – sometimes called an “edge line” or a “layout line.”
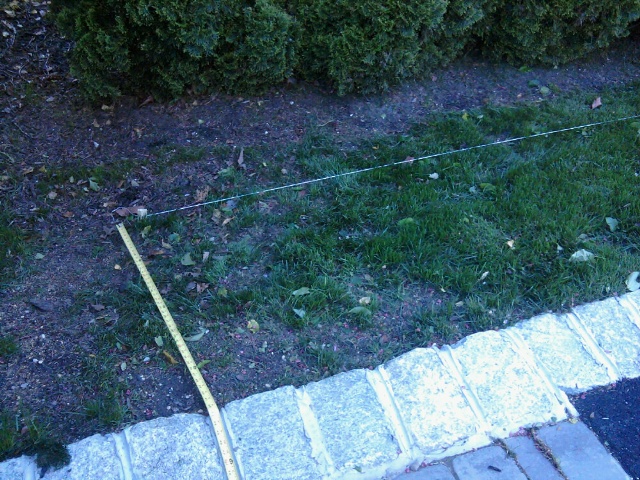
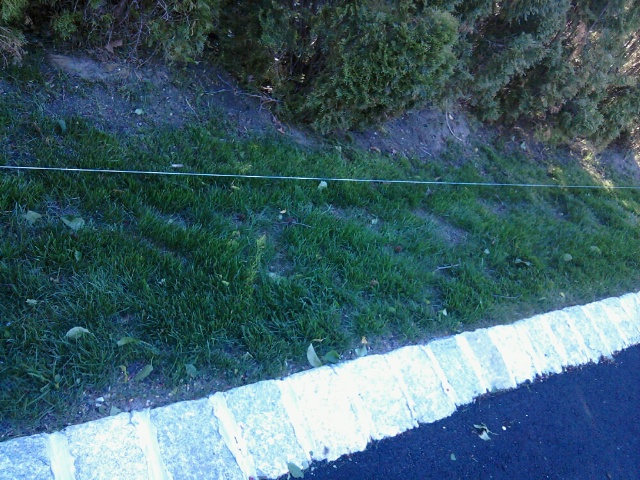
In essence, you have to determine the position of the outer edge of your landscape border. I measured in to a depth that I liked, and then I set two stakes and ran some masonry twine in between with a bit of tension. I did this as my goal was to have a border parallel to my driveway. This requires careful validation and a bit of adjusting – be sure to get it just right. If you’re running a curved (free-form) border, sometimes a garden hose is helpful to get the basic idea of the shape you like, and you can then make it more permanent with some spray paint on the grass.
But for my purposes below, masonry twine is run parallel to the Belgian block edge with tension…
Positioning & Setting the Flagstone
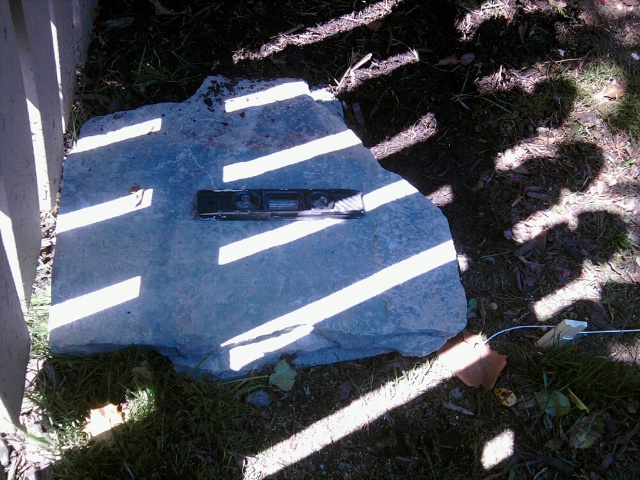
One of the special pieces I was searching for in my pallet was a particularly large chunk with a 90-degree edge that I could use as a cornerstone up by my fence. This was to be the starting point for the landscape border. I found this stone as shown below, removed grass as necessary with a straight shovel (which you’ll have to do for the entire border), ran the outer edge along my layout line and leveled the stone off using a small torpedo level.
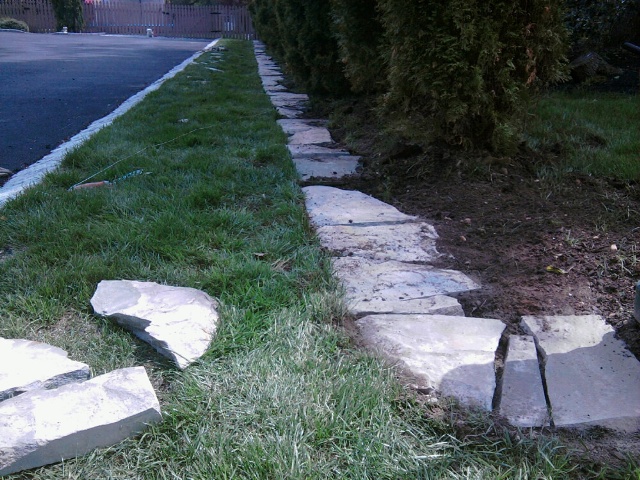
And now – the puzzle assembly begins. Stones are added one at a time, being extremely careful to follow the layout line, to level off and to interlock as best possible. I found a small sledgehammer was helpful with the final positioning of each piece. If you want to take extra care to minimize weeds and grass growing through the cracks between the stones, a thin strip of weed felt can surely be added as well.
This is slow and careful work. It doesn’t go as quickly as you might imagine. Each stone is heavy enough to be awkward, and every one truly needs to be stable and level.
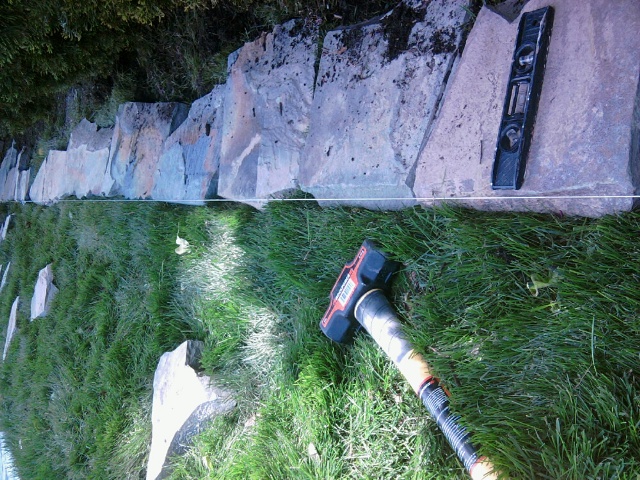
I wanted to finish off the border with a curve to a nearby utility box as you can see…
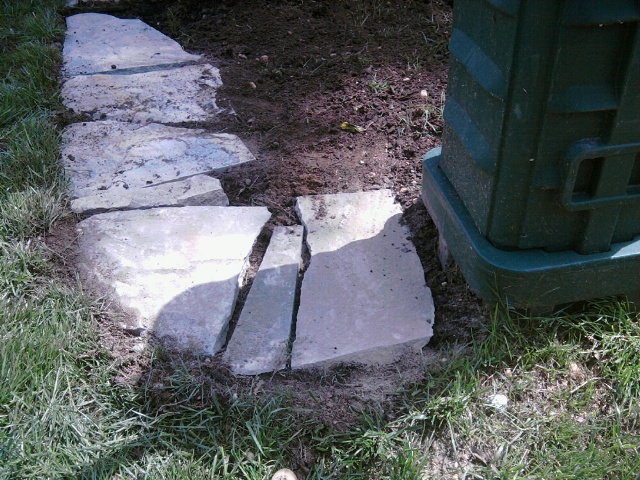
Once every stone is in position, you can remove your edge line as shown in the following shot – this is definitely a project milestone. You’re approaching the finish line.
Mulch and Finishing Touches
The mulch is applied and raked out nicely, and then everything is wet down completely.
The flagstone (or any natural stone that you use) won’t be clean when you get it, so this is really an impacting step. Hit each stone with moderate pressure and clean off the mud without knocking the mulch away. Wetting the mulch down will help it lock into position as well, and after a few days the natural decomposition process will begin and solidify everything even further.
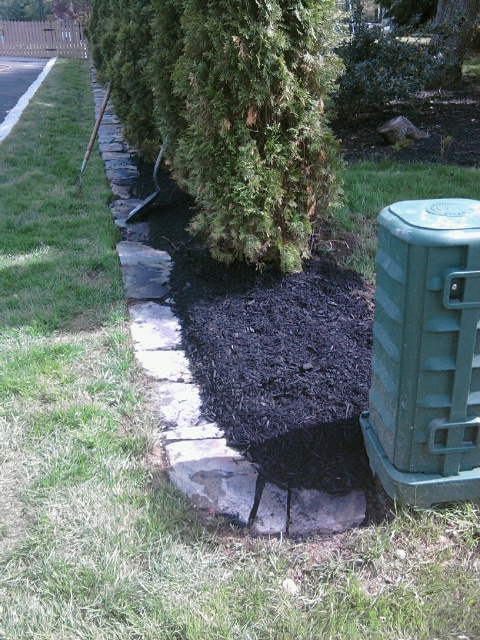
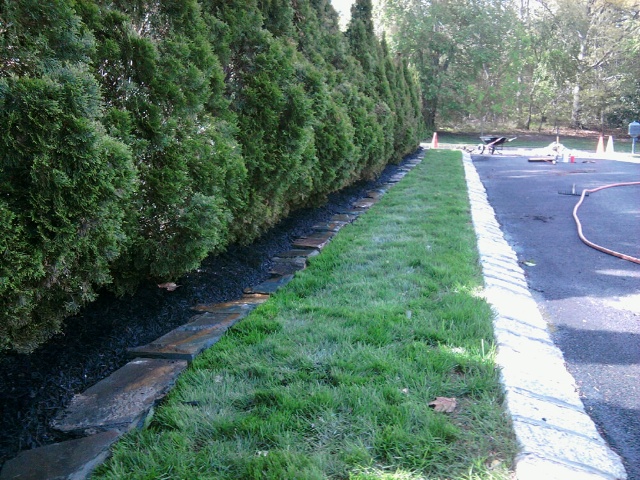

And we’re done. The border is finished – nice and neat, and surely with some added style for the entire Arborvitae line. Trimming the grass will be easy with a weed whacker as there’s now a nice definitive edge. And if I want to add some shade-thriving flowers in the spring (like Impatiens, maybe) that will likely work out nicely as well.
Time to clean up now and bring on that steak…

This is a great walk-through on installing this style of border. I like how low-profile the look of the stone is. Great job, and a solid looking landscaping job.
I appreciate the honesty of your article. You’re not over-romanticizing working with stone. You show how you have to struggle with each piece, literally and artistically. It’s not like a standardized craft project. And the challenge, as you show, is that the end result will be unique, depending on your choice of stone and the way you fit it together.