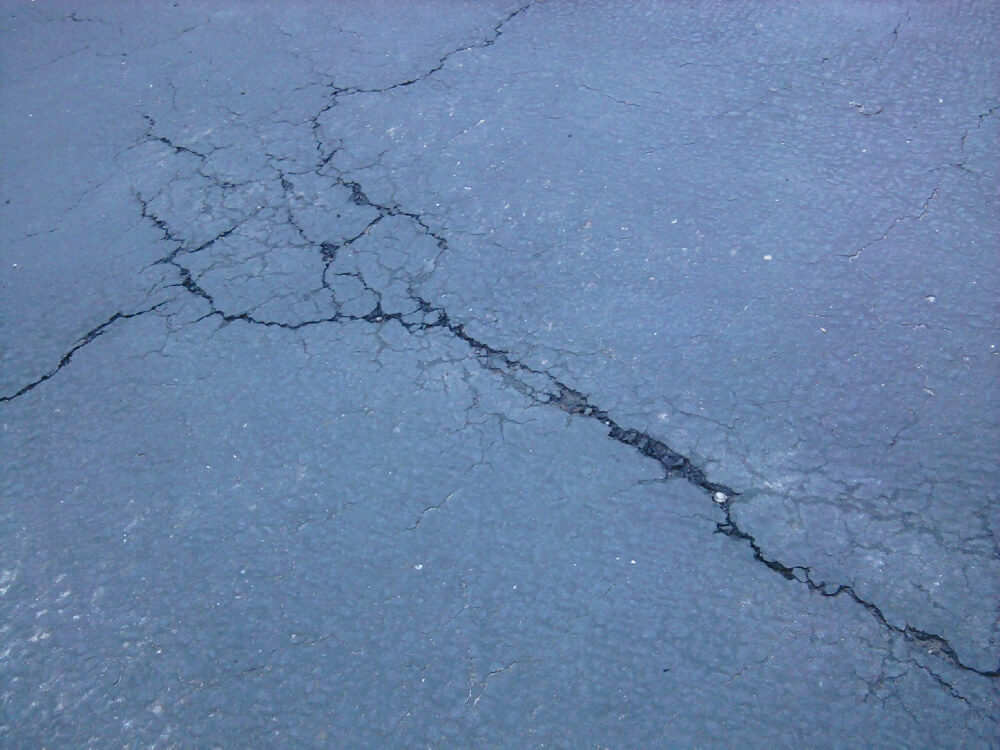
2024 Update – Surface tree roots and water drainage problems had been slowly killing my asphalt driveway for a number of years, but it was a convoy of construction trucks en route to the backyard that really finished it off. None of the usual asphalt repair quick-fixes could possibly help.
We tried to get creative and save the driveway with some beautiful (and strategically placed) Belgian block borders and paver aprons, but the asphalt was just too far gone – cracked and crumbling in far too many places. The asphalt had to be replaced in total.
This is not a cheap or simple project, and as with all such efforts – the more you know in advance, the better prepared you’ll be to ask the right questions and ultimately engage the very best contracting crew to work with you to make the job happen. I’ll lay out the whole process – you’ll see what it took and how it went…
From the Start: Asphalt Paving & Grading Problems
My house was built about twelve years ago.
A good asphalt driveway should easily last twenty years. In fact, I grew up in a house with a driveway that made it to more than thirty with just a little bit of care and routine maintenance. But a lot has to do with the asphalt driveway construction, which you may not have been around to witness or influence.
Much of the strength of a well-constructed asphalt driveway comes from the underlying gravel base more than the asphalt itself. A good gravel base should be several inches in depth (ideally 8-10) and needs to be compacted significantly before the asphalt is applied. Grading is another critical factor for the longevity of a driveway. Water must always passively flow away from your home, of course, but you don’t want it collecting near the edge of your driveway either. Ideally, water should flow away from your house – and then follow a path down to the street.
The reason I make both of these points?
My gravel base, it turns out, wasn’t quite as thick as it could have been. This became particularly apparent after the old asphalt was removed and additional crushed stone needed to be brought in. And to make things worse, water had been “ponding” next to my driveway for years due to poor landscape grading. The grass was quite green in these specific areas as the ground was often saturated, but the water was constantly undermining and weakening the driveway at the same time.
And then, there was one more mistake that I was FULLY responsible for… we planted a beautiful fern-like landscape tree which just looked terrific. It grew really fast – from about four feet to almost thirty feet in just about 7-8 years. My wife loved it, and I did too. But it had surface roots – and I had no idea about this when I got it. So while it was growing tall and umbrella-like, it was also destroying the driveway from underneath.
With all this going on for several years – it’s really no wonder that things completely began to fall apart when the construction trucks drove into the backyard. The driveway crumbled at the edges (chunks of asphalt literally broke off), and even the thin cracks that had developed over the past couple of years seemed to start spreading significantly.
Driveway Pavers & Belgian Block To Avoid Repaving
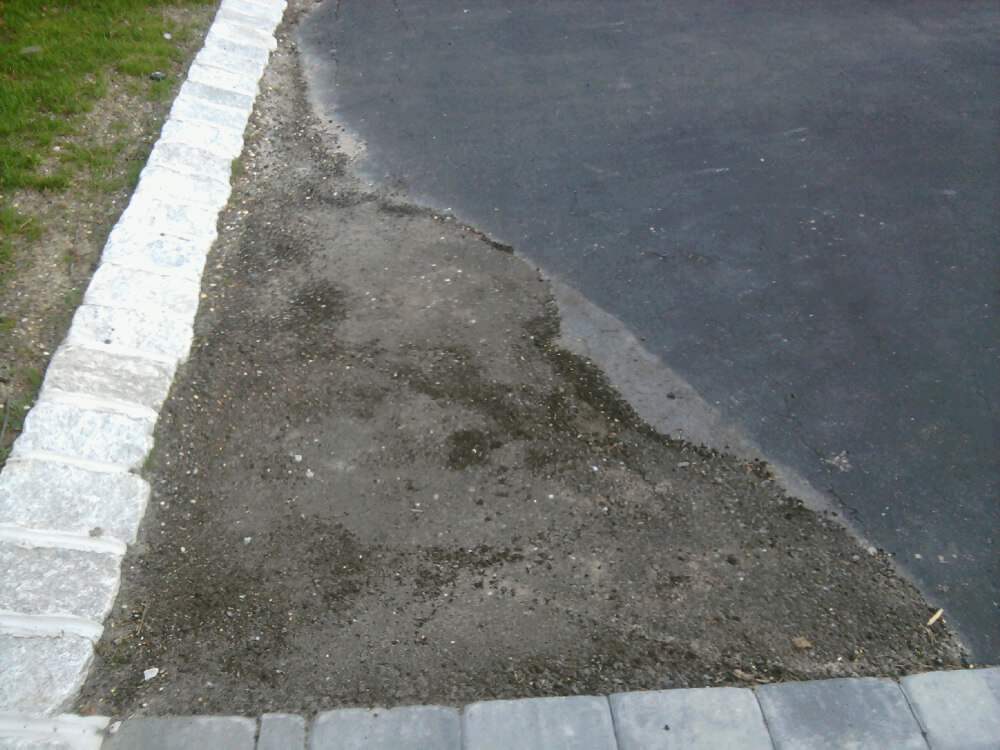
I mentioned earlier that we tried to be clever and deal with the destroyed edges with some very nice Belgian block borders and paver aprons. They truly looked terrific when completed, and there’s an entire article on the site about this as well that I hope you’ll look at. But as soon as that work began, we realized that our primary goal of saving the asphalt was doomed to fail – it was just too far gone already. The picture below shows one of the worst areas of the driveway. Where you see the Belgian block and pavers – the decimated asphalt had already been removed. But what you now see as an ugly ”patched area” is where additional asphalt had crumbled when the mason began working.
I think you’ll agree – this looks just terrible!!
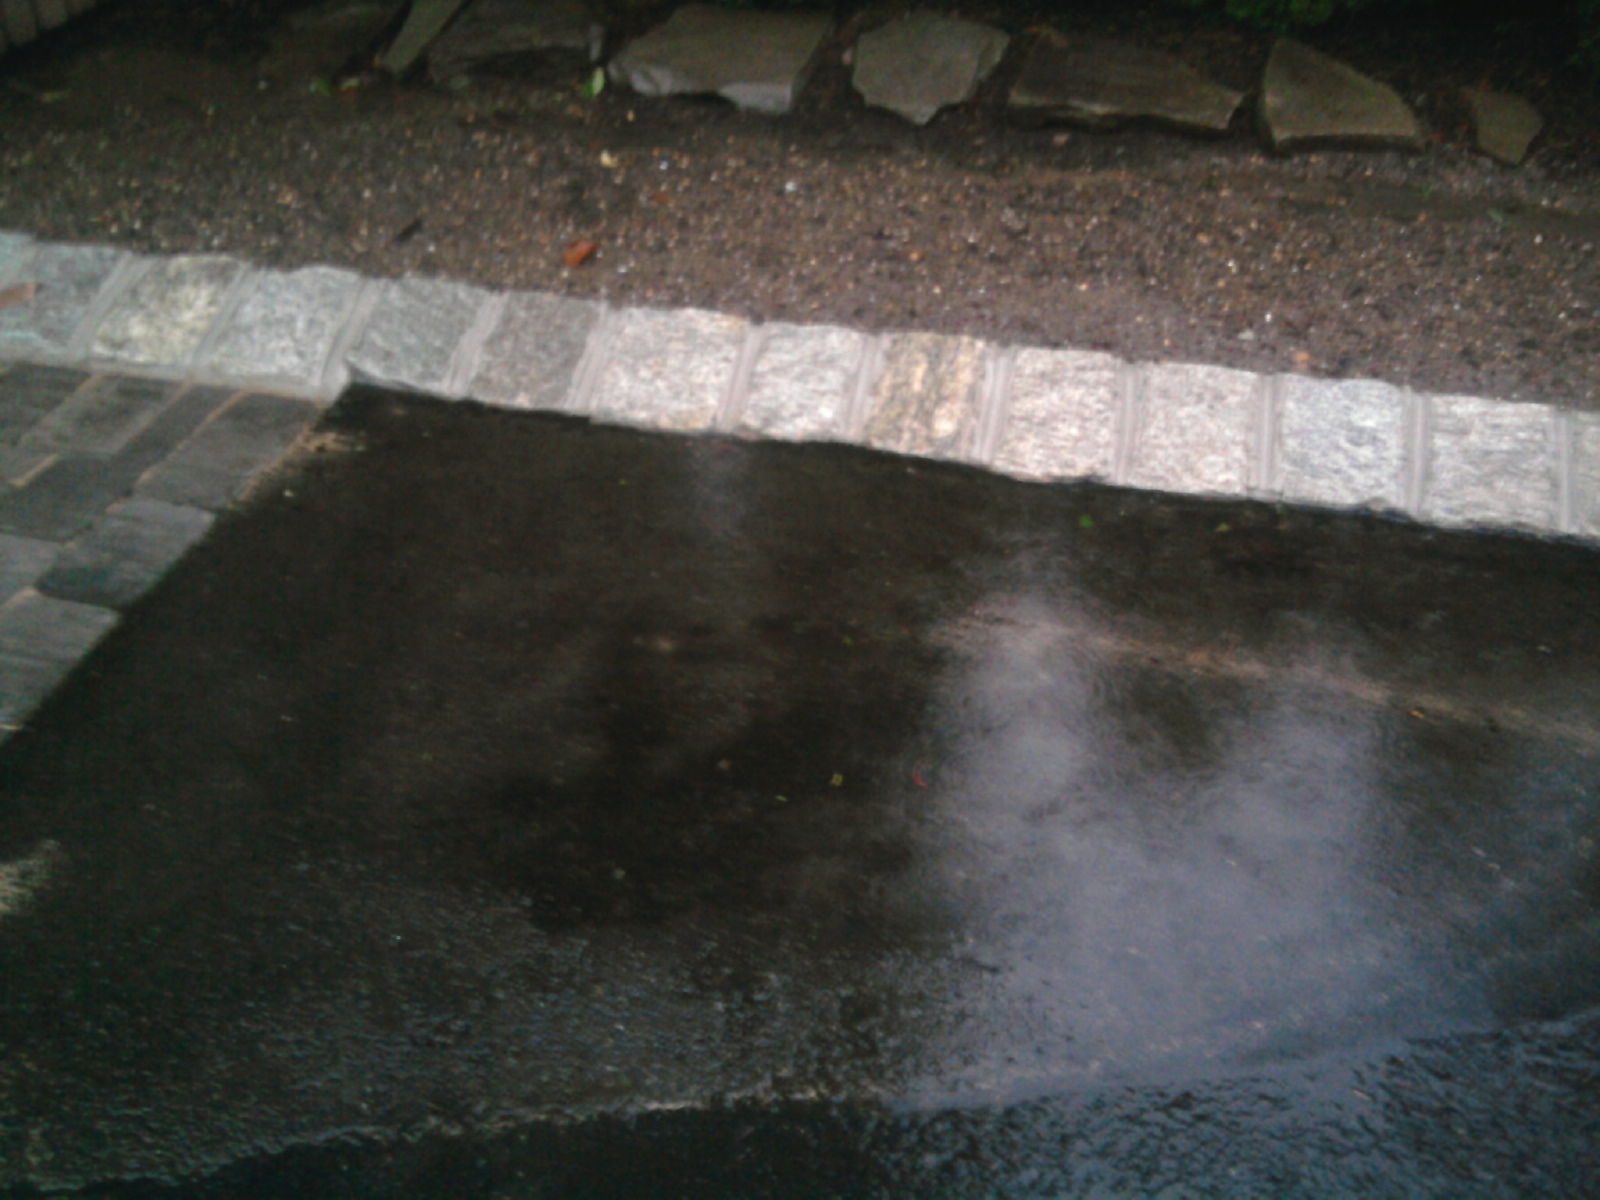
Adding even more “insult to injury,” this was one of the key areas that water had been undermining. So, once we locked everything in with the angled Belgian block – the whole area turned into a dam. While the water had previously gone into the grass and undermined the driveway – it now was blocked from doing so. So, it just sat there after a heavy rain… though it eventually seeped through the paver apron on the left and dissipated.
So, to summarize: I spent a LOT of money on pavers and Belgian block to try to fix a problem that I instead ended up magnifying. The driveway was now unquestionably at end-of-life, and the grading issues were more apparent than ever before. Just lovely.
Finding My Driveway Paving Contractor
I have a whole list of rules when it comes to finding really good people, and there’s a summary of what I do and recommend in “Finding the Best Local Contractors.” I went with a local company who came highly recommended – and after I met with the owner for about 45 minutes to discuss the detailed nuances of my job, I knew they were the ones. We simply understood each other. We “clicked.”
First Things First – A Murder Confession
I add this little paragraph only because I feel very guilty about what I’m about to say. I mentioned that beautiful fern-like tree with the surface roots earlier. I had to cut that down. My wife was really mad at me, and I felt like a tree murderer. But, there was no way we were going to rip out the driveway, fortify the gravel base, lay new asphalt on top – all while surface roots kept growing underneath. So, I had to get rid of the tree. I don’t even have any pictures of this; when the tree service arrived to do it, I actually left before they started. I didn’t want to watch. My key recommendation here: before buying any landscape trees to plant near a driveway, patio or pool – please be sure you know if the root structure can threaten any of these vulnerable areas over time.
Removing the Old Asphalt & Fortifying the Gravel Base
One of my main concerns with this entire job was damage to the paver aprons I had just installed in an attempt to save the driveway. I wasn’t worried about the Belgian block edges as those blocks were set in about 8-9 inches of concrete; they weren’t going anywhere. But paver aprons sit on top of stone dust, and that’s about it.
Another of my concerns was the grading at the top – I didn’t want water ponding on the driveway anywhere. Aside from looking terrible and being dangerous ice patches in the winter, standing water gets into small cracks, then freezes and expands – making larger cracks. You definitely do not want water sitting on a driveway or pretty much any masonry area.
I wasn’t sure if we would need to install a drain or if the grade could be modified to ensure water didn’t sit there. My asphalt contractor felt there was a very good chance he could elevate the base and asphalt in the lower area, especially given the angled Belgian block was there – as it provided the opportunity for discretely raising the driveway in that area. This was going to be the initial plan. If it failed, we would talk more about drains. Turns out, we didn’t have to; this worked out just fine in the end.
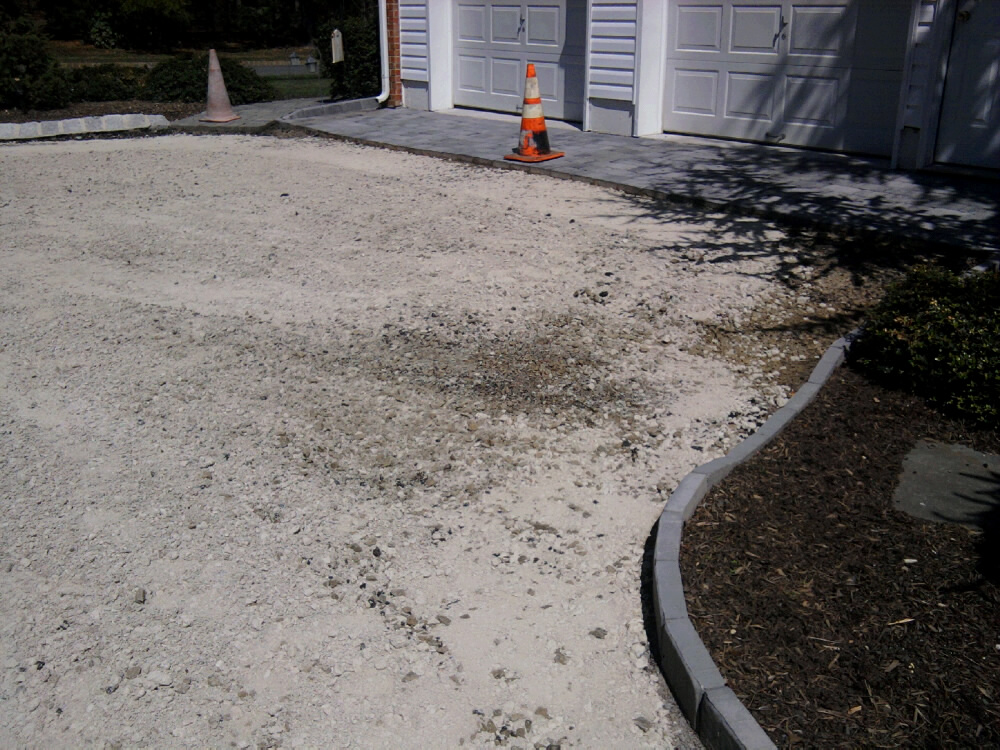
Removal of the asphalt took less than a day. It came up in chunks, and was carted cleanly away. Really hard work, but the crew got an early start and once the asphalt was gone, additional crushed gravel was brought in to fortify and elevate the base as well. This was compacted and then left to sit further for a few more days. The more it settles, the better.
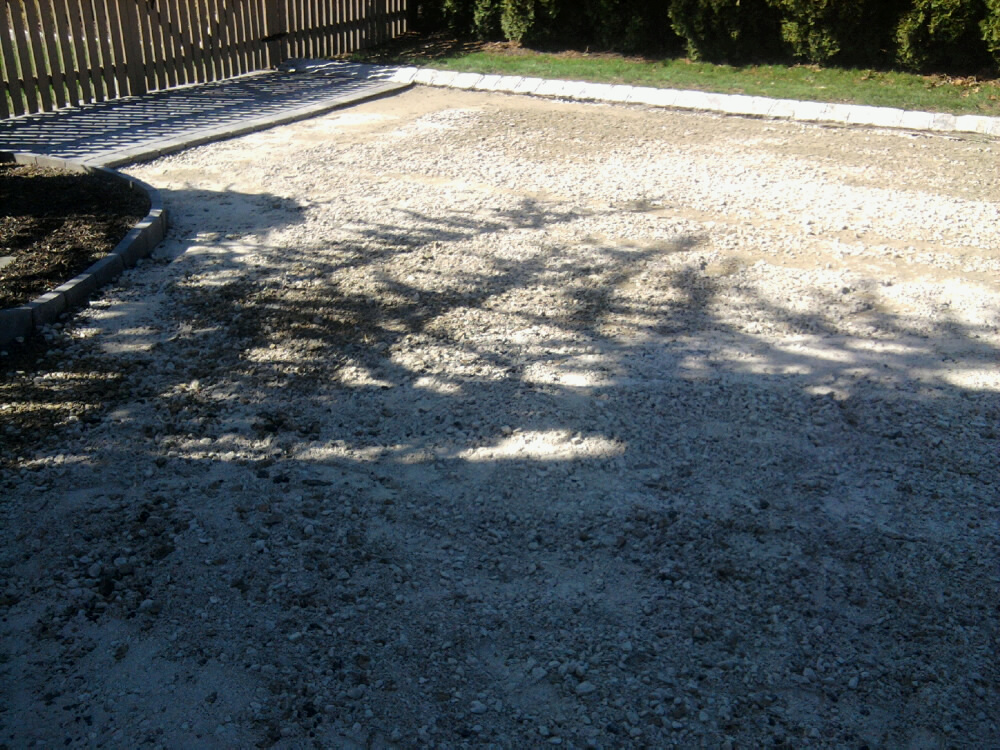
You can see two shots of the compacted gravel base below. What always impresses me with the very best construction crews is the meticulousness with which they work. It’s a tell-tale sign of good engineering from my perspective. (And I say that as an engineer of 20+ years.) If you’re neat and organized – jobs tend go much more smoothly and efficiently, plus it’s often safer for everyone involved as well.
If you click on the two shots below, also note the two paver aprons and the stone border. All were preserved perfectly. Meticulously.
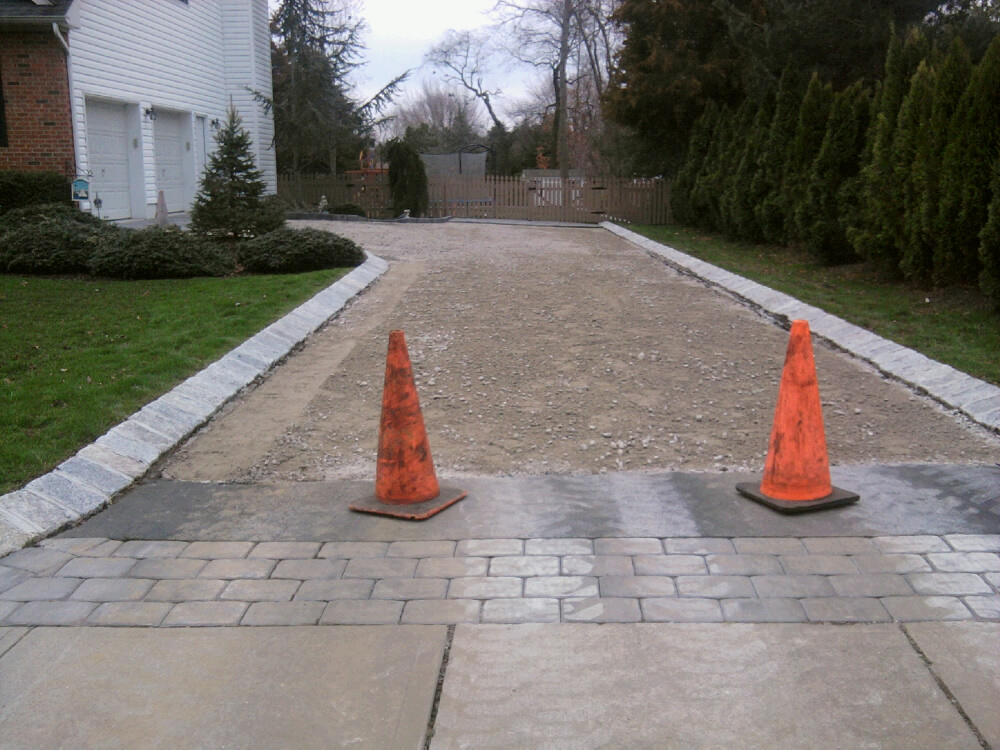
There’s one other item that’s also well-worth pointing out in the following photo. I have a third paver apron at the bottom of the driveway as you can see, and the crew opted to leave some of the old asphalt there until the day of the new asphalt paving. Why? Because they knew they were going to be taking heavy machinery over this paver apron to get to the top of the driveway. If there was nothing locking in these paver stones, the apron could have fallen apart as the trucks and machinery moved from the pavers to the gravel.
This is pure experience and professionalism at play here.
A question I’d like to put forth, and this is all intended for you to ponder while considering your own job, of course, is this: If you’re considering doing new asphalt in addition to pavers and/or Belgian block as I have, should the masonry work be done first… or second??
My opinion in hindsight: The masonry work should definitely be done first.
What you’re going to see in the shots that follow is just how beautifully the new asphalt locks and seals all of this stonework into place. It becomes picture perfect – because the asphalt is somewhat molten when applied. I’m jumping ahead, I know, but keep this in mind as you glance at the photos in the final sections of this article that follow…
Asphalt Paving Fun Facts & Construction Photos
I had no idea until the day this happened that new asphalt is mixed and applied at temperatures in the vicinity of 300 degrees Fahrenheit. One of the key tricks is to apply it thick so it doesn’t cool too fast. It makes for much heavier manual work, but it ensures the asphalt can be shaped and molded for a longer period of time – allowing for the best overall finished look.
A dump truck carrying about 20 tons of asphalt arrived at my house, along with a flatbed carrying a lot of additional asphalt paving equipment – including a large ride-on roller and an asphalt paver. Hot asphalt is dumped into the hopper of the paver (shown partially below), and the machine then allows for distribution over a specific area of the driveway being paved. This doesn’t do the “finishing” work – it merely distributes the hot and heavy asphalt so that the crew can work on one area of the driveway at a time.
This job is all about timing – once it starts, there’s a time limit.
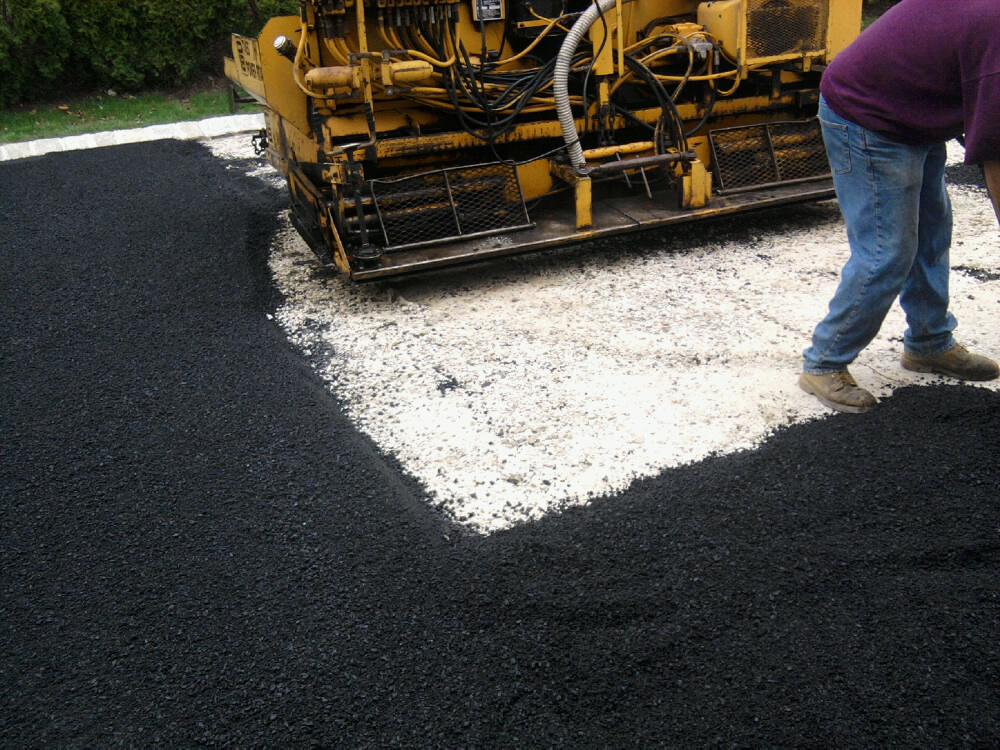
Hand tools for spreading, tamping and rolling the applied asphalt are used extensively by the crew as each section of the driveway is applied. The edges (especially where there are walkways, stone and random angles to accommodate) require special focus – much like trimming out paint on a wall or ceiling before using a roller.
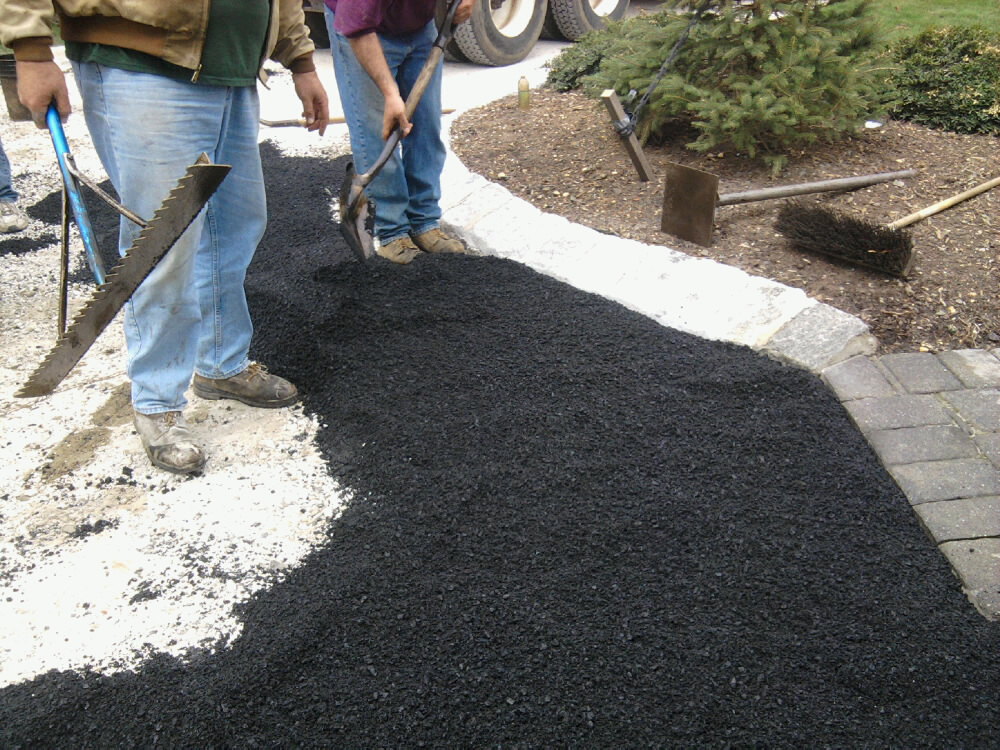
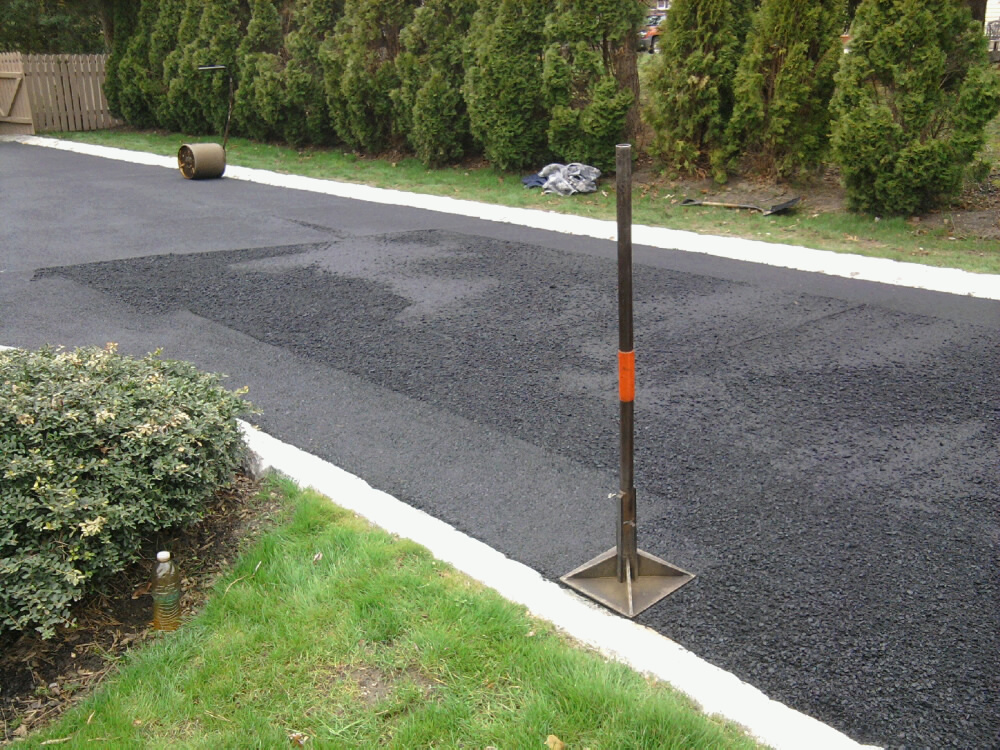
You can see below – once the tamping begins, the asphalt already starts to take on a more uniform look. It doesn’t look like “small black gravel” – but starts looking smooth and more driveway-like.
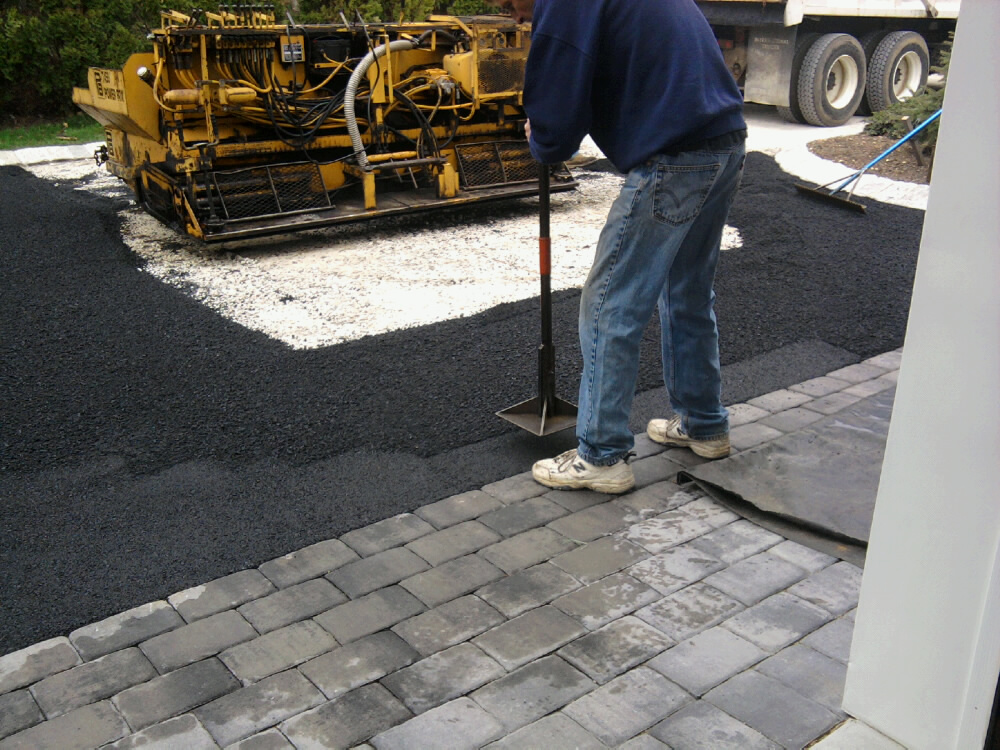
Aside form the small hand tools (which surely include hand-rollers), you can also see the large roller in the background of the shot below. This is in-place and all ready to be used to do the final smoothing of the driveway once all asphalt has been applied. Once again, timing is imperative here – so this was put into position before any asphalt application began.
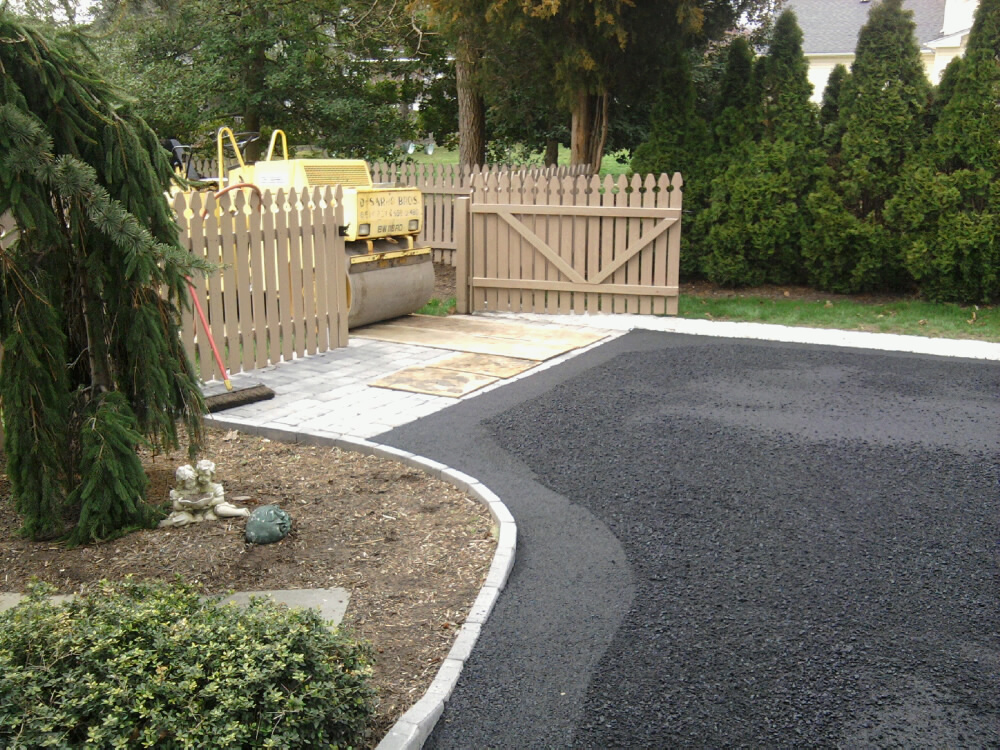
The application work continues down the driveway up to the street…
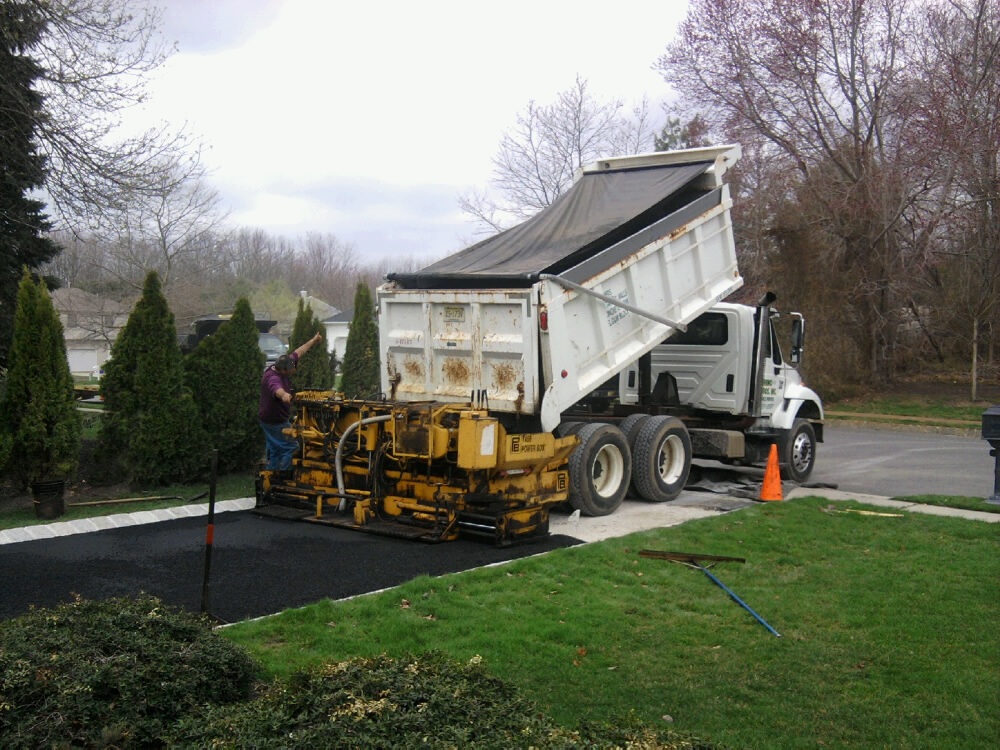
And eventually, the last piece of “old” asphalt is removed as the truck and paver are now out of the driveway in total. Note the protection applied to the paver apron – here again, everything is prepared is advance for careful, timely and efficient execution.
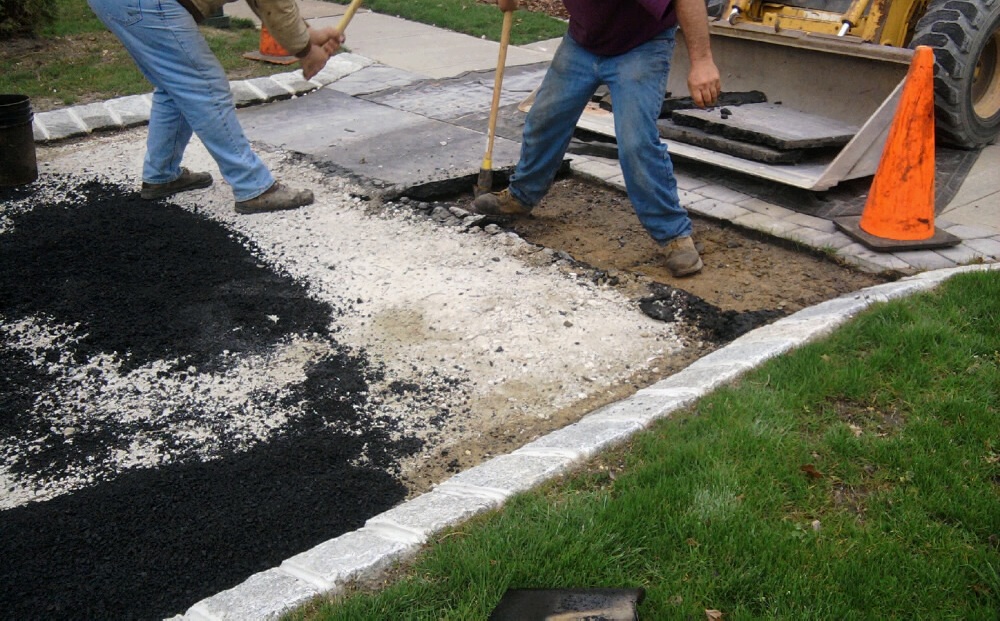
Final smoothing of the driveway overall took quite a while – there were numerous passes with the large roller along with a lot of careful crafting with specific edge areas. You can see the finished results in several of the shots that follow…
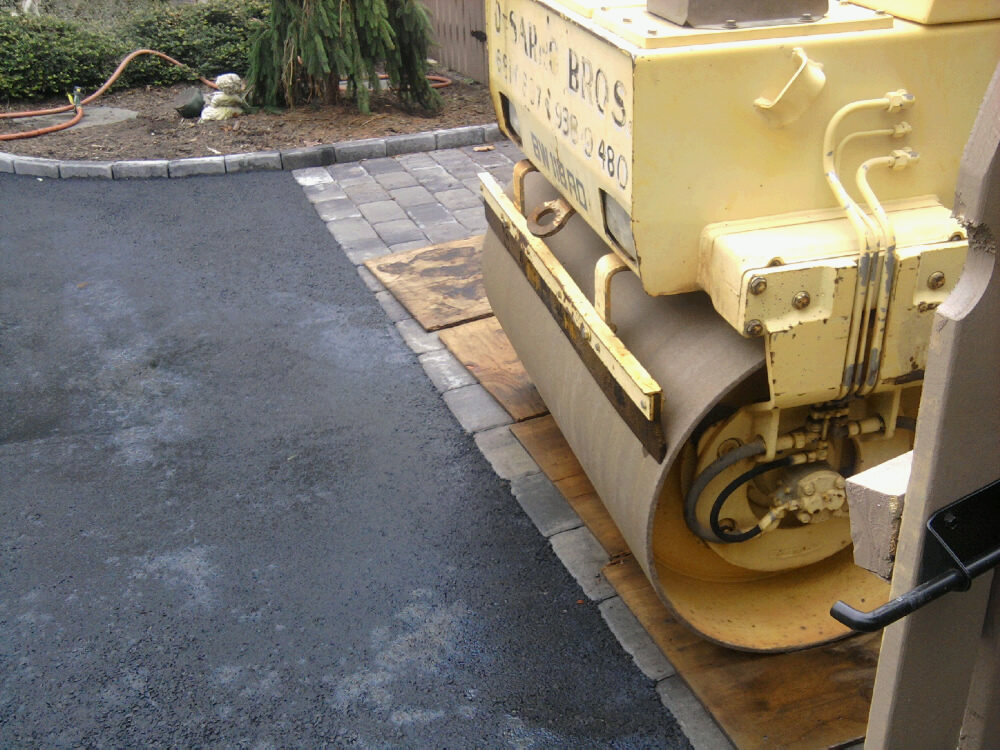
Expand the next three shots to see what I meant earlier regarding my opinion that the asphalt paving should be done after the Belgian block and paver apron masonry work.
Can you see how beautifully clean the edges/seams are?
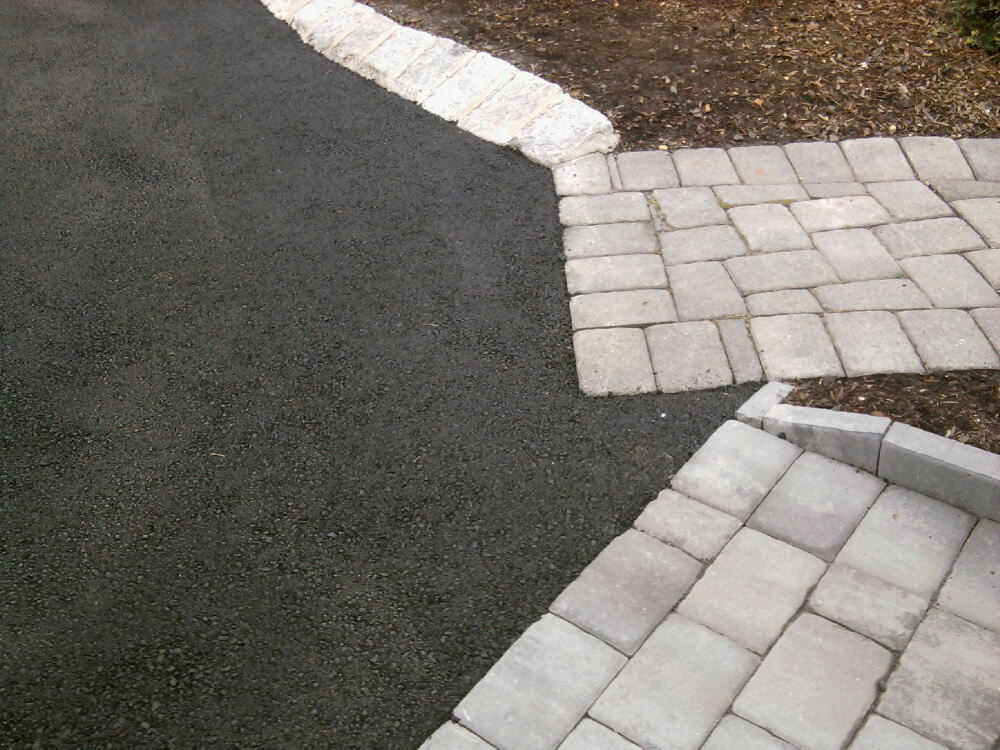
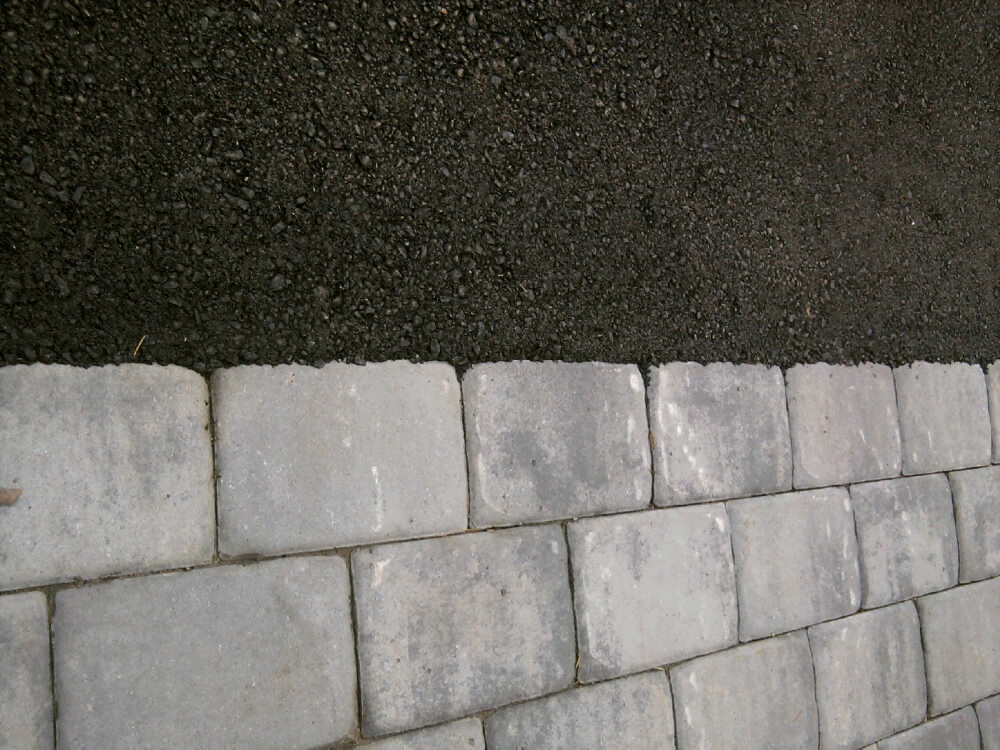
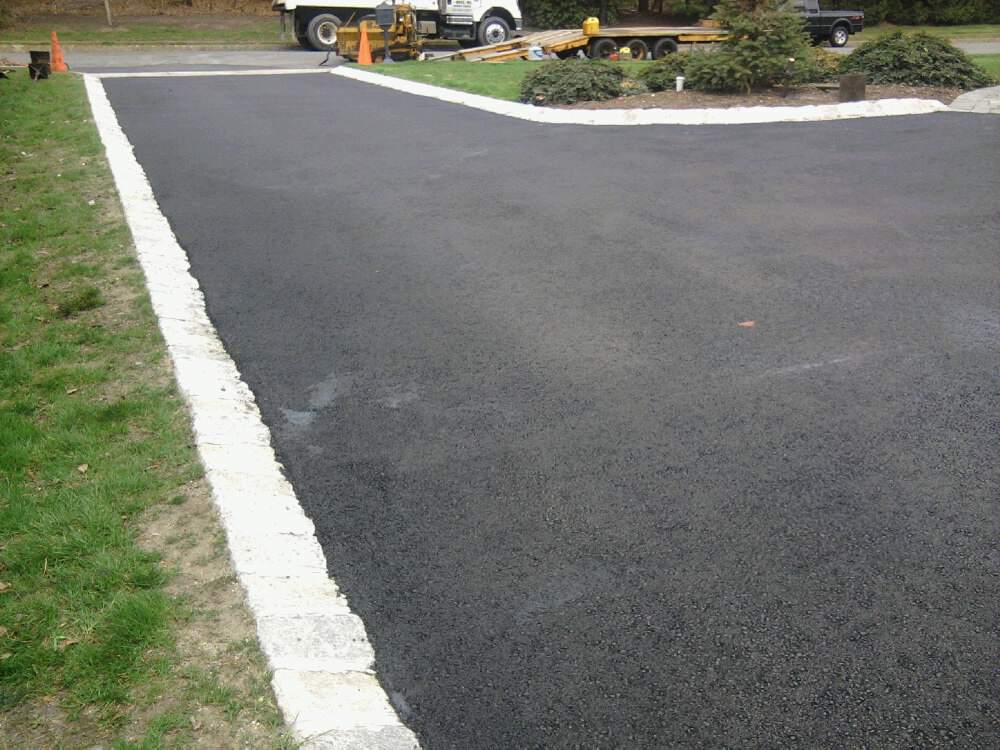
And the driveway is now finished – needing only to completely cure…
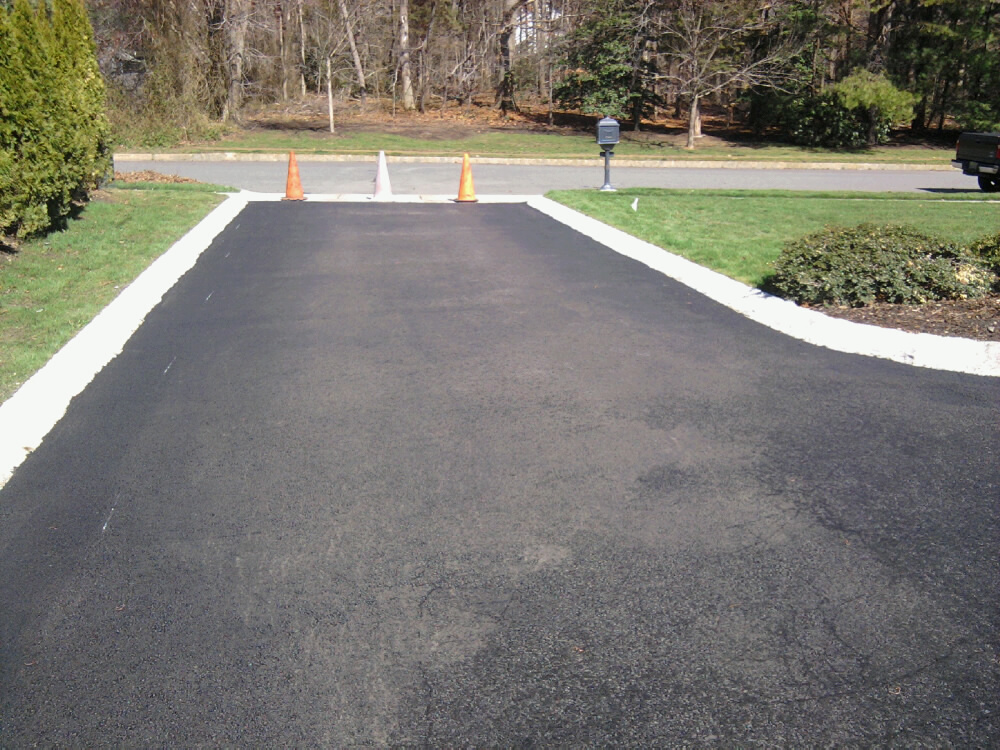
How Long Before Using New Asphalt Driveways?
There are several different answers to this question…
You should surely consult with your contractor, of course, as this will vary with climate and your current weather, but in my case – we could walk on it that day. (I could feel the heat through my sneakers, though.) He wanted us to wait 4-5 days before driving on it based on our temperatures here. I waited 3 weeks. (I’m like that.)
A general rule, though, seems to be that asphalt really needs a minimum of 90 days to cure completely.
When Should You Apply Driveway Sealer?
The general rule of thumb here is that you should never consider asphalt driveway sealer for *at least* a year. Sealing the driveway too early (before it’s truly 100% cured) will keep it from fully hardening – and thus leading to its early demise. So, don’t get overzealous with the sealing!
Other Items to Know About Your New Asphalt Driveway
Also be aware that during the first summer, it’s entirely possible for you to mark it up a bit on hot and sunny days. Try to avoid using bike kick stands in the heat of the day, and never turn the wheels of a car on the driveway while the car is not moving – as this can completely mess up/scuff the finished surface.
And if You’ve Read All This Way…
Then you must surely be planning something similar – or at least thinking about it. By reading this whole summary, you now have a good idea what you might expect. Will your job be different? Of course – every job is a little bit different. But finding the right people to work with is as critical as knowing what you want.
And if you come across any additional nuances or have suggestions that could help anyone else, I would encourage you to please provide comments & feedback below. Anything you can contribute is always most sincerely appreciated!
Need Professional Help from a Local Contractor?
Related Posts
- My Battle with Surface Water Runoff
- 7 Tips for Working with Contractors
- Belgian Block and Pavers – Dressing Up an Asphalt Driveway
- Designing the Perfect Deck
- How to Visualize Deck and Landscape Design Ideas
- Building a Removable Wood Fence Section and Gate
- Hall and Stairway Trim Work: Low Maintenance Shadow Boxes

Yeah, many of those quick fix ideas from national chains stores don’t do much to fix larger problems. It’s like trying to stop a leaky faucet by turning the handle a bit more. Still, credit to you for getting the job done! It’s not the most simple process.
WOW! This has by far been the best write up of someone’s beginning to end experience with having a driveway replaced. As an asphalt paving contractor myself, it’s good to know that there are still reputable paving companies putting their client satisfaction high up on their priority list! Glad you had such a good experience.
There is nothing that looks better than freshly lain asphalt. The pictures you have here look fantastic, you did a great paving job. We still have a concrete driveway, but we want to switch to asphalt as soon as possible, so I appreciate the tips on how to care for asphalt, I didn’t think about bike kick stands before.
I sounds like it was a good idea to remove the tree. I hope you don’t feel bad about it anymore, and I hope you also got a new tree to replace it. There is nothing wrong with removing threatening trees, just get another tree, put it in another spot, and replace the old one.