2019 Update – Initially Posted July 2015
Back in the day, simple yet free antennas were provided when buying a television. However, such antennas were only capable of showing poor quality and grainy channels. Thankfully, with the recent ubiquity of high-definition televisions (HDTV), you can now watch your favorite TV shows, without having to sacrifice clarity and sharpness.
And all you need to do to get your local TV stations (with Internet options such as Netflix, Hulu, etc. aside) is purchase and install a low cost/high quality digital TV antenna.
And as you’ll see from the Amazon choices available today, a roof installation isn’t even necessary for some options; there are plenty of indoor antenna options available as well. But first – let’s talk about some basics, and then we’ll get then we’ll get to ‘outdoor’ antenna installation tips, specifically. (As there isn’t as much to do with indoor TV antenna installations.)
Television Antenna Fundamentals
A television antenna is a special appliance designed for the purpose of receiving over-the-air broadcast signals, which are normally transmitted at frequencies starting from 41 to 250 MHz in the “Very High Frequency” band.
There are two different types of television antennas – the indoor and the outdoor. While an indoor antenna is commonly seen next to or on top of the television set, the outdoor antenna is often mounted on the roofs of houses.
How To Install an Outdoor Antenna
Step 1: Selecting the Right Antenna
Nowadays, there are a variety of antennas on the market. And choosing the right one for your home can be an intimidating and tedious process. Rather than stressing yourself out, you can ask a technical professional what type of antenna works best depending on your location.
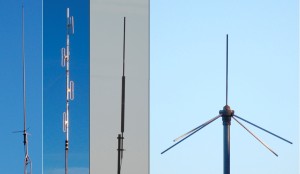
However, if you choose to select an antenna by yourself, here are the different types of outdoor antennas you may possibly encounter:
Small Multi-Directional
Though these are the smallest among all antennas, they are capable of receiving great signals from various directions.
Medium Multi-Directional
This one is a bit larger and more powerful. It usually comes with a novel stick and wing-shaped long elements.
Large Multi-Directional
Due to its bigger size, this antenna can receive more signal power. It is perfect for areas that are far away from the signal sources.
Small Directional
This type is capable of offering excellent picture quality, but only in the absence of signal reflecting structures.
Medium Directional
The average size and grain-reducing characteristics of this antenna makes it a popular choice.
Large Directional
This is commonly used in areas with the weakest signal because it offers the maximum possible TV reception.
Step 2: Prepare for the Antenna Installation
Before you begin the installation process, you have to know about the different channels and their corresponding compass headings.
Do note that the link above focuses on Australia (where I’m located and writing from right now) as well as parts of Europe. Naturally, if you’re located in New Jersey, Canada, Ecuador or elsewhere – research accordingly or contact a local professional.
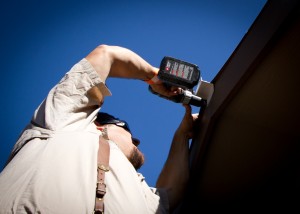
Next, make sure the mounting bracket is secured to the roof by following the instructions provided in the mounting kit. Use roofing screws and silicone bolts to ensure they are protected against water.
If you prefer to have your antenna installed using wall mounts, you will have to drill holes in the wall. In doing this, make sure you leave a space of about 12 to 14 inches from the brace on top and the one below. By doing so, the antenna pole will not sway when strong winds will blow.
Step 3: Assemble the Antenna and the Pole
This step depends on the type of antenna that you’ve purchased. While most antennas come in one solid piece, others will have to be assembled.
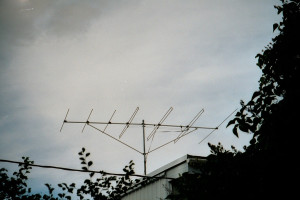
Once the antenna is ready, you can now loosen the screws and the bolts on the sleeve of the mounting bracket. In this way, you can easily slide the pole to the bottom of the sleeve. Secure the pole by tightening the bolts.
Step 4: Attach the Antenna to the Pole
Now, you can loosen the bolts found on the sleeve of the antenna. Slide it slowly over the pole until the top meets the pole’s sleeve. Slowly rotate the antenna to the direction of the broadcast tower. There’s no need to fully tighten the bolts just yet because you might still have to adjust the antenna’s direction.
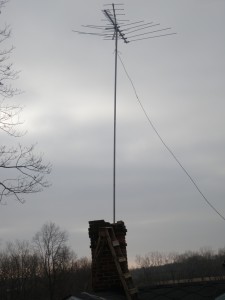
Step 5: Connect the Antenna to a TV – Test & Tune
Connect your antenna to a television using the appropriate coaxial cable.
Make sure the end of the cable is attached to the cable output terminal of the antenna and the other end is on the coaxial input of the television.
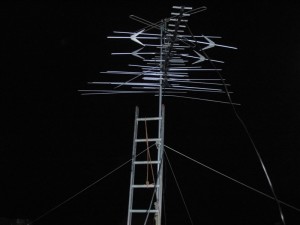
Ask someone to tune in to different channels while adjusting the direction of the antenna.
Once everything is set, secure the antenna on the pole by tightening the bolts. Use insulated U-clamp nails or a nail gun to ensure the cables and other wires are in place.
Step 6: Electrical Grounding & Signal Splitting
The antenna must be grounded for safety.
This can be done by using a grounding block with a connection to your house or building ground. But above all – ensure that you follow the appropriate electric codes for your area.
And the last thing you have to do is to connect the coaxial cable to a splitter so that you can enjoy your favorite shows from anywhere in the house.
Always remember that installing an outdoor antenna will usually require you to climb onto your roof, which can be quite dangerous. So, if you aren’t familiar or comfortable with this sort of work, you should always consider calling a professional.
Image Sources:[1][2][3][4][5][6][7][8]
Author: Debbie Davison

Debbie is a technology enthusiast through and through. She loves movies, computers, and anything that helps improve our lives. She also enjoys doing small home improvement tasks around the home. At the moment, she helps put content together with an amazing team at Australian Antennas and is currently growing her career with the technology space with a strong personal online presence. You can reach her through her website or Twitter.
Need Professional Help From a Local Contractor?
• Visit Our “Find a Contractor” Page
Related Posts
• Troubleshooting and Repairing a Broken Doorbell
• Phantom Dinnertime Doorbell Ringing
• Installing a Bathroom Ventilation Fan
• Carpet Tiles for a Quick Rehab
• Rehabbing a Redwood Swing Set
• Combat and Clean Mold from your Wood Deck

I really like how you said to test the antenna before you get off the roof. I had never thought about that. I will have to have a friend stay downstairs testing the signal on my TV as I move it around. I hope this helps me get better TV reception. I get such bad reception out here with bunny ears.