2020 Update — Originally Published April 19, 2011
It’s 1999. My wife and I just moved into our new home with our 3-year-old daughter and infant son – and we pretty much plan to stay here forever. So naturally, we want to do everything right. And setting the kids up with a killer play area is near the top of the list. We had seen some of the redwood and cedar swing sets that were available – and there was no doubt: they were gorgeous. But some were crazy expensive. After much consideration, we ultimately decided to “bite the bullet” and invest in a high-end set that could hopefully be with us for our grandchildren one day in the distant future. We even had a custom name board made up with the thought that it would always commemorate our first addition to our new home for our kids.
Seemed like a pretty cool “finishing touch” to add…
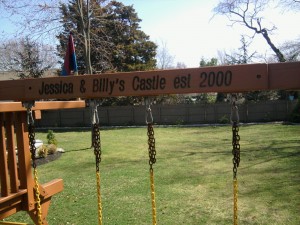
But can a redwood swing set really last for 30 years?
Flash-forward now to 2020. More than twenty years have passed, and there’s no question that there’s some significant maintenance required keep these sets looking good and remaining functional. And frankly – some stuff simply has to be replaced as well.
Wooden Swing Set Maintenance Experience & Tips
Tip 1: Cleaning the Swing Set Canopy
Each year, I removed the canopy (the blue/yellow/red tarp) in the spring and brushed it clean in the driveway with a soap and water solution. You have to be very careful not to crease this when removing it, as it can be delicate given the size. It’s cumbersome. For the first few years, this was more of a chore than later – as I initially had the set underneath some trees which eventually had to be cut down. Once the trees were gone, the canopy was spared the pollen and a lot of the staining that seemed to come with being in the cool (moist) shade.
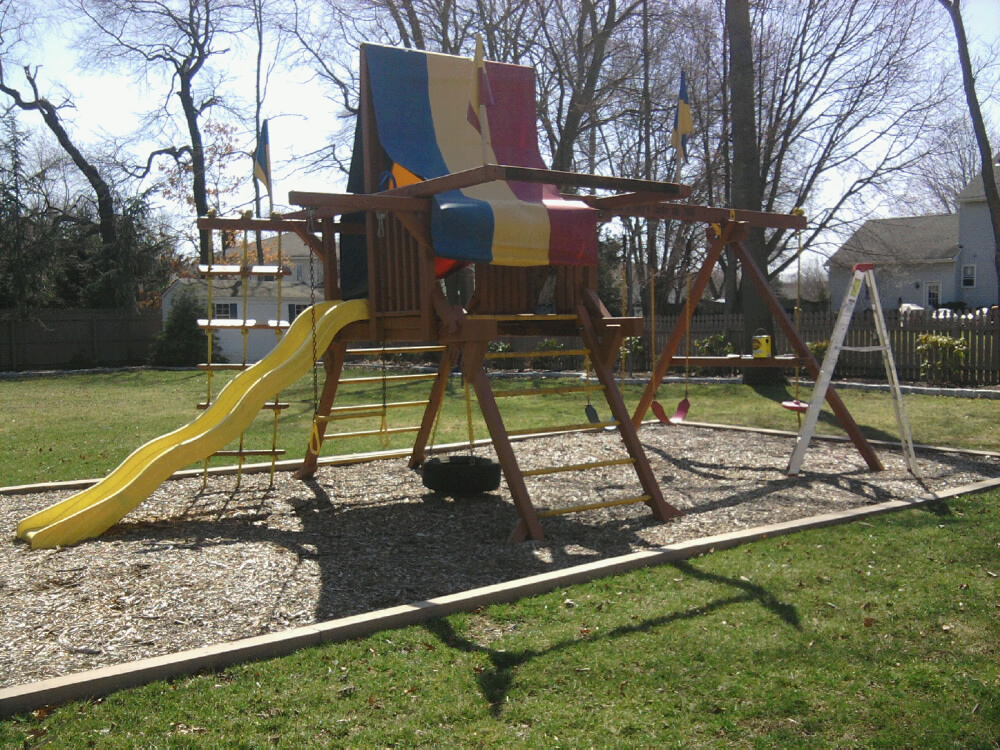
Tip 2: Redwood Stain for the Long Haul
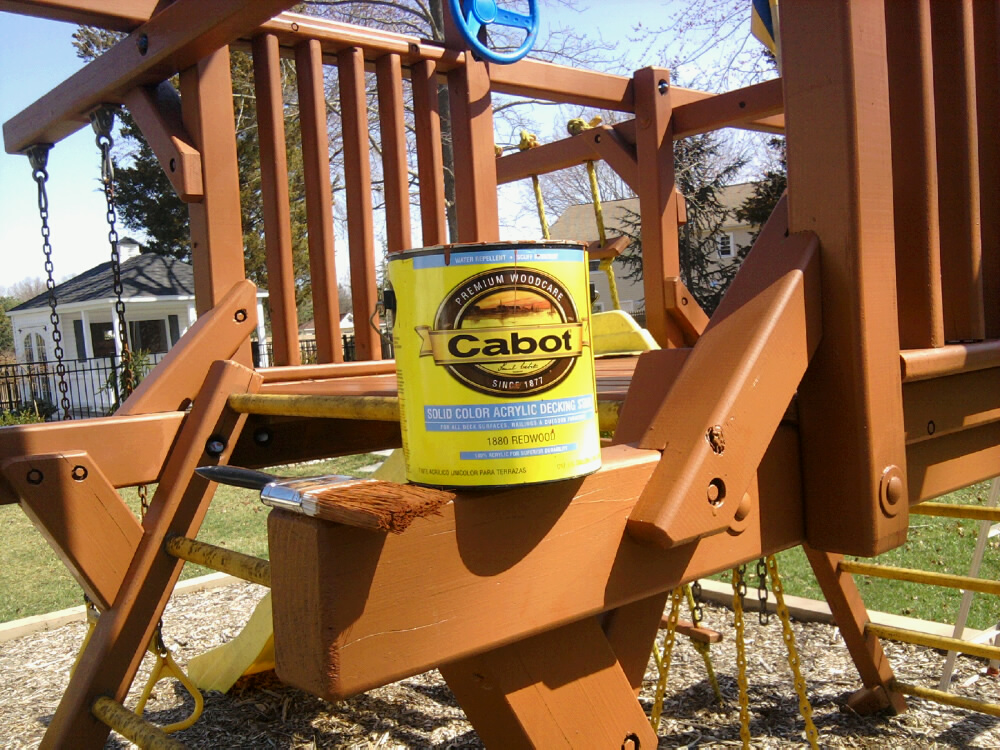
The wood needs to be actively protected. For the first few years, I stained every other year – but after 4-5 years, I started doing it every single year. Use a high-end stain, and plan to spend at least 2-3 hours as there are many nooks and crannies to be covered. Be very careful to avoid getting stain onto the plastic and rubberized pieces. And surely remove any canopy that may be part of your set before you start.
I didn’t really intend the following picture to become a commercial for Cabot stain, but this is simply the brand I used last time; half of this can is on the paint shelf in my workshop right now. Go high-end, and go with whatever brand you trust. Here’s a whole list of redwood decking stain options from Amazon, with ratings and reviews.
Tip 3: Cleaning the Swing Chains and Rubberized Steps
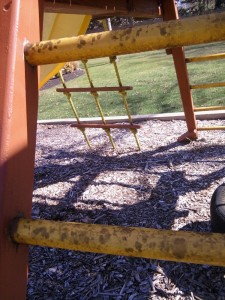
This was really an ongoing problem. After the first couple of years, we started to develop black and often sticky build-up on the yellow steps – but much worse were the swing chains the kids had to hold. The swing chains got really sticky. The manufacturer recommended using a product called Magic Eraser which we tried, and it definitely works to some degree. But it was always a matter of increasing effort. Year-after-year, it just seemed to get worse; I couldn’t ever get it back to the “new-looking” condition that I wanted. I don’t know how bad they would look if I hadn’t done this. Major advice: Don’t let this slide!
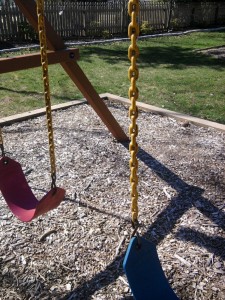
Tip 4: Dealing with Rotting Wood
The wood will eventually rot, especially where in contact with the ground. One of the legs split completely (perhaps about 7-8 inches from the ground up) in about year nine. To deal with this, I bought a piece of pressure treated hardwood and manufactured a replacement leg myself. I found this was more of a chore than I anticipated when the hardware was stripped as well – so I had to manufacture a new leg and also create custom hardware to affix the leg to the set. In the shot just below, the leg on the right is my custom replacement. I don’t think you can tell by sight, but it feels different to the touch – it’s clearly denser.
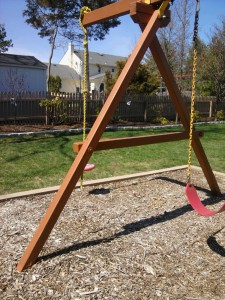
The second leg in this A-frame portion of the set is starting to rot as well now. Take a close look at the next photo and you can see it.
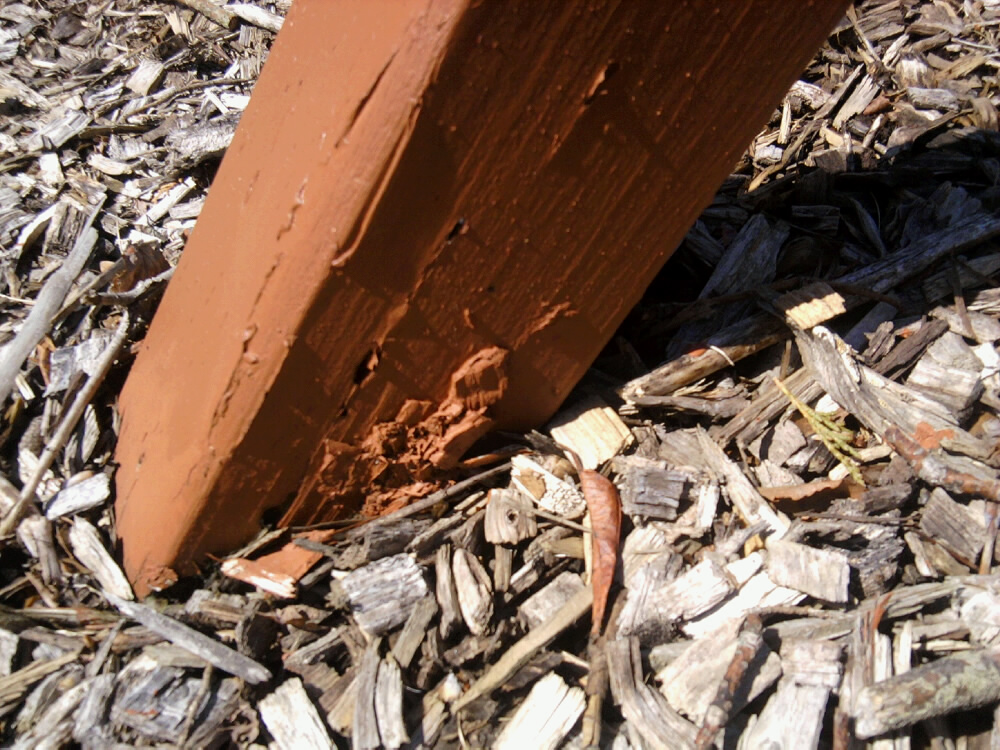
I have no intention of creating another custom leg though, as I got a little smarter this time. More to come on that, but first read through the next section because this is equally relevant as well…
Tip 5: Dealing with Insect Damage
Wood will rot, and insects will help it along. With me, it was the carpenter bees. They started showing up regularly in about year seven or so – in the late spring. These bees bore perfect holes deep into your wood (they love dead wood) to lay eggs. Once the eggs hatch they move on, but you now have holes bored into your wood. There are chemicals you can use to keep them away – but these aren’t really good for children, so I never wanted to go this route. One exterminator told me I could shoot something as harmless as hairspray into the holes and it would kill the bees. It didn’t. I tried plugging up the holes as the bees were making them – filled them and stained over them, but they just persevered.
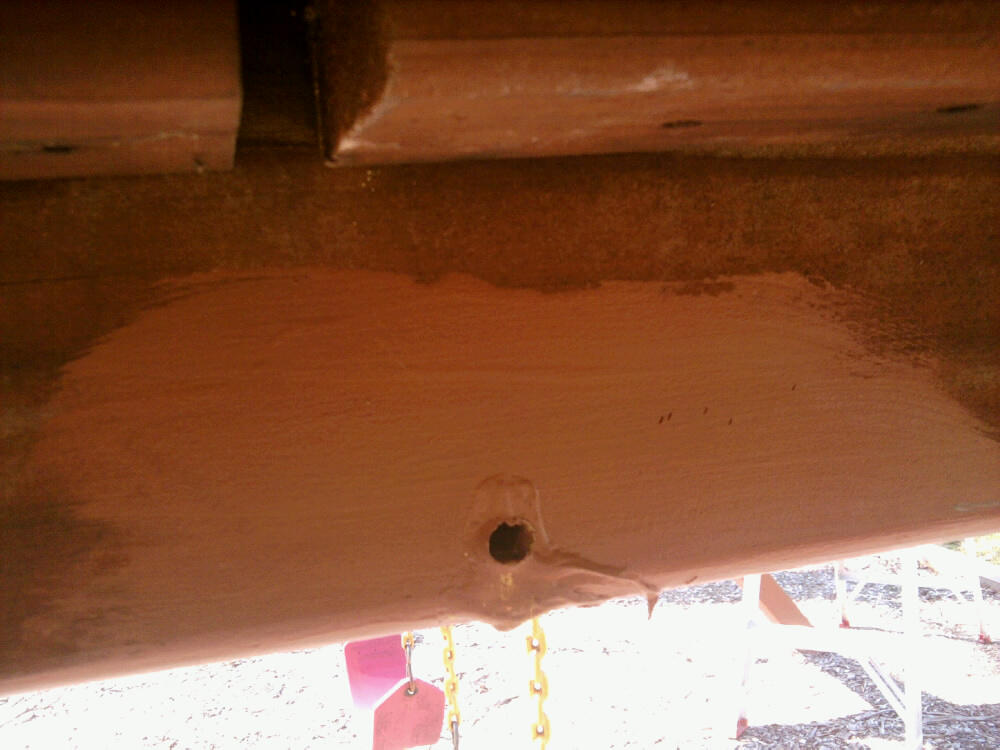
For whatever reason, the bees consistently went after the deck area. The shot above is a major load-bearing support under the deck. Not only does this slowly destroy the structural integrity of the set, but your kids aren’t going to play with it with bees flying all around. I’ve recently heard that sealing the wood with an oil-based stain will actually deter the bees from coming each year. I’ll give that a try moving forward, but it does nothing for the holes that are already bored several inches into the wood today.
Once the holes are made, the wood has been compromised forever.
Tip 6: Using your Wood Play Set Warranty
Here’s where I got a little smarter. Many of these redwood swing sets come with a 15-year warranty; some come with a lifetime warranty. Given my set was so old – this didn’t immediately cross my mind. The details of each contract will vary, of course, but I found that the wood pieces could qualify for replacement if I provided proof (photos) of insect or rot damage. I’ve been working with the manufacturer of my set for the past couple of weeks to move this forward, and I’m quite happy to say that a number of replacement wood parts are now being manufactured and shipped to me. They’ve been wonderful. Some of those parts include the ladder pieces with the black-stained steps – those will all be brand new again soon. I have to pay for the shipping expenses, but that seems fair. You’ll most likely need to be the original swing set owner to do this, and you’ll surely need your receipt – even if (like me) it was from so many years prior.
Tip 7: Buying Swing Set Replacement Parts
If your goal is to have the set for the very long-term, then warranty-aside, you’re going to need to buy some replacement parts. The canopy started to tear on me after about 9 years. I held it together until spring of 2011 (year 11) when I ordered a new one that had to be custom manufactured. It served me well, and installing the new canopy was really quite easy. Less than an hour of effort.
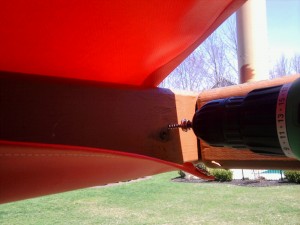
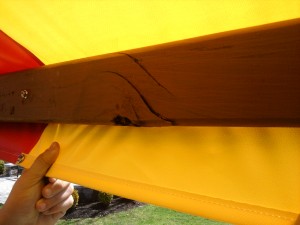
In addition, I decided [at that time] to go for new swings too. The swings (unlike the wood pieces) come with a 1-year warranty, and was ancient history for me. These would once-again look brand new – because they *would* be brand new. Sticky and black-stained rubberized chains (and the non-rubberized now-rusted portions) would soon be perfect again.
For the full 2011 “Renovation” effort – Check out Rehabbing a Redwood Swing Set.
Tip 8: Maintaining the Play Set Mulch
“Wait a minute… weren’t there supposed to be seven tips in this article?”
There were 7 Tips – originally. But this is an extra and important one I added!
Re-mulching around the base of the play area is something I do roughly every 3-4 years. There are various materials you can use, and frankly – you really don’t need to have anything other than soft grass for safety. But from the standpoint of aesthetics – I personally like the look of mulch. The material I use for my set is fiber-based mulch. This is the material you’ll find at many public play areas. It’s quite clean, and once installed (and after a few days) it knits itself to form a nice surface on which you can walk without kicking mulch all over. For my play set area, I usually order 3 cubic yards…
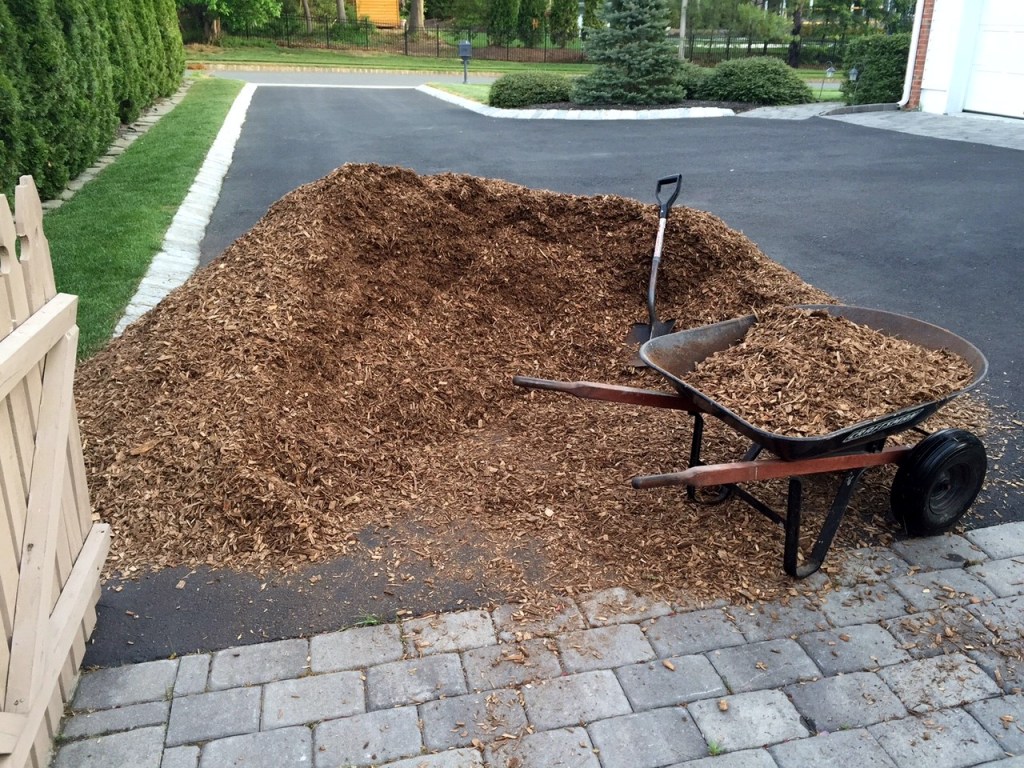
One of the critical things to truly avoid when applying mulch – you do NOT want to bury the redwood footers. While it’s true that redwood (as all woods) will rot over time, there no need to rush it along. And it’s so easy to make this mistake – because this is a quite lot of mulch to apply. Once the mulch is down and spread out nicely, all you need to do is spend 5 minutes clearing it away from the footers a bit as shown in the three shots below.
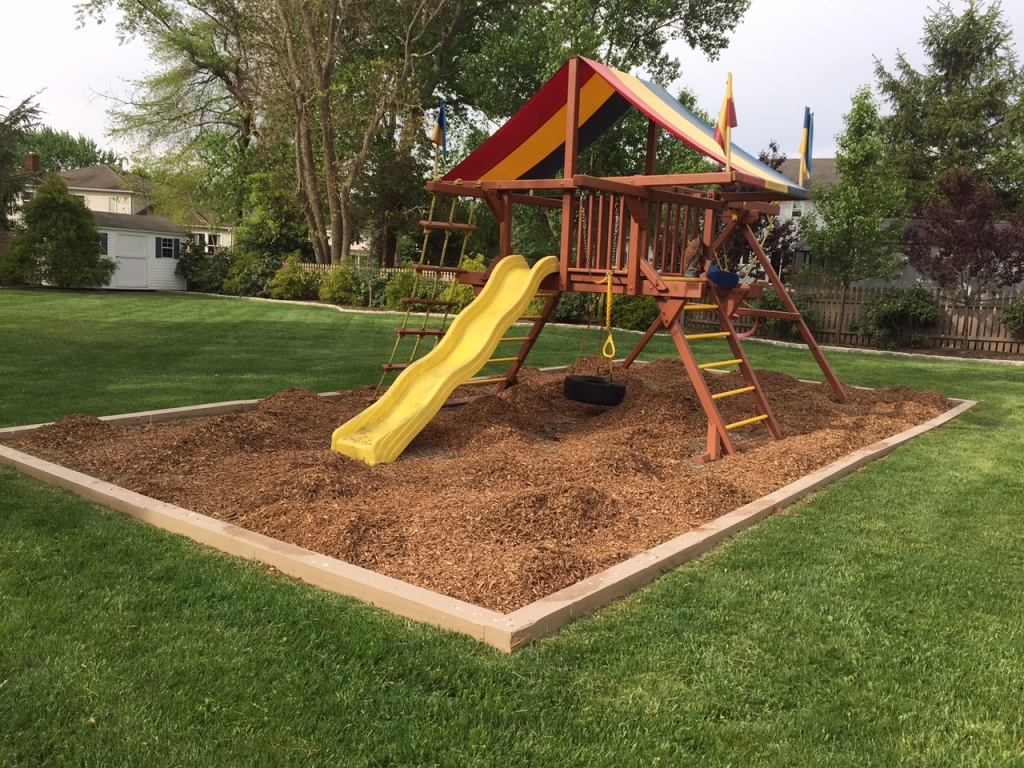
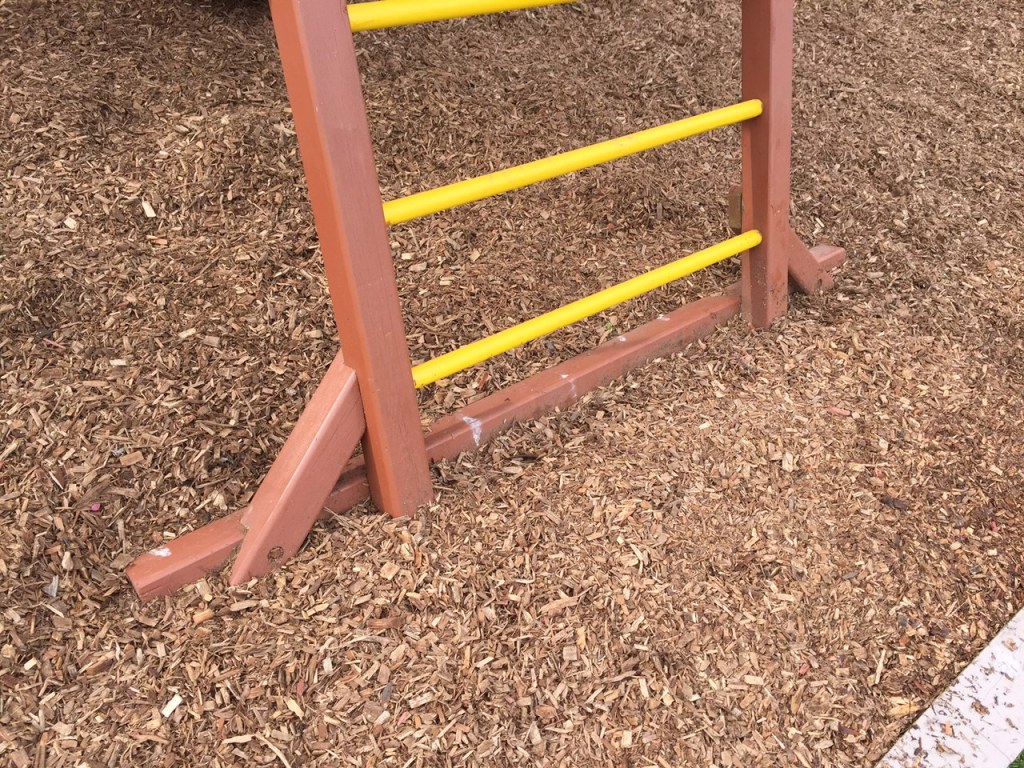
So, in short – be sure you can see the footers and that they’re as minimally-buried as possible.
Does anyone have any further wisdom or experiences to add? Has anyone had a wooden swing set (redwood, cedar or otherwise) set like this for more than 20 years??

I have the original Rainbow “Castle” built in 1988, (35 years old) here in Twin Cities, Minnesota and with some care and leg rebuilding will be in excellent shape by spring when I finish. I just rebuilt all the nine 4×4 redwood legs by cutting the lower 9 to 24 inches from each leg and cutting a pressure treated new leg section. I join the two sections with a half-block splice with a 3.5 inch overlap which is glued and attached with two 1/4-inch stainless steel bolts. Some legs had longer sections removed due to squirrel damage. The 4×4 ground frame was replaced with new pressure treated 4×4 and joined with new hot dip galvanized lag bolts the same as the original. The 2×6 skirt around the nine legs was also replaced. Some boards on the first and second platforms were also replaced. I used pressure treated “Cedartone” wood from my local Menards. The swings were removed and stored when not in use. For wood preservation I recommend PPG (Sikkens) semi-transparent stain about every 2-3 years.
My kids have long since grownup but I am renewing the Castle for coming grandchildren. The Castle was purchased when the company was still doing business out a house and garage in Shakopee, MN.
My granddaughter’s redwood playhouse & redwood swing set is being chewed by squirrels. The bird feeder has been gone for months, have tried various repellents that are child & pet safe, but nothing deters them? Any suggestions? These sets are very expensive & heartbreaking to see them destroyed. Thank you.
Hi Mark– I just purchased a used Rainbow Swing Set slide in hopes that it will work with the swing set we just built. Can you tell me what length of slide yours is? And the deck height? I am thinking that it’s the same slide as in your picture and am a little worried it may be too long for our swing set now.
Thanks!
Loren
Hi Loren,
The deck height (top of deck to mulch below): ~55-56″
The slide measurement is trickier – it’s not just a simple triangle hypotenuse. So I have to qualify this carefully. As measured from [1] the back of the bottom of the slide touching the mulch to [2] the bottom of top of the slide where first meets redwood: ~102-103″
There’s additional blur in the first measurement as I have a mulch base. So, I’d take the deck height with ‘plus or minus’ a couple of inches, too. Especially if your set on a less malleable surface than mulch – like a lawn.
Hope this is of some help!
First, thanks to all for your posts – starting with the original one and all the advice in the comments. Helped me a ton. Took a 15 year old playground set that had NEVER been stained or sealed and restored it. It’s not perfect, but it’s sure a lot better now. Did it so the grandkids have something respectable on which to play – and something not only functional, but won’t give them splinters, etc.
1) Powerwashed it. This took a couple of weekend days to do properly. If you don’t take care of a playset, there is a LOT of dirt that gets in the wood.
2) Sanded. Buying an attachment for our drill was a back-saver. We mostly did coarse sanding, and fine sanding only where we know their little feet and butts will be.
3) Stained. Due to the COVID crisis, there is a nationwide shortage of stain. Ultimately, found some at Lowes (their own brand – Valspar). We used the Natural Redwood color. I’d say it works well, but I have no doubt there is better stain out there. As mentioned by posters, using a stain and sealer in one is your best approach. Because we hadn’t done anything to the playset in years we used 2 gallons on the first coat, but only needed one for the second coat. By the way, do not try to use the “tintable” stain. They tell you it will match the premixed color. It does not. Made them buy it back and drove 30 miles to get the last can of premixed needed.
4) We rebuilt the climbing wall. We bought redwood Cedar fence posts (our Rainbow Sunray playset was made of this) and cut them to size. Worked great, and cost like $2 a board.
5) Bought a 12 pack of rock holds off Amazon from PlayKids in blue. They look and work great. $35.
6) Bought from Home Depot 1/4 inch 20 x 1.25 inch Phillips head bolts. bought the corresponding 1/4 inch washers and 1/4 inch 20 x 5/16 inch Tee Nuts. Cost also like $30.
7) Replaced the swings off Amazon as well as the telescope.
8) Also purchased the Deck Boss stain brush by Pedura. It’s a 7 inch brush that attaches to any standard broom handle. Not only did it also save some back strain, it was fantastic in reaching the highest parts of the playset. Even on our Gorilla ladder, there was no way to reach the top without climbing up there. Then you have to figure out where to put the pan that is holding the Stain, etc. With this thing, we could reach every part of the playset. Even when on the ground, it was faster to use than the 5″ hand held brushes, and with less strain on the whole body.
Again, not perfect, but better than spending another $1400 on the playset and $500 to pay for someone to install.
Pictures Attached. Thanks!
Whoa – what a truly AWESOME addition to this whole thread, Marc!
The before and after shots look fantastic, and thank you so much for your detailed list above with all the steps you went through and the tips/wisdom for everyone to ingest!!
I find there’s nothing like seeing the end product as it compares to the starting point with all of my projects. Actually… I take that back with regard to the play set work. What’s always been best for me on this front (and I strongly suspect this applies to most everyone reading here) is seeing my kids and their friends playing & laughing happily on this set. And occasionally using it myself too, which I do even now from time to time… :)
I had carpenter bees for years in my redwood set and just gave it away at the wrong time of year; the bees stayed! Probably should have given it away mid-summer after egg-laying and before egg-hatching.
I didn’t want them finding the wrong new home, so I looked into traps and found a great YouTube video for making carpenter bee traps by SpecificLove.
Photo of one of my traps per that tutorial is below.
I filled the jar halfway or more with water, stirred in some sugar and added a couple drops of dish-washing liquid to break the surface tension to promote drowning (like in a fruit fly trap)… Caught a bee almost right away, and takes only a minute to unscrew the jar, toss bee & liquid, refill and replace. Wish I’d done this years ago. Making more traps!
Additional 2020 Update – Now at the 20-year mark for maintaining my redwood set, below are two more maintenance photos from yesterday morning. I did redwood paint touch-ups, assessed the set for damage overall – and I cleaned everything down, with a high focus on the yellow rubberized items, as always.
Now, the set still looks awesome – and remains focal to my yard, but note two things…
1) In the first shot, I’m not showing the tarp. That’s because it’s approaching end of life once more. The last time I replaced it, the set was 11 years old. And it’s close to twice that now.
2) In the second shot – the slide is simply pitted now. 20 years of baking in the southern-exposure sun of my backyard, perhaps. Even though it looks okay in the close-up photo, I doubt that anything is going to slide on that, presently. It has acquired the texture of, perhaps, 100-grit sandpaper.
That all said – it’s approaching time, I think, for another significant rehab. Perhaps a project for the Fall. Or heck, maybe next spring!
Hi,
Thanks for your interesting article. I found it quite helpful as I am in the process of rehabbing my ten year old Rainbow play set. My biggest hurdle is cleaning the yellow plastic coated plastic parts to remove the mold buildup. I’ll definitely give the OxiClean and Magic Eraser a try. Anyone else have any success or other suggestions to clean these?
I see in the pictures the use of mulch under the play set. My suggestion would be to substitute “playground chips” for the mulch. Mulch is primary shredded wood, which tends to be sharp and scratchy while the chips are more rounded wooded pieces making for a better “landing.” Wherever you buy mulch should also carry playground chips.
I just used brush cleaner and that worked pretty well. It not only took off the stain drops but brightened up the yellow all together good luck!
Hi Mark,
Thanks for this great article. I originally found your page while my wife and I researched used Rainbow play sets two years ago. Last year, her sister (and sister’s hubby) decided to give us their very large 15 year old Sunshine Clubhouse. The set was cared for fairly well, but at that age, there was substantial rot everywhere. As I write this note, I am completing a very large (3 week) rebuild of about half of the entire set, along with raising and extending the swing beam to 16′ (to accommodate four swings). Although I am using pressure treated wood (there was just no way I could afford cedar, much less redwood.) I am mimicking Rainbow construction and design to a tee with all countersinks and routing, and even replicating those trademark 45 degree wood braces identically. I’m then staining the entire set with a solid Behr “Chestnut” stain – it looks great so far. Anyway, I just wanted to let you and your readers know that for DIY inclined people like myself who have the tools, this is a really fun project that you can feel good about. I look forward to heading to the yard after work every day. I plan to try Jeff’s suggestion of OxiClean on our yellow ladder bars and beam brackets. I hope it works!
Some pictures of the progress so far, starting at the bottom with the lumber in my garage…
Wow – AWESOME job, Danny… this is looking fantastic. You clearly have an entire rehab going on here, far more than routine maintenance to say the least. I have another article up addressing my full play set rehab effort as well. But you know what I love most about the photos above? The “staging area” that you once called your garage! That’s just beautiful. Thanks so much for the kind words, the insights you provided to everyone regarding your ongoing project – and for contributing these great construction [reconstruction] photos!!
Any suggestions for getting the canopy tarp back on? We took it off to clean and can’t get it to fit back on
Definitely, Nicole – With the tarp oriented in the same way you removed it (color stripes in the same direction), lock down one side completely first. Then, as you stretch the other side into position – if you find it’s just too tight for some of the snaps to engage (from shrinkage), unscrew the side of the snap that’s connected to the redwood – and reposition it so there’s less tension. There are 2 photos in the “Tip 7” section above that sort of show this, though I’m seating a brand new tarp in those photos. Hope this helps!
Hi Mark,
My husband and I just bought a used Rainbow Sunshine swingset. It is good condition, but we weren’t expecting the wood rot from the anchor posts that had sunk in the grass . My husband reinforced the post by adding 2×4’s around the section. I questioned if this was the best solution. Once it is stained it will look better, but I am not thrilled with the appearance now. :( Since it is used, we don’t have a warranty to use. I read a previous commentor’s idea of wood filler, but I suppose I am leery that would help? Have you heard of any better solutions? Great site, I stumbled up on it while looking for tips!
Hi Brooke – I have another article that addresses a whole play set rehab. It’s right here. In there, what I felt I had to do in some cases was replace the wood in total. I did this with one leg, and I also did it with both footers that were partially buried. What’s nice about the solid stain is that even if you bought exterior (non-redwood) lumber for this – it’s painted. So, it can be made to “match” perfectly – and the material in contact with the ground, especially if it gets buried, seems at highest risk to me. Perhaps this is another option you guys might consider. Have a look at the article linked above, and you’ll see some photos there. Hope this is of help, and best of luck!
Hi! Would it be a good idea to set some larger pieces of wood or block under the A frame legs and also under the base of the deck for preventing rot and bug infestation. It might be a bit more difficult to square things or not. Any recommendations or suggestions to this regard would be appreciated. Thanks!
Hey Craig – You can try that, but my guess is that the set might bounce a bit when under heavy use. (The mulch acts as a bit of a shock absorber, inherently.) Plus, I don’t really think sitting the set on wood or block will do too much to inhibit the rot or bugs. If I were starting from the very beginning today, I’d try using the clear plastic coat that someone had suggested in a recent comment for places where the wood touches the mulch. Here’s the link right here. (But I’d use CLEAR, not this yellow.) I haven’t used this myself, but it seems very reasonable to try. Any experiences you have would be great to hear about here when you can. Thanks and best of luck to you!
Howdy, we inherited the same plays set featured here. I am new to all of this, so apologies if I say/ask something silly/dumb. I saw the type of stain that you have been using and know it’s an oil stain. Do you know if the set was originally stained with an oil or water stain? Does it matter? Is an oil stain definitely the way to go? Is there anything special I have to do to the wood before using it?
This is a GREAT question, Robert… The stain I’m using is acrylic, not oil. Now, the first time I stained the set, I used the same exact stain the manufacturer used – which was also a non-oil-based stain. So, for me, the base has always been consistent. With intent. A year ago – on a separate endeavor completely, I was painting an entire home interior (with a crew), and we tried to paint an acrylic based paint over an initial (original) coat that was oil-based. This did NOT go well, and we ended up having to use oil over the oil for all semi-gloss areas in the home.
Now, I suspect this will be much less of an issue with solid stain an exterior play set – but I’d still be very careful. Perhaps test a small area (letting it dry completely) before doing the whole set. As for preparation – some people power wash. For me, I just ensure the set isn’t terribly dirty. Good luck!
Hi! I am currently working on restoring our 6 year old set which has been neglected. I noticed that some of the yellow paint is coming off of the metal rungs on the ladder that leads up to the platform. Consequently, there is some rust starting to form in those spots. Any advice about what to do about that would be greatly appreciated!
If you’re the original purchaser, there’s a great chance the manufacturer will replace the ladder with you paying only the shipping, Wendy. (You can read more about this, from when I did it myself, at the article here.) If you’re not the original owner – folks have commented about a yellow plastic top coat in the thread below… In fact, here’s an Amazon link for this product right here which includes some reviews. I haven’t tried this personally, but it may be worth a shot. But I’d definitely start with the manufacturer. The shipping cost won’t be terribly cheap, but your ladder(s) will be brand new!
hey mark,
what do you think of using royal blue plasti dip on the rocks on the rock wall? mine are blue but they are faded. They are structurally sound and in great condition, just faded. Would the kids using them climbing on the make the plastic dip wear away?
Hi Robert – I really can’t be sure, as I’ve never tried this myself – but it’s a very interesting idea. Perhaps you can test? For example, pick one rock that’s a first foot-hold and spray it carefully. Then see how it holds up with some good usage over a few weeks. Maybe even get some adults to use it – really stress test the finish. And traction. If it holds up, this may be a really nice way to bring back the color. If you try this, could I ask you to please report back?? This is new. Nobody has ever asked about this before!
We just took ours down after 7 years of our use and 10+ years of the previous owner. I am donating the slide to a campground but our slide is faded. I have pressure washed it but would like to use something to ‘restore’ the original yellow color…..any suggestions???
So, I found the plastic/rubberized spray paint that some people use to cover the metal pieces and had a different idea. the footer parts of the swing set always get wet and rot. So, what I did was “dipped” the bottom 6 inches of the wooden legs with the plastic dip stuff as well as covered the underside of any piece of wood that is in contact with the ground. I am hoping that it staves off the rot and decay. Not to mention I had it sitting on the ground but now moved it, laid down landscape paper and put the swing set on that, then covered with rubber mulch. FINGERS CROSSED!
That all sounds pretty interesting Mike – do you have a picture you could share? (Is the “dip” clear, for example?) If you send it to me using the Contact Us tab above, I’ll put it up here so all can see. Thanks for sharing your thoughts & ideas on this!
Thanks All About The House, your comments are very helpful.
Mike, I am dealing with a bit of post rot because I have left the posts under the mulch for too many years. Making matters worse is the swing set has sunk down to pretty far and I am trying to find a way to raise it and add concrete blocks to keep it from sinking. Can you let us know your product for the plastic dip or will any off the shelf stuff work?
Hi Mark,
Thanks for all your wonderful tips! We’re in the process of researching Rainbow for our little one. Can you tell me the dimensions of your mulched area (lengthxwidth)? We have an area in the backyard but we need to make sure it’s large enough. Thank you!
Hi Lindy,
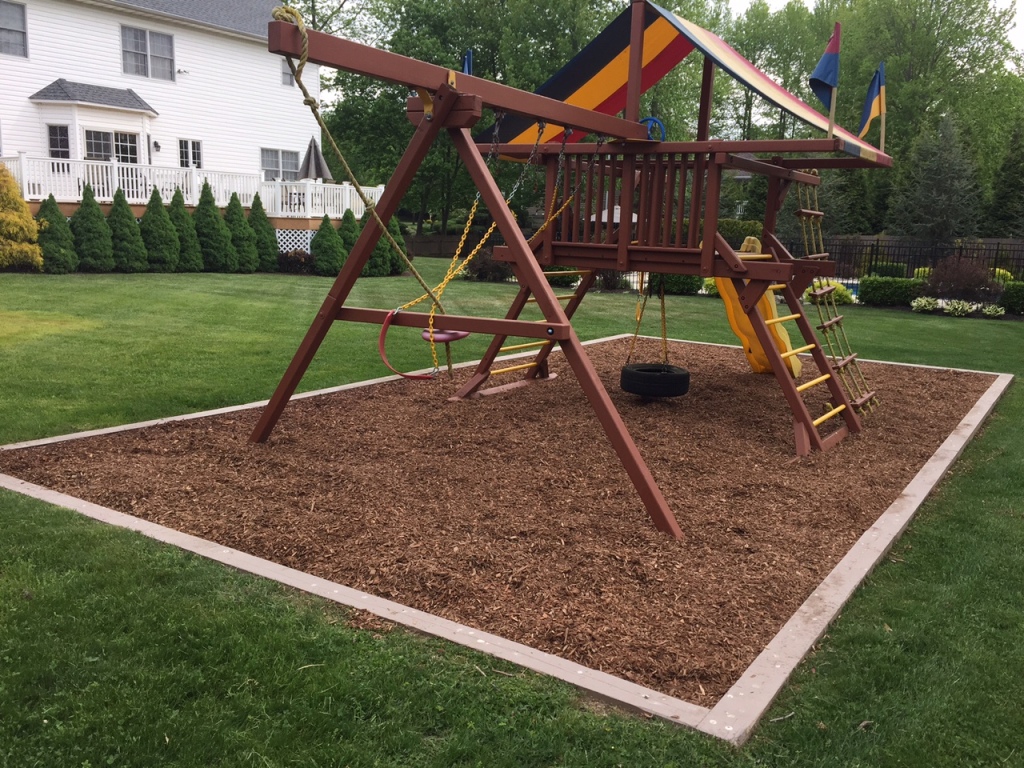
With my set, I ended up with a 16′ x 32′ rectangle. In coming up with these dimensions, I gave much more area to the left and right (by the slide and rope swing) in contrast to the ladder sides of the set; this is what I thought would work best for my layout, and of course this will vary with set size and personal taste/goals as well. But for me – you see 16 x 32. Hope this helps!
THANKS for the post! We got almost 20 years from out Rainbow, gift from grandparents. My wife religiously took down the canopy, flags, and swings every year. She cleaned the canopy and stored everything in our basement. I wish I knew about OXI CLEAN for the mold. Definitely keep the footers as clear and dry as possible, they were the 1st thing to go. (The flag post ends that set inside the cross beam were the 2nd things to go, but I just had cut off the ends and flags were a little shorter.)
It’s really interesting you mention the flag post ends, Bob – as I can see that’s happening to me now as well. Sawing off 3-4″ is a great idea. I’ll definitely do that when the time is right. Just this past week, for 2016 maintenance, I replaced one of the top rails in the clubhouse too – had rotted through. You can see a just-prior-to-staining picture just below. Your comments and insights are much appreciated!
I have had the same issue with rotting in the ends of the 4×4’s where the flag posts go. I’m curious though- if you cut off 3-4 inches of the tip to get back to good wood, how do you deal with the excess tarp that this creates? I hope I am understanding what you are doing correctly. My plan as of now is to just buy pressure treated 4×4’s and rout, drill and replace what is there.
As for your 30 year question- absolutely possible. I got ours from someone who originally purchased it in 1989 and took mediocre care of it. It was in rough shape and I have replaced a TON of the wood (entire deck, both 4×6 deck runners, both 4×6 A frame legs, and the 4×4 vertical supports for the canopy- I have used PT on most and cedar on some as well). That being said, it is still in pretty darn good shape for being 27 years old and with the replacements I have made, I see at least another 10 out of it if I take good care of it, probably longer.
I’m hitting it with a good solid stain this weekend, assuming my wife and I can come to an agreement on color :)
I haven’t done it yet, Jonathan – but reading your comment here, I’m now inclined to do exactly what you’re planning. I suspect with Bob B, he may have re-drilled the snap connectors for the tarp in higher positions to take up the slack. And 27 years is now the record within this thread here – VERY cool and thank you!! You gotta send me some photos at year 30… :-)
I too just was ‘given’ a used Rainbow Swing set for the grandchildren, and am in the process of trying to figure out the ‘restoration process.’ The set I was given is an exact match to the one you have pictured, and I am curious as to the model name and age of the set…….I am hoping to replace the nuts and bolts as during the dismantling it was extremely rusted and I an concerned that it would difficult to ‘reuse’ the bolts in their condition, and the company can not help me unless I know the model name….. Lee in NJ
Hi Lee – My set is a Rainbow Sunshine Castle from Year 2000. But I’m not sure that’s the best way to approach the manufacturer as there are so many variations of these sets that even if they look similar, they may not be exact. I would suggest taking several photos and having Rainbow confirm. The tarp you now see? That was replaced a few years back – and they had to custom-create it for me as it was no longer manufactured. They used the photos that I sent them to confirm my measurements and model. As for replacing the hardware – I definitely agree that you should. And I’d also suggest getting new plastic covers for the ends of the bolts as well; those haven’t aged well and replacing those will be at a very minimal cost and they’ll look nice. I’m sure you saw the redwood swing set rehabbing article that I posted as well? If not, you surely should have a look – there’s a LOT of information I think you’ll find very useful there. Best of luck to you!
I enjoyed your post and it’s given me a few ideas. I’ve not put any mulch down around our Rainbow set and am planning to do that this year. how did you anchor your 6×6 in the ground?
Hey Ed – Those 6×6’s are really heavy, plus that rectangle covers a huge area with a slight grade. The anchoring, in essence, is two-fold: a) I leveled the area of the rectangle perimeter to ensure the wood was sunk into the ground a bit – some parts higher and others lower depending on the grade and b) I used long screws to lock the pieces to each other as well, countersinking the screws and filling over the holes before painting with a solid stain. In the 16 years those 6×6’s have been there – they are still quite rock solid. And by touching up the paint each year, the whole structure still looks beautifully new. You’ll have fun with this – but it’s not a small job. Plan for the better part of a full day – and an upper body workout too!
Interesting reading all these comments. I have had my Rainbow set for 16 years now and have ran into all the issues most folks have spoken about. The key to the bees is to first spray wasp killer in the holes. They will start dropping out like it’s no tomorrow. Thoroughly fill all the holes with a paintable caulk, let dry and sand. Power wash and stain your system at least once every 3 years! I use the Sherwin Williams Super Deck Redwood flavored product and it makes it look brand new.
You will experience rot. Period. Reinforce and replace the areas with pressure treated wood, let the wood dry out for a few weeks and stain. For some reason I have not had a rotting issue on the supporting legs.
The yellow stain issue totally sucks! Especially if any of the components are in a shady spot. Like most people have said, Magic Eraser is the key however if you are not cleaning them early in the going and often, you will have permanent stains that will NEVER come out.
I clean the canopy and the slide once a year with a Magic Eraser. They look brand new to this day.
My kids are in their teens now but still hang out around the playset, We also have friends with young children of course it still gets a lot of use. I can’t say it is an easy task but maintaining the playset is the key to it’s longevity!
Thanks for all the helpful comments. We are resurrecting a 20 year old Rainbow redwood play system and will follow much of the advice found here.
Any suggestions for how to bring back the surface of the yellow slide? I’ve scrubbed it so it is no longer dirty, but I’d like to put some sort of wax, or coating that can make it slick. But I’m afraid to use something untested, for fear of making it sticky, or gummy.
Thanks so much.
Hi Barbara – My slide, which is original and 15 years old, isn’t super slippery – but it’s always been fast enough. [I have this vision of someone getting half way down and coming to a stop on yours!] I know one reader commented that she used waxed paper to speed things up a little bit. And I would only suggest that if you try some type of other product, that you test it underneath the slide first just to see that it doesn’t cause any type of unexpected chemical reaction, per your very-warranted concern. Other than that, is there anybody out there with additional suggestions or tips on speeding up those slides??
I just bought a new gorilla playset looks like a fortress for my 2 boys. I’m not sure what I should use for the first sealer. It says use oil based sealer or preservative not sure what brand is best to use. Reading the instruction manual I read to prevent bees from burrowing into wood it suggests putting dish soap on a cloth and wiping the wood underneath the fort with dish soap.
Says to lubricate swing hangers with olive oil, Pam or mazola oil no wd40.
I thought another ingenious idea was to wipe the slide center only with wax paper every 2 to 3 weeks to speed it up.
Hi Megan –
Congratulations on your new set purchase! As for wood sealer, I can tell you that I’ve used Thompson’s Water Seal in the past, and I’ve had great experiences with it – but I’ve never done so over existing stain; I’ve applied this only to bare wood. So, it’s important to know exactly what may have already been applied onto your set by the manufacturer (mine came pre-stained) and to be sure they truly bless an additional top-coat like this. So, I’d definitely suggest you call your dealer directly (an 800-number in the assembly manual, perhaps) and ask a person there what specific wood sealer they recommend for your specific set. Just to play it safe. And thanks for the great additional tips as well!! (I hadn’t heard of the dish soap carpenter bee strategy before – they can really do a lot of damage!)
We were given a Rainbow playset from my previous employer. They purchased it in 1991 for their boys who are now in college! We’ve had it since 2003. It was 12 years old when we received it, and in fair condition. After sanding and staining the wooden parts, we replaced the tarps, flags, swings, and ropes. It looked brand new once again! Total cost was about $1000. We have had to restain every few years, and the once yellow bar steps are brown, but this year we adopted four more kids, so we sanded, stained, and replaced the tarps once again. Looks terrific! It is now officially 24 years old.
Absolutely awesome, Joy! You’re the first person who has confirmed that my “30 year goal” may indeed be possible, and given that you’re 9 years ahead of me – I’m feeling more confident than ever now. Thanks so much for your comment and the additional insights as to what it takes to maintain the set for this length of time!
It’s springtime at the Jersey Shore once more, and so it’s Magic Eraser and repainting time – cleaning up after yet another winter.
And with the set now at 15 years old, I’m still very happy with how it’s holding up – and how it looks. (A new photo from this morning is embedded below.)
But you *really* just cannot let the maintenance slide…
I’ve had my Rainbow set for 10 years now, and I’m always fighting the rot problem. I’m currently using an epoxy based wood filler to fix things up as best I can. Paying for shipping/install to get the warrantied pieces is a last resort, as I don’t want to dump more money into this, and the kids interest has waned (ages 10-13). My recommendations to owners: 1) Don’t stain with a clearcoat like Rainbow did, use a solid body stain that will last much longer and seal cracks. The sunny side took such a beating and cracks developed. 2) Get the whole thing up off the ground. When I spied some rot years ago (as the weight of the unit pushed it into the ground), I jacked it up and put concrete blocks under the legs. I still have issues because water runs down around the edges and was bleeding into the wood. But, you can at least get to the wood to stain it or repair it. Personally I think the wood touching the ground needs to be rethought; maybe vinyl coated tips.
Hi, I noticed you stained the bolts also? Is that ok do? thanks
I didn’t stain them intentionally, Charles – I’d definitely try to avoid them if you can. Mainly because it will just look nicer!
Great article! Thank you! I just acquired a Rainbow set in a home purchase. It appears in pretty good shape, but I do need to re-stain as it’s starting to look a little worn. Do you recommend power washing and staining anew, or just brushing on 1-2 coats of new stain? Also, when you’re staining annually, do you do anything to prepare the wood prior to staining?
Hi Jarad – Congratulations with your new home! With my set, I’ve never power washed or prepared for the staining in any fashion, mainly because I’ve always kept the set clean from the start. Unless there’s a significant reason to power wash (some type of significant staining or grime), I’d just hit it with a coat or two of wood stain and see how it holds up. I suspect that will very likely be just fine. Good luck!!
Hi! Very helpful post. I’m in the process of refinishing our playset for the first time and there is some great info here.
Something I want to share is an experiment that I did with the yellow rubberized areas and the ugly mildew that loves to hang out there. I was really determined to get rid of this stuff so I tried multiple cleaning agents (soapy water, simple green, citrus-based stuff, 409, etc) and they made zero progress. I rented a pressure washer for the rest of the playset and tried it on these areas too. Nothing! One day when I was trying some oxygen based cleaner (I used 6 scoops of OxiClean in 1 gal of warm water) on my brick patio, I decided to give it a shot on the playset mildew too. I scrubbed it on with an old kitchen dish brush, let it sit a minute and rinsed it off. MAGIC. The mildew was completely gone!
I’m so glad you posted this, Jeff – this sounds REALLY promising. I don’t have too much of that mildew on my set at this point due to a recent rehab where I replaced most of the pieces with yellow rubberized areas, but I know *exactly* what you mean about it. It’s incredibly stubborn once deeply established. I’ll definitely try the OxiClean myself. Thanks so much for sharing your tip!!
I’m going to try this out this week, thanks for the tip!
hi!
I am in the process of “sprucing” up my cedar swing set. We have only had it for a year now but the wooden roof needs to be painted and i would like to stain and treat the rest of the set. Do you recommend using a Colored stain and water sealer (to match) or since it is not really faded, can i use a regular water sealer (clear) like Thompsons and stain using color in later years?
Thanks, Emily
Interesting question, Emily – Since the roof needs to be painted, I’d start right there…
Is there any way for you to contact the manufacturer and find out what specific stain/sealer they used so you can match the roof perfectly?? (I did something like this with my set’s manufacturer in Year 1 as well.) If you can get, from them, exactly what they used – I suspect treating the rest of the set with the same would likely work out very nicely. And… thereafter, you can assess clear seal coats on top too. But I’d start with what’s already been used as your baseline.
How many gallons of stain do you typical use to re-stain this size Rainbow System (which I’m guessing is a Castle Climber or Monster)?
Hey Jeff – It takes me less than a gallon for a one-coat re-stain; it’s not terribly paint-consuming if the set is maintained annually.
Great article and thanks for the questions and comments. All very helpful. Two questions for me:
1. We are replacing the ropes for the jacob’s ladder and rope swing and are struggling to untie the knots and measure the ropes. Anyone have dimensions for the 3 pieces of rope for the ladder and for the rope swing?
2. Anyone used a plastic spray product to renew the yellow parts? Scrubbing is not doing the trick. Thoughts on this?
http://www.usplastic.com/catalog/item.aspx?itemid=39161&catid=699&clickid=searchresults
Hi Jana –
Some thoughts starting with your second question first…
+ Check out this link right here. I never heard of the product you mentioned above, but I just found the same item on Amazon – and it has some pretty decent reviews. (The reviews are one the reasons I love to use Amazon; scroll down on the page from link I just provided to see even more buyer feedback on different product colors.) If anyone tries this (or has already used it) – posting your personal experiences would be very helpful.
+ As for the rope lengths, I suspect it may vary on the ladder and rope swing per set design. But if it were me, I’d take rough measurements of what you have now – then buy clearly-longer lengths and trim once you complete the restoration. Or – contact the manufacturer for the precise measurements for your set; you may need to provide photos, though.
Good luck!!
My swing set has started looking worn out. Can you please suggest what should I apply on it and the number of coats that are to be applied? Thanks, Mark for providing the great tips.
Hi Brandon – And thanks for your comment. See just below for my response to Laura – which is similar in part. The only thing I would add is that if you already have a coat of stain on your set, one more coat should be fine. If you’re staining from bare wood – then I’d start with a good cleaning (per below) and hit it with 2 coats. I use a solid redwood-color decking stain on my set.
We are buying an 11 year old rainbow that has never been stained. I like the color of the wood without the stain. Do I need to stain it? I was told when the wood is that old you don’t need to stain if because the stain will not stay on the old wood and that it won’t protect it because the wood is do old. Is this true or should I stain it? If I do need to stain it can I use chest since I like the gray wood color and will I need to do that every year?
Hi Laura – If you like the way the set looks now, I’d personally leave it the way it is. You can surely stain it to be the natural aged color you see now, but to do so would require you prepare the wood for staining – which would mean cleaning/blasting the old wood surface with a power washer (at a minimum) for stain preparation. Then, you’d need to get a solid color stain – so that it was essentially opaque. And thereafter, you’d have to stain again every 1-2 years to keep the finish looking uniform. What I’ve found is that the damage due to bees, insects and rot (at the ground surfaces and other prolonged wet areas) to be far more concerning than natural weathering of the wood surface. I like my set to maintain the redwood color, and thus I stain to maintain every year.
What you might find moving forward, though, is that if you need to replace a piece of damaged wood (as you can see I did in my “Tip 4” above), you could be forced down the staining route so that all the wood pieces match. In fact, if you haven’t yet broken the set down to transport to your house – it’s possible you’ll find such damage. Definitely review my redwood swing set rehab article here for further insights on what you could find when you break the set down.
But the bottom line, for the present, as I see it – this set is for your family to enjoy. If you like the way it looks unstained, then enjoy it as it is!
We bought a 6 year old Rainbow set on Craigslist too. Can’t wait to try the Magic Eraser on the black film covering the swings.
On the topic of Carpenter bees getting into older Rainbow Sets…
WD-40 Kills wood boring bees, spray it into the holes in the swingset. Then fill the holes with wood filler BUT NOT WHILE THE BEE IS IN THERE. The female lays eggs in the holes and they will bore their way out. You can also stuff steal wool in the holes and then patch with wood filler to prevent further boring.
The Magic Eraser definitely works if the stains aren’t long-term, in my experience. So, you might find it doesn’t get everything off if there’s been 6 years of accumulation. But the beauty is that they’re cheap – and they’ll definitely help to some degree. Best of luck!
Hi,
We are buying a 12 year old Rainbow Castle from a neighbor. I started the breakdown process and ran into a hiccup with the carriage bolts holding the support beams. The bolt spins when trying to loosen the cap nut and the main nut. I can’t seem to figure out how to troubleshoot this without cutting into the wood. Any suggestions or experience with this?
I used a hack saw blade for this once, Adrian… not the entire saw, just a blade. And I didn’t go after the head of the bolt where, if memory serves, it was countersunk. I went in between 2 pieces of wood that were held together by the bolt/nut. I simply cut the bolt and replaced with new. Perhaps this is of some help for your situation?
Thanks for the reply. I ended up using your suggestion on only one of the bolts. While removing the rest, I used a counter pressure method by using a wedge between the wood posts. It is not the best method if you are super concerned with preserving the aesthetic quality of the wood. I was not too preoccupied with that as I knew that I intended to replace the damaged pieces and/or patch any superficial damage to the wood. Thank you for your advice, it was incredibly helpful!
Hello,
I just bought a 1997 Rainbow swing set for $100 in May 2012!!! Clearly these swing sets LAST! There is rot at the ends of the beams, but other than the completely disintegrated bottom horizontal bases for the main clubhouse the set is pretty good. Clearly I have no warranty withstanding as it is so old and I am not the original owner. That said, I do not believe this set has ever been stained. There is plenty of bee holes and carpentry work and no evidence of stain or paint. I am going to buy stain today… stain suggestions welcome!
Hi Rob – Once you stain that set (I’d suggest 2 coats since it surely looks like bare wood) and if you’re inclined to add a canopy, I think it will *really* look amazing. I use Cabot stain for my set of late – there’s a link above, but you can pick it up anywhere. Thanks for your comment!
Mark,
Last week I primed and painted the yellow step bars with Rust Oleum Yellow paint. Will take a picture of it tomorrow. They turned out pretty good. I used about 4 coats of yellow after the primer dried.
I also spray painted the silver chain and the yellow plastic chain, that looks pretty good now. (It would have cost me $28/chain to replace X6 for the 3 swings = a little steep. I used a little darker stain, and it turned out pretty good. 6 hours of work total.
We had a little lichen appear on the south facing top part which I had to sand and wire brush off, looks good now.
And we had the carpenter bees. The web said to put bee poison in their holes at night, that will kill them when they come out the next day. Then I filled in the hole with a long screw and then brown filler putty. Just used an oil based stain again which should keep them away, they don’t like the stain. Brown paint will also prevent them from chewing through it.
Best,
Kevin
By all means – if you want to send a picture, Kevin, we can insert it with your comment here. You can send via the Contact page or the email address on the About page.
We just purchased an 8 yr old rainbow playset in WNY. We have powerwashed, contacted Rainbow for a price on some replacement parts, and will be staining with an oil based redwood stain with a brush this week – it really cleaned up well and most of the damage was the ropes and wood the sat on the ground. Hopefully the oil based staining will keep wood bees away (we didn’t see any bee damage – but I see 1 flying around at our place already!) We were told goo-gone works wonders once a year on the black stuff on the yellow metal & chains. We were told to rag stain the playset each spring after it’s been powerwasher and dried. Any tips for us would be great! Any tips for where to place it in the yard? The slide comes off the end of the Supersized Rainbow Castle Set.
Mark – how is your set holding up?
Hi Amis – Sounds like you’re well on your way! Once you stain your set, I bet it’s going to look stunning. But let me address your three questions:
1) Regarding frequency of redwood staining, I do it once a year as well – in the early spring. So, we’re quite together there.
2) As for placement in the yard – I initially had my set under trees, one of which I cut down and another that was recently “removed” by a hurricane. What I’ve noticed is that my set seems to stay somewhat cleaner now that it’s in more sun and dries more quickly. So, if you could, I’d suggest finding a spot that’s mainly sunny – near some trees, but perhaps not directly underneath.
3) How is my set holding up? Well – it’s now 13 years old [two years older than when I first wrote this article], and it was stained 5 days ago. A brand new photo from this past weekend is below. I’m quite happy with it, and I’m still planning to have it for 30 years!!
Hi Mark,
You mentioned you like to use cabot stain. What color did you use in the picture above?
Thanks!
George
It’s “1880 Redwood” Solid Color Decking Stain. About a month ago, though, I found out that this may be something you have to have custom-mixed now. So, if you get to the paint store, you might hear them tell you this. Also – up at the top of the article, there’s actually a picture of the can I used that you might want to glance at too. Enjoy!
Mark,
Can you please tell me the brand and color stain you used?
Sure Regina – It’s a Cabot Solid color decking stain; 1880 Redwood is the color. There’s a photo of the can itself up at the top of the article.
We are looking for something to outline our play set in to keep the mulch inside. My husband doesn’t want railroad ties. Very curious as to what you have here….it looks really good! Thanks!
Hi Kristen – I built the frame you see from pressure treated 6″ x 6″ sections. In fact, what you see above are 12 such sections, each of which are 8 feet in length. I started out with the railroad tie mindset, but it was just wasn’t for me either. This is nice and neat. It definitely costs more, but as you can see – 13 years later, they’ve held up great. I stain them every year, as I do the swing set. A different color, though… ;-) Thanks for your comment!
I recently got a swing set in the backyard. Someone suggested that I should put concrete slabs under the wooden legs to prevent rotting. Is it a good idea? Is there any other way to prevent wood from rotting?
Interesting question… Let me start with a couple of preliminary comments: 1) the wood will, of course, rot over time – it’s a matter of making it last as LONG as possible, essentially. That being said… 2) I don’t think putting the set on top of concrete slabs is necessarily best since it could cause the set to rock or vibrate (when the set is being heavily used), and the slabs may eventually move as well. Plus, the bottom of the wood will still be wet when rains.
So now I’ll tell you what I’ve been meaning to do for 2 years now: seal the bottom of the new wood with a marine epoxy resin of some kind. I really have to give this a try this year myself!
Hi Sandra – We were told to use Magic Eraser at least twice by our manufacturer. It worked pretty well at first – but with each passing year, it got a little harder to clean. You *really* have to stay on top of it, but I’m frankly not sure it will work forever.
Mark,
What cleaner did the manufacturer suggest you use for the yellow rails and swings?? I can’t find suggestions online ANYWHERE?!?
Thanks!
Hello Mr. Russo,
I enjoyed reading your post. I research before buying looking for customer reviews not for future maintenance issues. This is very informative. My husband just finished assembling the set – Do you recommend staining the wood now or waiting until next year?
Hi Mari –
First off, *please* feel free to call me Mark! :-) With my set and even my wooden deck from some years ago, I stain right off. It’s a bit of a pain to do, quite frankly, but I try to seal the wood as soon as I can. Hope you guys all enjoy your set!
Hi Phil – The epoxy suggestion sounds absolutely excellent for preventative maintenance. I now plan to lift the wood areas touching the mulch, let them dry out a bit (in the spring), and then apply a couple of coats of clear marine epoxy. We’ll see how it goes. Great idea. Thank you!!
Hey Mark,
Thanks for the very complete and thoughtful write-up. There are only two things I really regret not doing in my life, and one of them is not building or buying a play set for my girls when they were little. (The other is not continuing dating Maureen Sullivan in high school – she wound up being a model). So just doing it, no matter which bullet you need to bite, sounds like great advice to me. For the pre-drilled (bee-drilled?) holes, in another life with my old (c. 1790) house, I remember an epoxy-type product especially developed for filling in rotted wood on sashes and the like. I don’t remember how structural the repair could measure up to, but it might even be a treatment, or a preventative, for the leg problem discussed. IAE, happy maintaining and please keep up informed. One could do worse than being a swinger of, well, swings. (Apologies to Robert Frost).
Hi Elle – I’m really glad you asked this question because this could be dangerous! These canopies are expensive, and having purchased a brand new one earlier this year (while having the old one in hand, unlike your case) – I found the measurements didn’t match the manufacturer’s specifications due to weathering. In order to ensure you get the right one, I would strongly suggest contacting the manufacturer and sending them photos of your set. If you know the year it was originally purchased, that would very likely help as well. They seem to make a lot of different sets which further vary per year, and I’m not at all sure the canopy sizes can be trusted to stay the same. If you get someone’s input and it’s wrong – you could end up making a costly mistake that it’s best you avoid from the get-go. Also, aside from the “snaps” you see me installing in the photos above, there’s no additional connection to the top of the set. It just “drapes” over – installation is really pretty easy as long as you drill pilot holes first.
I just bought this same set used a few weeks ago. The person who sold it to me no longer had any canopy on it at all, but I would like to put one on. The swingset is identical to yours, plus an addition of a small second level with a turbo slide.
Anyway, can you tell me the dimensions of the canopy this swingset needs? I am not sure how to measure it. Also, another picture of installation (mainly how it is attached at the top) would be greatly appreciated!
Thanks!
We bought a used set off craigslist at about 1/3 the cost of an identical new set. I’d say it was 3-5 years old. In our part of the world sun damage had taken its toll on the appearance of the finish, as well as, a slight degree of warping is visible on the deck planks. I’ve sanded and stained all the parts so everything looks nice. I also had to spend $30 to place the two pieces of wood that came in contact with the ground. I am grappling with replacing some of the hardware with bolts rather than the screws currently used. I’m also thinking of reinforcing the deck with more wood underneath that joins the planks together. When I went to take the set apart a number of the screws had either separated or broke off the small piece of wood underneath that joined the planks together to make the deck. I just wish I could be more confident that these are worthwhile ideas.
I can completely relate to what you’re saying, Starmirror. We researched our set for hours upon hours as well. Ultimately, it’s a personal decision – but what I can recommend is the following: contact your dealer and get a written copy of the warranty in-hand for the new set you’re considering. Review the precise terms. The wood simply *will* rot after numerous years, and it will be subjected to insect damage as well. It’s just nature. If you really want to keep your set for 10-15+ years, the warranty might enable that – especially if it’s from a reputable company. I can also tell you that my company honored the warranty without any issue at all – and I received about “half the swing set” (brand new) via a delivery last week. I had to pay the shipping, but that’s all. I was pretty impressed. Will post new additional pictures once I have it all assembled. Your decision is definitely a personal one to make, but having a hard copy of that document in-hand might really help to clarify!
Hi! I stumbled on this by chance after spending hours and hours for the last month researching Rainbow playsets. I am so stuck as I first bought a used one which I then cancelled as I saw how bad the runner beam was rotted. Then I gave in and put down a deposit for a new one and then yesterday bought another used one as it was so cheap! It’s 10 years old but in good shape but there is slight wood rot at the legs. Now I don’t know what to do – Should I go for it or just buy a new one and make use of the warranty? I want to keep it for 10-15 years too!