2020 Update — Originally Published April, 2018
We all knew there was going to be maintenance with owning a swimming pool, but I honestly never considered the non-Summer efforts; it turned out I also needed a reliable, long-lasting submersible pump for the off-season months. To drain excess water.
Chemicals, algae, filter, heater, chlorinator, skimmer and pool vacuum considerations all come immediately to mind. But during the off-season months, I really don’t want the water from rain or melting snow overflowing, which in my case with an inground pool, means reaching the top of the vinyl liner and hitting the coping. I just don’t like the thought of water getting behind the liner where it might freeze, expand and do more damage. So, in addition to my summer pool maintenance manual (I truly have a manual I wrote covering everything you can imagine from backwashing to salt concentrations for optimal chlorination), I developed a procedure for keeping the water level down using my Flotec submersible pump, which I can highly recommend having used it this way for almost 8 years now.
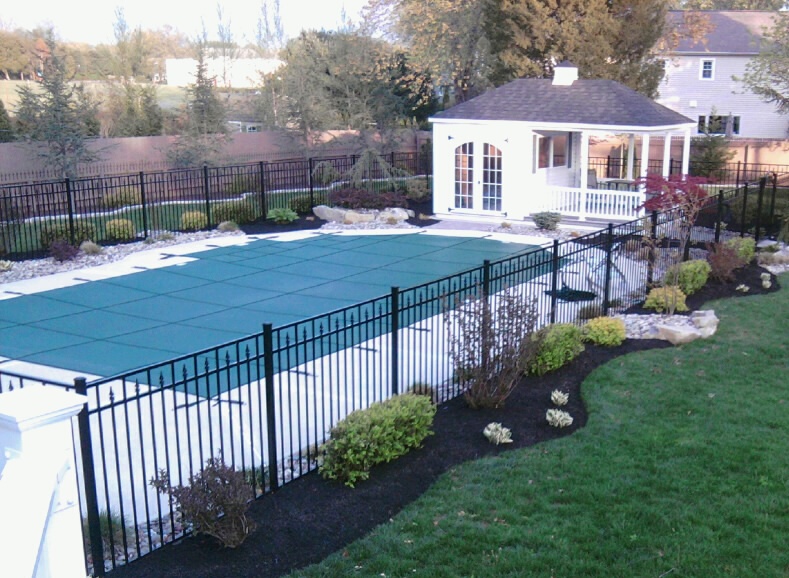
Now, there are lots of ways to address the removal of off-season excess pool water – I’m going to show how I do it, and it works beautifully for me. So, let’s start with a video. And afterwards, I’ll go into more detail about my approach along with other options you can consider as well.
A Video: How to Drain Excess Pool Water
Please have a look now on YouTube as I’ll show how I go through my process, while simultaneously trying to keep my dog from taking an unexpected swim…
My Submersible Pump Assembly for Pool Water Removal
So, as I mentioned in the video – what I have below is a Flotec submersible pump (generally used as a sump pump), and I’ve modified it just a little bit with the [white] PVC and the [black] check valve assembly that you see on the right side. The PVC is there simply to connect to the pump, while the check valve is functional in that it ensures the water can only flow in one direction. If you look closely at the picture below, you’ll see there are directional arrows on the check valve which show you how to install it; they show you which way water will be able to flow.
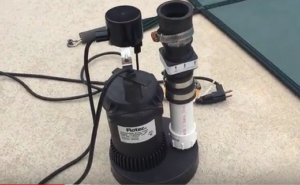
Now, a few additional words on that check valve: when I’m removing water from the pool like this, it should only flow in one direction anyway. But, for me, this submersible pump serves also as the backup for my home’s sump pump. And for that, I absolutely want the check valve in place as there are many feet of pipe above the pump there – and when the pump turns off, I don’t want water falling back downward toward my basement. So, for the pool water removal configuration, you really could avoid using a check valve – but it doesn’t hurt. And again, I have my submersible pump configured for dual utilization: pool water removal and basement sump pump backup.
Looking at the picture below now, you can see I’ve also fit the blue pool drain hose with a gray plastic collar insert that mates right into the check valve assembly – and I’m securing everything with some very low tech, inexpensive and very effective metal mounting straps.
I guess I’ve sort of “MacGyvered” this a little bit.
(I only recently heard that word used as a verb… and I like it!)
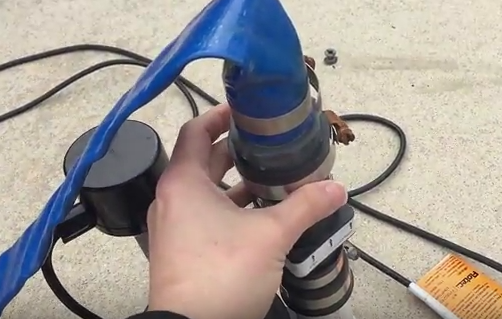
It’s true that there’s a little assembly required each time I do this, but as you saw in the video – it’s truly only a couple of minutes. And that’s important, as when I do this (usually once every ~4-6 weeks off-season), it’s generally FREEZING outside.
7/19/19 Update: If you’ve read to here, I simply have to add this paragraph – with the link and the photo that follows. It’s now about a year after I wrote this article and LOOK what I just discovered on Amazon: A fully assembled Swimming Pool and Hot Tub Pump with Hose. In fact… this item appears to be using the same blue hose I have in my assembly above! Kind of uncanny – and pretty cool! You might want to check this out too; you can click the link above or the photo below.
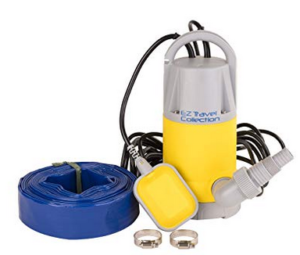
Now, let me lay out all of the parts that I’m using here, and as usual, I’ll link to Amazon so you can see details and prices for everything; the only item that’s a little expensive is the submersible pump itself. But again, I’m going on 8 years with it now and there’s nothing about it that’s looking ratty in any way so far. It’s in great shape, in fact, as it’s designed to be used as a sump pump – submerged most of the time. Mine is living a very comfortable life in the relatively warm (and dry) shed, on a shelf – waiting to be used once a month or so.
My Pool Water Removal Assembly Part List
⦁ My Flotec Submersible Pump
⦁ A screw-on PVC Coupling (sized to the interface on the pump)
⦁ Mating PVC pipe (sized accordingly)
⦁ PVC Glue (to glue the PVC pipe to the PVC coupling; this entire assembly then screws onto the pump)
⦁ A Check Valve
⦁ Potential Rubber Couplings, sized accordingly, to connect your Check Valve to PVC and also to your Drain Hose
⦁ A plastic coupling for your drain hose, sized accordingly
⦁ Metal Mounting Straps (4 of mine came with my check valve) to connect all couplings securely
⦁ A pool drain hose to carry the water far from the pool; probably at least 50 feet
From the above, which again, may be slightly different for your assembly – the rest of the typical operations follow the steps in the video…
1) When the water level starts to get too high, it’s time to take action:
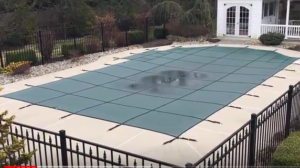
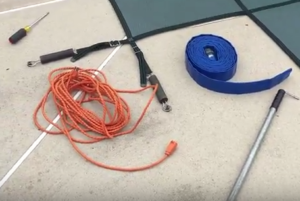
2) Gather your tools and accessories, including an extension cord for the pump, your drain hose, a screwdriver for the mounting straps, whatever you use to open a small area of your pool cover – whether an inground swimming pool or an above ground pool:
3) Once the cover is opened slightly and the assembly [above] is completed, it’s time to get ready to submerge your pump:
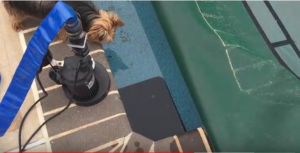
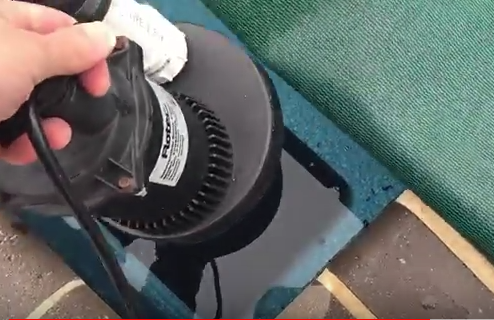
4) Once your submersible pump is submerged and sitting stable – you power it on, minimize kinks in the drain hose and ensure you have a nice flow far from your pool or anything else that could be damaged from the water:
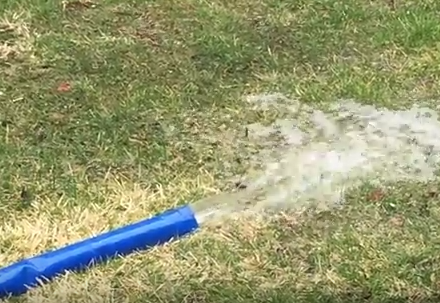
5) And by all means – WATCH THIS CAREFULLY! You don’t want to drain too much water from your pool. Or in the worst case… all of it. You simply want to remove the excess.
5/16/20 Update: Now, on a totally indulgent side-tangent… If you’ve watched the video above or had even the slightest bit of concern for the safety of our Yorkie [Sherlock] being so close to the pool water’s edge, have no fear. He’s in the water all the time over the summer. And he’s always under the careful watch of everyone in our family. Now that said – he does occasionally suffer an occasional indignity. The one just below – courtesy of my wife and son.
Is it just me, or does he actually look angry??

Off-Season Pool Water Draining: Additional Options…
The other main class of options that’s readily available for removing off-season excessive pool water includes a variety of pool cover pump variants. A pool cover pump is designed to sit on your cover and drain water that accumulates right from the top of the pool cover. Actually, here’s a photo of a popular, well-rated (on Amazon), cover pump. You can even click the image to get more detail from Amazon if you want…
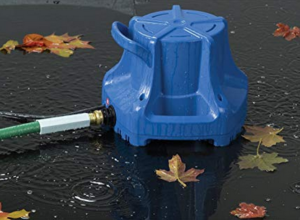
I’ve never used one of these, but I’ve never heard anything bad about them. I would only caution that these seem, at least to me, a little flimsier than the approach I’m taking above. Plus – what also jumps right out to me about these options is that pool covers oven contain a lot of leaves and other organic muck that could clog things up pretty quickly. So, I’ve personally avoided these – but that doesn’t mean they won’t be a great option, especially if cover opening is an issue. In fact, with above ground pools, these may work particularly well as the covers aren’t as tight usually, but rather dip in places where the pool cover pump could be set up.
Now, without question – a third class of options also includes the use of passive siphons. And this is what my Dad taught me to set up many years ago. You need some hose and a height differential, so these are best suited to above ground swimming pools. And you also need a way to get the flow started – which, when I was a kid, required that I use my lungs and try not to catch a mouthful of freezing, dirty water! But there are options available for these as well – that don’t require any risk of drinking nasty pool water.
Does anyone have additional thoughts, experiences or ideas to share on any of these fronts?
Need Professional Help from a Local Contractor?
⦁ Visit Our Find a Contractor Page
Related Posts
⦁ Salt Water Pool Chlorinator Questions and Answers
⦁ Refreshing a Swimming Pool Landscape
⦁ My Battle with Surface Water Runoff
⦁ Building a Removable Wood Fence Section and Gate
⦁ A Rookie Carpenter’s 5-Step Guide: How to Build a Playhouse
⦁ 7 Tips for Maintaining a Redwood Swing Set

Do you leave the pump in the water the entire off season?
Definitely not, Todd –
I mean, you probably could… but I’ve never even considered it.
And now that I think about why, two reasons come right to mind: 1) my pool is salt water and I don’t want to corrode/age the pump more than necessary and 2) I don’t want to leave a hose exiting the pool over the off season – which will leave an opening through which dirt/leaves/worms/etc. can get more easily into the water.
My pool cover is below… as is the storage of my submersible pump in my pool shed. These photos are from ~2 hours ago. I took them in response to your question!
But again, you probably could leave it in the water all winter if your conditions differ from mine. I simply choose not to do that.
I prefer to keep things nice and tight.