2025 Update… My asphalt driveway was assaulted.
I was hoping for the best, but we had construction trucks in and out several times during a pretty significant renovation project, and at some point the asphalt started to crack a bit on some edge areas — and then just continued to crumble. It wasn’t pretty. And the damage went beyond all the best tried-and-true, low cost asphalt patch and crack filler remedies.
Arguably the driveway wasn’t of highest quality from the get-go, but now it simply had to be professionally repaired.
When something like this happens, there are always a couple of options. You can focus on the specific repairs, of course, striving to bring things back to their original state. But another option is to take it one-step-further: try to turn the repair into an improvement… and make it look like the whole effort was part of your plan all along!
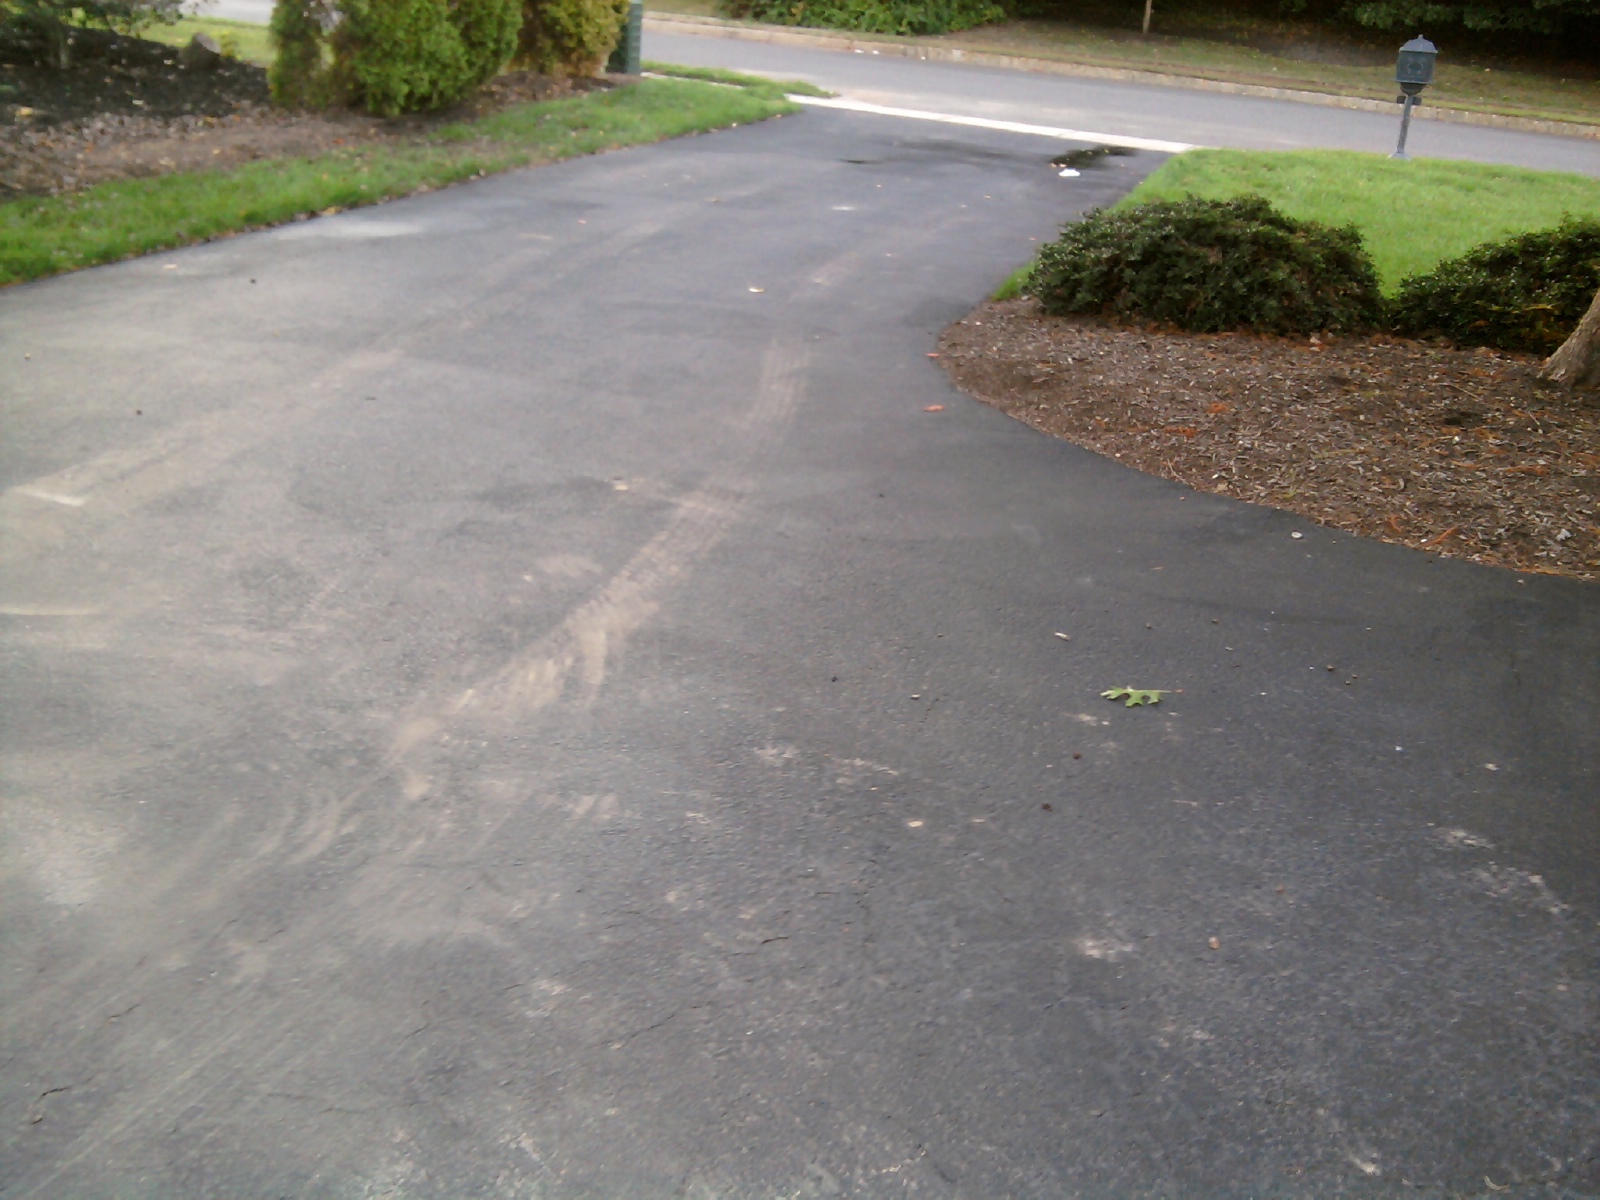
Originally, I had a pretty standard-looking asphalt driveway as pictured above.
It was perfectly functional, and it was about 12 years old when this photo was taken. The damage was done to the edge on the left and also to the edge up at the top leading into the yard — in both cases this was due to huge trucks rolling from the asphalt onto the grass.
I met with a local mason who I had worked with on many other projects – great guy. And we talked about what might be feasible.
My Goal: Asphalt Repair & Hardscape Driveway Edging
I wanted to save the driveway without having to replace it in total.
Plus – I wanted to have it look nicer than it did originally. If we could pull this off at a lower cost than re-asphalting, it would be the ideal scenario: achieving a repair that *looked* like an intentional improvement. The plan was going to be to salvage the driveway as best we could by surgically removing the damaged asphalt edges – and replacing with some combination of Belgian block and/or pavers.
Hardscape Design Ideas & Considerations
1) Grading design is always a imperative and unforgiving concern with outdoor projects – and this project was no exception. The edge of the driveway farthest away from the house had been a destination for water over the years as the driveway was properly graded to take water away from the house. However it hadn’t been properly graded to carry all of this water down to the street – and this was part of the reason one of the most damaged areas was so fragile.
My asphalt had been getting passively undermined for years.
With that understood, we knew we had to be as careful as possible with the edge farthest from the house. Not only did we need to *try* to remediate the grading there, but the edge we added needed to be rock solid.
2) Due to the above, we opted to use Belgian block set into concrete (not stone dust) along the left and right sides of the driveway. This border would be inherently stronger than asphalt and would add a very significant rigid support to the driveway overall. Incidentally, these would also serve as “bumpers” for anyone who might to occasionally drive onto the lawn! (Using pavers here would look nice for a little while, but wouldn’t provide any structural support at all.)
3) For purely aesthetic reasons, we would set these Belgian block edges on a nice angle, not vertically upright. You may have seen this before; it’s a really nice look – there are pictures below.
4) At the top of the driveway at the entry to the yard – we would use a paver apron set in stone dust. Could we have used Belgian block here as well? Definitely. But pavers are cheaper – and there was no need for the same structural consideration. Furthermore, my mason felt strongly that the contrast between the paver apron and the Belgian block edges would make things “pop” even more.
5) For additional aesthetics, I also wanted to do a matching paver apron going into the garage, and my mason suggested he would add a third little one coming in from the street as well because he thought that would tie together comprehensively. Some people have vision for this type of work; I know that he does and this wasn’t an up-sell, he just mentioned he was going to do it as well because it would look really nice. Can’t beat that, right?
Construction Photos
Belgian Block Landscape Edging & Driveway Pavers
So, the work now gets underway…
Stone dust is delivered – this will be used as the base for all the apron areas.
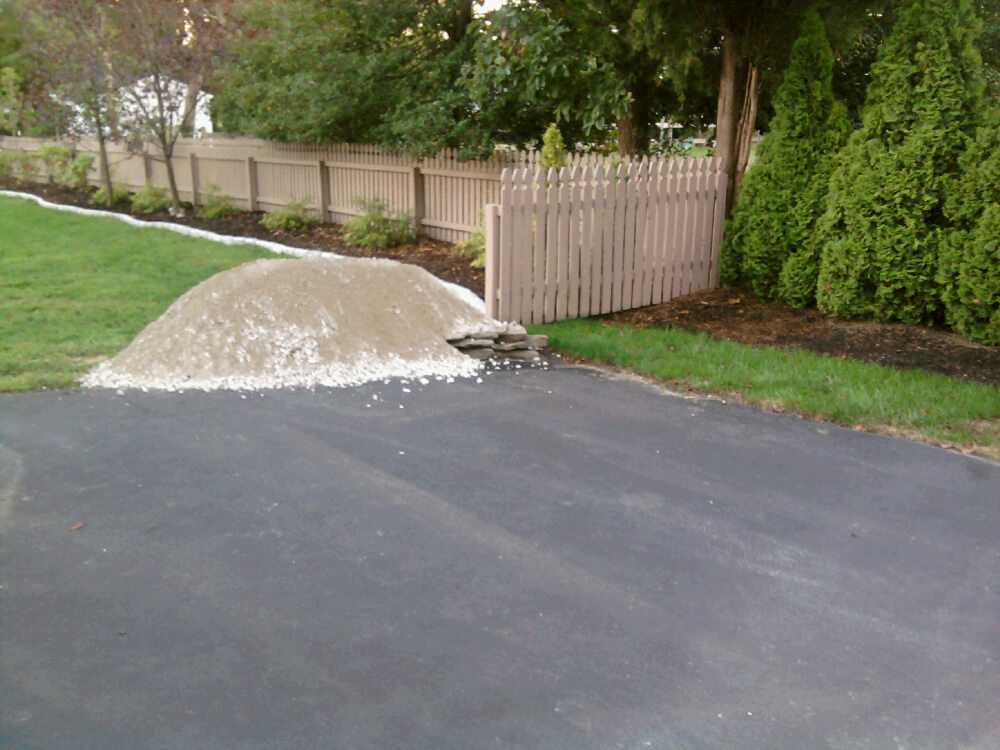
The damaged asphalt areas are removed and areas are cut/dug for the aprons as well as the Belgian block edges.
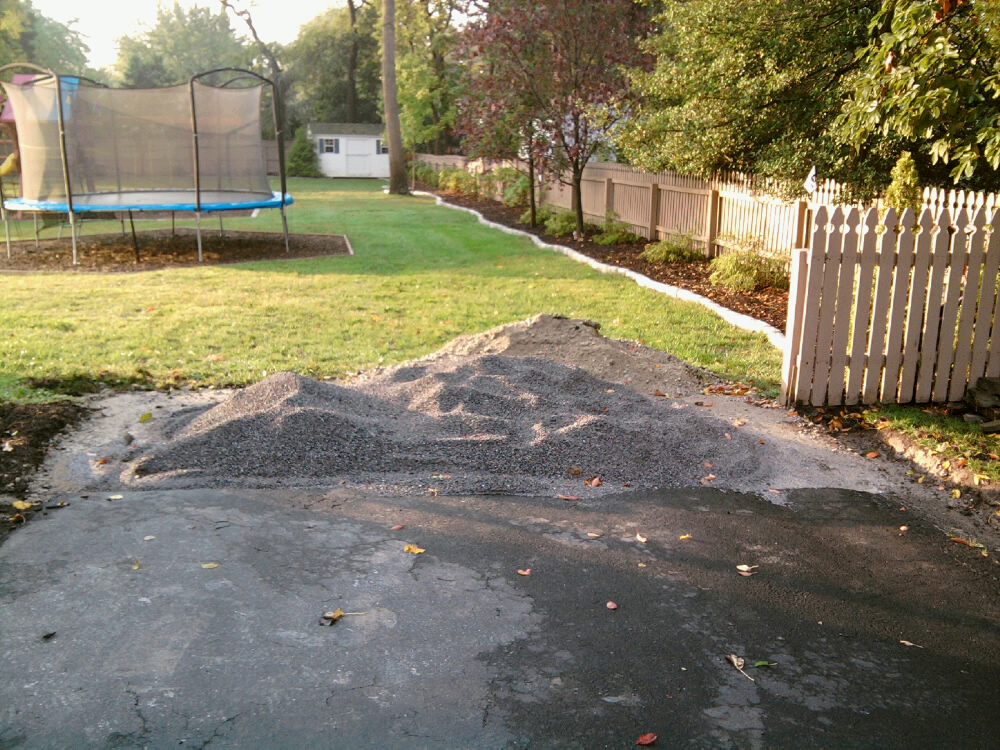
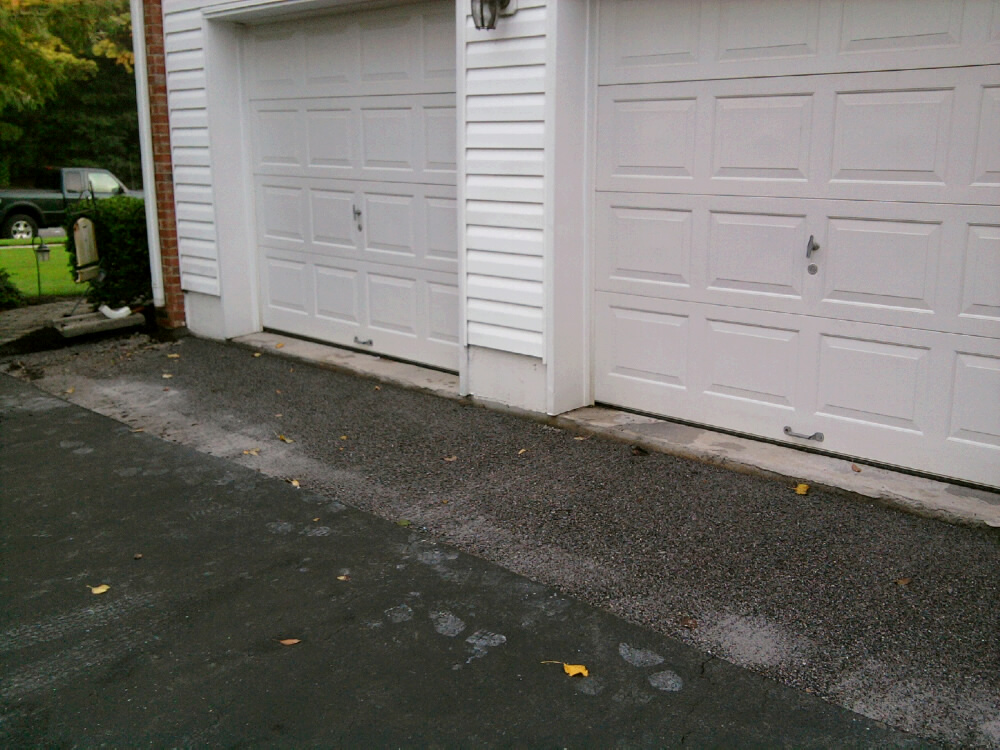
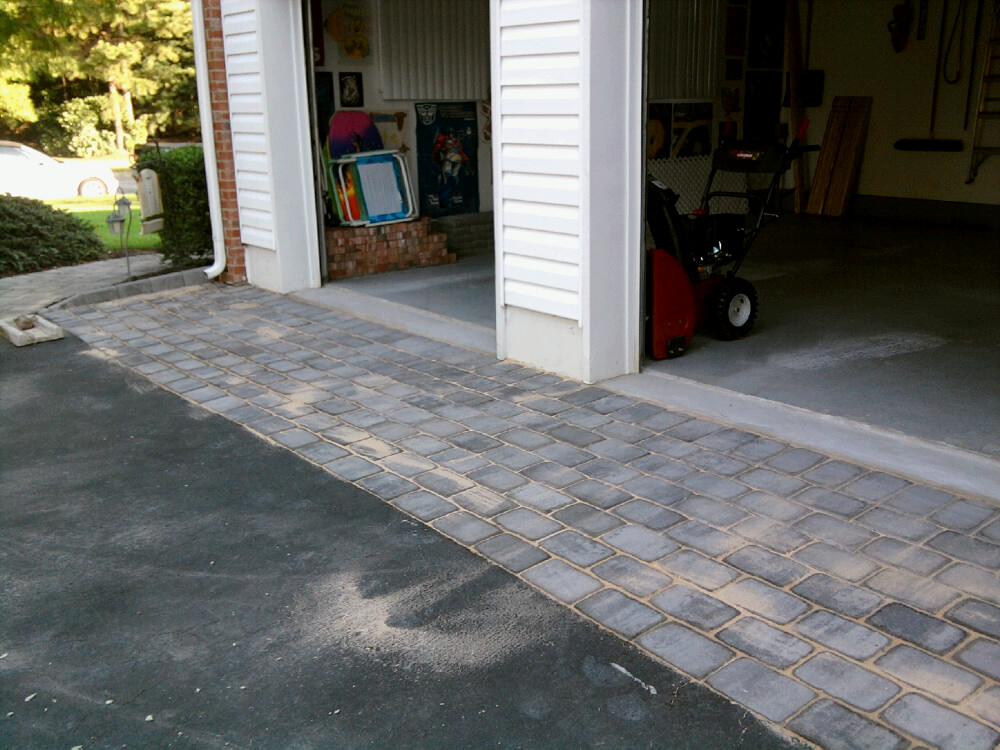
The paver aprons are now installed on the stone dust base, and the Belgian block is set into concrete.
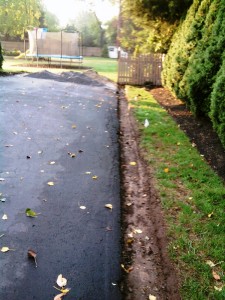
The block will not be “jointed” until they set for a couple of days, so you’ll still see spaces between each of the stones.
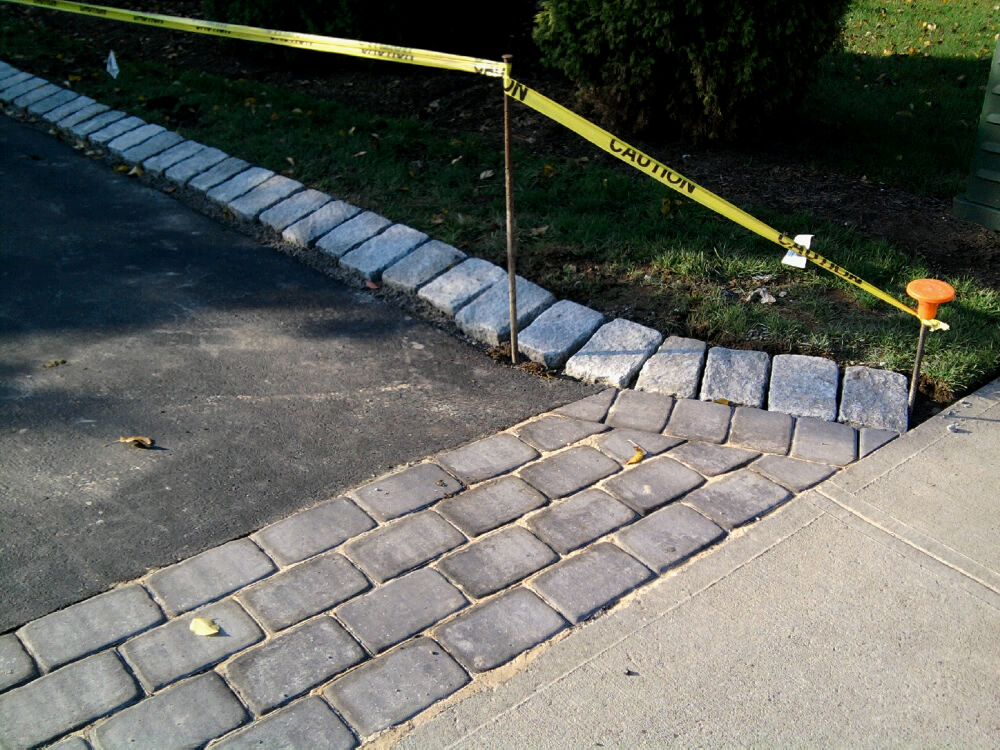
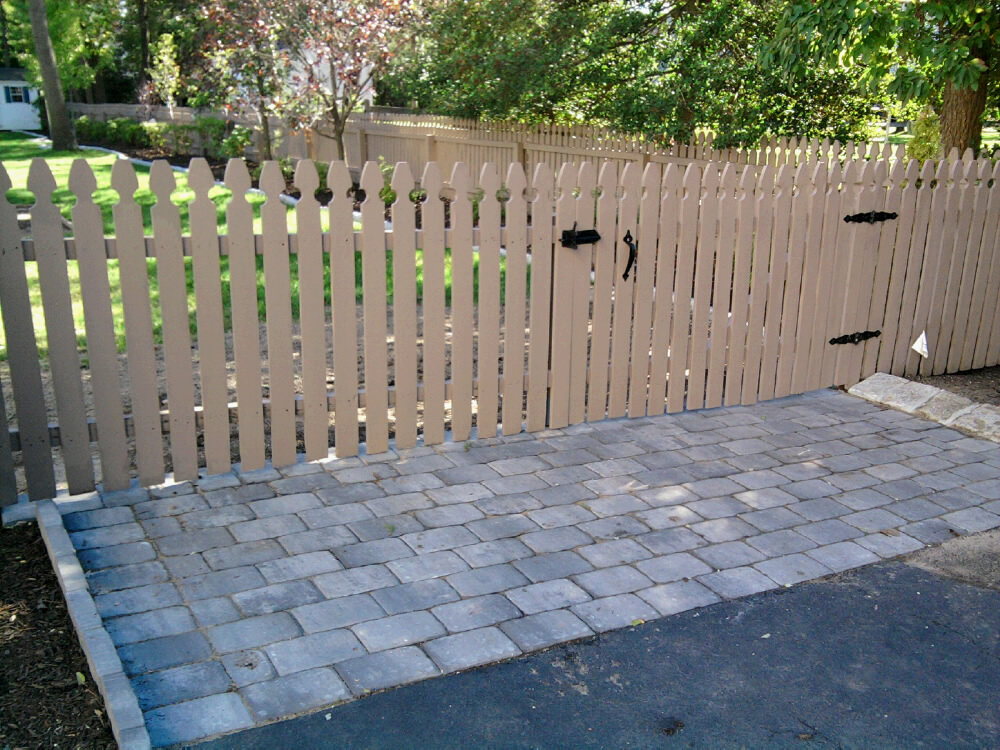
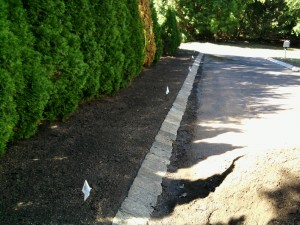
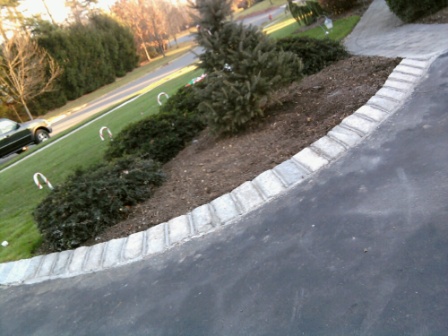
Once the blocks are jointed – you end up with the more “connected” look you would expect. In the picture that follows, you can see this – and also note the white flags. When inserting Belgian block on an angle as we’ve done here, you need to anticipate impact to the adjacent lawn areas: they must be elevated. The white flags denote sprinklers which also needed to be lifted to accommodate the new higher elevation.

My Asphalt Driveway – In The End…
Well, this project turned out to be a good news/bad news story.
The good news is that I have these beautiful aprons now and a rock solid (and really striking) Belgian block border on each side of the driveway as you’ve seen.
The bad news is that the asphalt driveway couldn’t actually be salvaged.
The damaged edges were just a symptom of a much bigger problem; the driveway was actually on the brink of falling apart in total. You should normally expect to get about 20 years out of an asphalt driveway but due to the water run-off issue and some surface tree roots, we were pretty much at end-of-life here. Once the crew started cutting, it became very clear.
So… I’m going to have to redo the asphalt (as well) anyway. You win some and you lose some.
I’ll next need to engage an asphalt company. Will be a lot more money than I ever planned to spend in aggregate, but on the upside – I’ll end up with the nicest driveway on the block.
Not sure I’ll let anyone drive on it, though.
Part 2: For the full “Asphalt Replacement” effort – Check out Paving an Asphalt Driveway.

Awesome…we are looking to do something similar to our asphalt driveway. Taking out the fact the whole driveway needed replaced at the end, what was the original price quoted to execute just the original enhancements?
Was about $4K, Chris, for us – but please remember these costs will vary a LOT depending on where you are, so be sure to get a few quotes. I rarely give out costs for precisely this reason; it can vary so much. Additionally, for me, this was about 10 years ago – and we’re now in what I would call a ‘very hot’ home construction and improvement/repair era in some parts of the country. But the main thing… find a mason that’s a true artist. Because this is going to have massive impact to your home’s facade. So… once and right!
Hi Mark,
Hope all is well. I was wondering what kind of pavers you used for the apron? I have looked at so many pavers none quite like the ones used for your apron, they have a very smooth clean look.
Thank you
Jess
Hey Jess –
I wish I could give you a manufacturer on those; I really don’t know – it’s been quite a while. But below are a few more close-up pictures if it helps, Maybe you can share with some local bulk landscape & hardscape suppliers in your area. Perhaps they’d have recommendations for comparable materials if you shared a photo? The first is a close up of one block in the apron. And the next two – a base I made for our mailbox a few years later from extras. (Always get extras, of course. I have more… but not enough for another apron!)
Hi, just searched and found your blog. I had a driveway redone and put Belgium stone after the asphalt was paved (my mistake not knowing the importance of edge only afterwards) so the question to ask you is how to seal the gap between asphalt and Belgium stone? The contractor used cement which only lasted several months then cracked. Having the contractor come back to repair it. Now it’s cracked again less then a year. Frustrated. Did contractor use cheap cement? Live at NJ. Your thoughts?
Tricky question without seeing exactly what you have there. Is that gap (concrete filled) on each side more than ~2 inches over the span of the driveway? Is it cracking periodically after a run of several feet from top to bottom? Is your driveway steep in slope? How wide are the cracks? What I’m getting at here, if it’s feasible (based on the answers to those questions), might be something like this… If you have periodic cracks every several feet down the run of a ~40-foot driveway on a ~2 inch concrete filled-gap – might it be conceivable to fill those cracks with something that can also act as an expansion joint (maybe a latex exterior caulk or even an asphalt crack filler, perhaps)? If so… could you then apply an asphalt sealer over the driveway in total, including the thin concrete, crack-remediated, expansion-joint-hacked edges as well??
Just a thought to consider. It’s the first thing that comes to my mind, but again… I’m not sure if it really applies to your specific situation. I am sure, though, how terribly frustrating this must be. Hope this is of some help?
I saw a picture of the cobble stones next to the garage doors on your site, and I will be having the same thing done next week as the concrete cracked and looks horrible. I was told by neighbors that having more concrete put in will still crack after our severe winters. After thinking what could I do to remedy this problem I came up with cobble stones. The only other problem is if the rain can come in under my garage door, this I will find out when we have another Nor’Easter.
The answer to driveways being damaged by heavy traffic… I have my driveway sealed every two to three years by a good company in my State. It looks great all of the time and if you spend your money this way instead of having a new driveway put in, the cost to re-seal is so low you can have it done as I do for the next twenty years, and it will always look nice. I have an eight car horseshoe drive way and the cost for the company to come out and do the re-sealing is under $300. I get lots of nice comments about my drive way looking so good. Nan.
I really like the look of having the rocky brick pattern as a boarder to the pavement. If I remember to when I redo my driveway, I need to come up with something similar. With my driveway, I probably wouldn’t use asphalt, so I would need a way to make the boarder look good with concrete.
The borders on your driveway are so beautiful! I would never have thought to do edging like that, and I’m glad you shared because it is stunning. I’m so sorry that you couldn’t save your asphalt, but you are right: by the time you’re done you will have the nicest driveway on the block! I can’t wait until we have the funds to re-do our driveway. I might have to take a page out of your book and edge it too, if you don’t mind.
It’s pretty amazing to see how far your asphalt driveway has come so far! Even the edges in the pictures look really nice with your brick concrete sidewalk going up to your front door and fence. We’re looking to get this same sort of quality when we keep our sidewalk design, but get our driveway concrete installed with clean lines on the edges like you guys have. Thanks for showing such a good example of what to expect!
Really glad you like the site, Tom, and thanks for your question.
I had the same problem at the beginning. I knew what I wanted, but I had a hard time finding information about it. I think the slow-rising Belgian block have a beautiful aesthetic – and they’re really practical as well. (They keep people from driving on my lawn without destroying [or scuffing] tire sidewalls like vertically positioned Belgian block can.)
The asphalt-touching *edge* of the Belgian block should be pretty much at asphalt-level, of course, and the back-end (toward the lawn) is raised to your desired angle. This dictates the depth and length of the trench. There’s one nice trench shot in the article body above. I had a contractor do this – by the way; I didn’t do this myself. But I oversaw and specified the design.
One other thought you might want to consider if you’re going to do this yourself:
If I were undertaking this myself, I’d start with an area in my backyard and 3-4 blocks and do a test there first. Full blown. It’s hard to imagine an easy “redo” with this project, and if your concrete dries without your stones positioned “just so” once solidified – best this happens on a “test” area (which you’ll later rip out) than on your real driveway.
Best of luck to you!
Hello Mark,
First off, thank you for the great website! It is very informative and helpful to me as a fellow DIYer.
I’m in the process of redoing my driveway as it is shot beyond repair and I love what you did with yours. I’m planning on doing the same with mine and following your advice of curbing first and then having the contractor come in with the asphalt. I’d like to lay the Belgian block edging on an angle as you did but for some reason I can’t find any information on laying Belgian block in this manner except for your website. I know it’s not as popular as vertical installation but it’s weird how nobody else has posted details on the angled installation.
My question for you is related to the depth of the concrete base and manner of laying the Belgian block on an angle into the concrete. I’ve seen how the vertical installation calls for sinking the Belgian block a few inches into a concrete base and then troweling some concrete on the outside of the curbing at a 45 degree angle to the same height as the asphalt on the other side in order to hold up the Belgian block. However, laying the block on a 30 degree angle is a different story and I’m not sure how deep to make the concrete base for that and whether to sink the entire block into the concrete so that the outside edge will have concrete coming up the side or just laying it onto the concrete base without sinking the outer edge into the concrete. Also, is the trench dug with a flat bottom or is the bottom of the trench angled at the same angle as the block is to be laid?
Thanks in advance for your time and help!
Regards,
Tom
Looks very nice, I would have suggested doing the apron with granite blocks as well.