I never really considered the use of carpet tiles before.
If I need to carpet a room, it’s usually something I contract-out because it’s clearly a talent – with wisdom acquired from experience. Best to have a professional carpet installer handle this. On the other hand, area rugs can be absolutely beautiful as well, adding all kinds of charm and character to a room or open area, especially if placed over hardwood flooring. And the great part about area rugs – no work required!
But carpet tiles… how well could they possibly work? In short: they worked perfectly for me. Lots of photos and all of the details will follow.
Rehabbing a Studio Apartment
During a recent rehab effort, I found myself having to remove a studio apartment kitchen that had been created from part of the home’s original large master bedroom. This part of the apartment had a damaged and decrepit linoleum floor that had to be ripped out. And underneath that were very old (circa 1971) floor tiles that were pretty hideous…
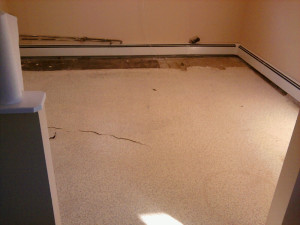
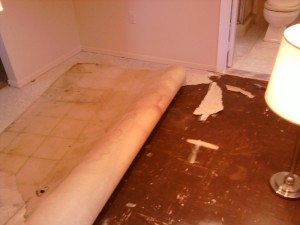
In order to sell the home, the bedroom had to be restored to its original layout, bringing the house back to a 3 bedroom, 2 bathroom ranch – but I now had a very serious problem with the flooring.
I had little time to fix this, as the house was a 3-hour drive from me, and I wanted to get things into a stable state so the home could be listed as soon as possible. I found myself faced with three options:
Hire Someone to Carpet the Entire Master Bedroom?
While this initially sounded like the easiest option, it was much more than was really needed as only the kitchen area was destroyed. And worse – it would have required oversight. (Overseeing this effort would mean another lost weekend with 6 hours of round trip driving.) Furthermore, what if the buyers didn’t like the carpeting I picked, and replaced it 6 months after moving in? I didn’t like anything about this option.
Hire Someone to Carpet only the Damaged Area?
I gave this only a little bit of thought because, ultimately, it was the oversight logistics once more that were pretty daunting (selecting a contractor, negotiating, scheduling, traveling), and since the damaged area was only a small fraction of the master bedroom flooring area – it didn’t seem this could be cost effective either.
Do Something Custom by Myself – Overnight
Was this really viable? I wasn’t sure, so I ran out to the hardware store looking for some inspiration and some consultation. I had already made the 3 hour drive out to the house, and if I could figure something out, well, there was no pressing need to sleep that night!
The Carpet Tile Experiment
As I walked into the store and made my way to the carpeting area, I was frankly considering something as fundamental as buying a fragment close in color and texture to the existing carpeting. Maybe I could shape this to the damaged area and hold it in place with some high-end two-sided tape? And then for the carpet-to-carpet interface, install a length of some kind of threshold? This all seemed possible-enough, but I wasn’t at-all sure it was the best way to go.
Then I saw the carpet tiles.
The carpet tiles I used were designed with self-adhesive, no additional padding required. They were in 2-foot by 2-foot squares, 10 tiles per box. And one of the colors on-hand at the store just happened to be close in color and texture to the existing carpet. The Amazon link above isn’t exactly what I used – but it’s pretty darned close.
The color/texture that was best for me is show below – I liked this a lot…
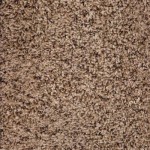
I asked one of the folks in the department, “Do you guys have much experience with these – do they actually work?” The response was interesting. The associate replied something like, “We only started stocking these carpet tiles about 2 weeks ago – but a couple of people have raved about them.”
That was enough for me to decide to give it a go. I needed to figure out what tools I needed, then I needed to get everything back to the house and prepare for my all-nighter, which would involve ripping up what was left of the old floor, prepping for the carpet squares – and then installing them.
Hopefully, it would work.
Flooring and Carpet Tools
I didn’t really need too much, which was good because I was far-enough from home that I couldn’t rely on my tool collection. The most critical items for this job consisted of a carpet knife, a floor scraper tool and a nice solid straight-edge.
My Carpet Knife
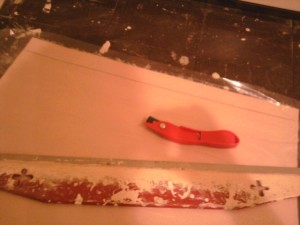
I bought a slotted blade carpet knife, shown below. This is extremely sharp, inexpensive – and it worked beautifully. It came with 2 blades and you can re-position each blade to use all four corners – so it’s really like having eight blades.
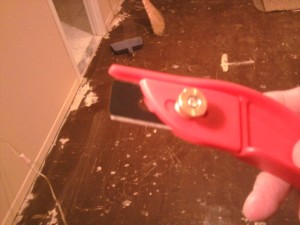
Much like with wallpapering, it’s critically important to keep the blade ultra-sharp – rotating it as soon as you notice the very first signs of dulling.
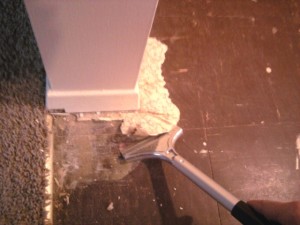
My Floor Scraping Tool
The floor scraping tool was also absolutely imperative. I never used one of these before, and this was the tool that impressed me the most. Incredibly effective. I’ve used it a few times since this job for other items. It’s also extremely sharp, but very strong too – you can really get stuck-on, disgusting crud off a flooring surface quite easily. This came with a number of blades, but I only needed one – I never had to change blades.
Straight Edge
The straight edge will be used to guide your cutting, so you can use most anything as long as it’s true and solid. Fortunately, this is the one item I was able to borrow from my Realtor, Karen – who also happened to recommend a great Sushi restaurant when she stopped by to drop it off. Working all night is best accomplished on a full stomach, after all.
Installing the Carpet Tiles
The sub-floor has to be prepped initially – ensuring it’s clean and level…
Side Note: I do have to apologize for the “pink” quality of the photos throughout this article. All photos were genuinely taken with lamp light, late at night. All quite authentic!
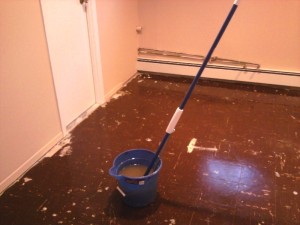
After the surface vinyl flooring was completely removed, there were some cracks in the underlying tiling. I wasn’t trying to be perfect; I essentially made sure everything was solid – nothing loose.
And in a few places (where tiles were cracked and some pieces were missing), I filled in with a little joint compound to even things out.
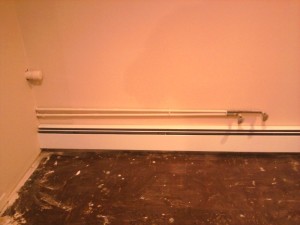
Choosing the right starting point is important.
I opted to start with the corner I felt was most visible, hence a full square would go there with no cuts. The walls with the cuts would be the least seen, and as this area was laid-out, a knee wall was completely covering the view from the main area of what was now starting to revert back to the home’s original master bedroom.
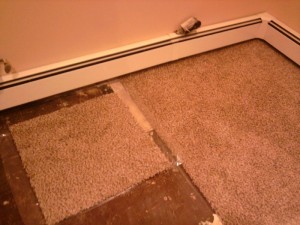
Each tile has an “arrow” marking on the back – and you need to be sure they’re all laid with the same orientation, however you choose to start. This allows them mesh together optimally; they’re designed for this.
When the plastic backing (you can see in the shot above) was removed, the adhesive wasn’t as “sticky” as I imagined I would be, but it held just fine.
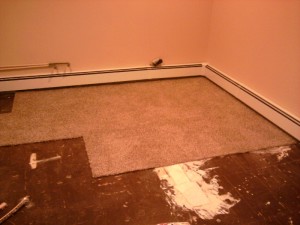
As the flooring was covered more and more – this quickly became one cohesive carpeted area. You could see the carpet squares a bit if you looked for them, but if you weren’t looking – it was really quite surprisingly good.
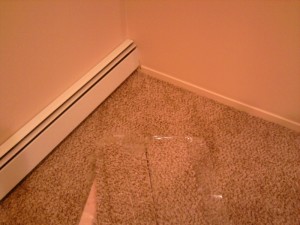
I carpeted right up to the base moldings – no problem at all.
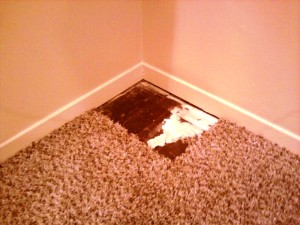
In the shot below, you can now see the final carpeted area – and the interface with the existing carpeting in the remainder of the bedroom. I know the lighting isn’t great for the photos in this article, as I had only a lamp and two recessed lights in the ceiling above to work with, but it really looked great.
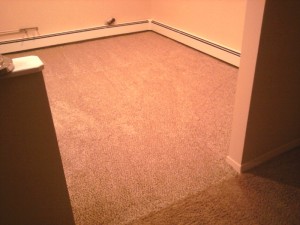
So, in the end this experiment paid off beautifully. The new buyers could leave this down or rip it up – but the house would be able to show very nicely. I was in and out that one weekend, with the carpeting completed. Even with my [outstanding] Sushi dinner break, I managed to get to bed before 3am.
And that doesn’t even really qualify as an all-nighter, right?
Need Professional Help From a Local Contractor?
• Visit Our “Find a Contractor” Page
Related Posts
• Preparing to Install Hardwood Flooring
• Hardwood Floor Installation and Trim Work
• Dining Room Design Accents: Wallpaper within Shadow Boxes
• Hall and Stairway Trim Work – Low Maintenance Shadow Boxes
• Finding the Best Local Contractors
• Seven Tips for Working with Contractors

Leave a Reply