2020 Update — Originally Published January, 2012
My backyard deck is simple, but beautiful. And though it may seem deceiving, a HUGE amount of design consideration went into it.
But how can I call it perfect, though? Well, as I see it, if you start out with some extremely careful thinking and develop a crisp/clear end-vision that you can morph into a reality that meets (or even exceeds) your design criteria — then I think you’re allowed to say the end product is perfect. Because you’ll surely feel that way!
One thing for sure – designing and building a deck is not a small project, even when starting with a relatively simple design such as mine…
And for the effort you’re going to put in, the money you’re going to spend – and the amount of time your deck will be a permanent part of your home, some serious advance thought is definitely warranted.
Need to hire a local deck design & construction professional? Get free estimates online from top pros in your area!
In the following 2 shots, you essentially see the before and after.
The “before” being a software rendering I did of my design vision, when still we had a muddy backyard soon after moving in. The “after” being a photo I took this morning. In a light drizzling/misty rain. Of the real deck…
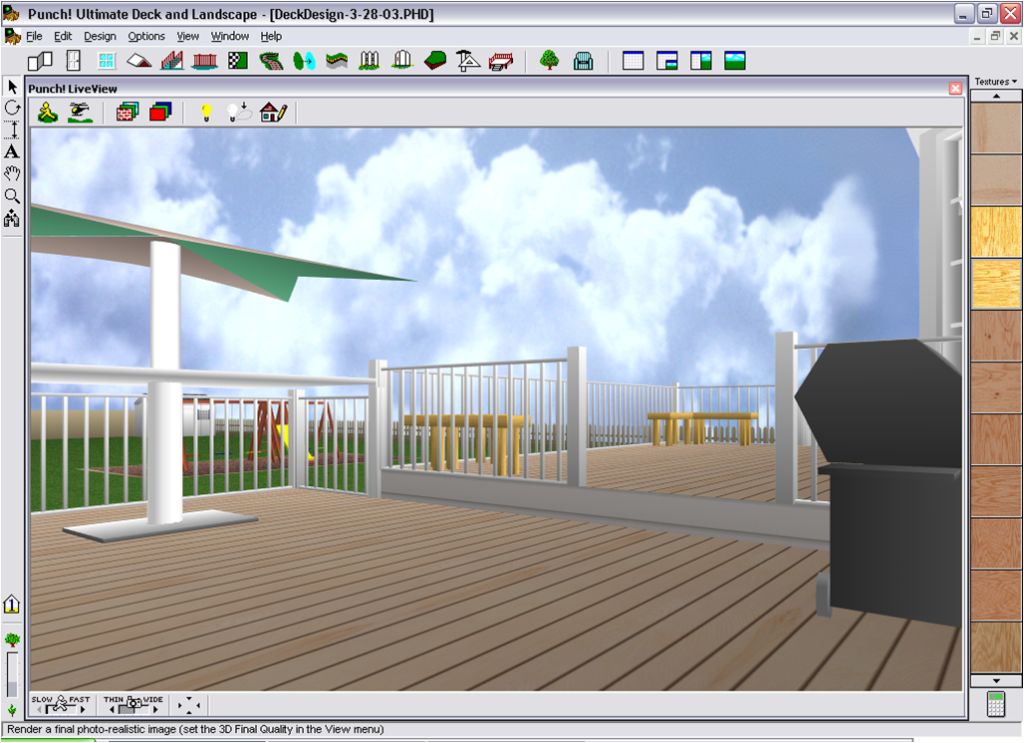
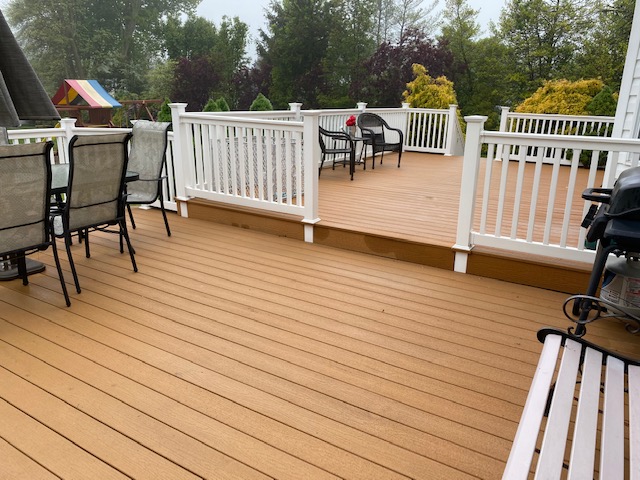
In the full summary that follows, I’ll lay out the thinking and steps that went into my deck design. This will include deck design drawings (slides I created), deck design renderings (from a deck software design package that I bought and used), contractor engagement suggestions/tips and materials – and then we’ll wrap up with the FUN stuff: lots of actual construction photos!
You’re about to get my whole process, from soup to nuts…
Deck Design Ideas & Considerations
To begin, I made a list of everything I could think of that mattered to me. This was the second time I was designing a deck from scratch, so I had a little experience. Still, though, it pays to be exhaustive in your thinking. Keep in mind how much money you’re going to be spending – you *really* want to do this right.
Wood Deck or Composite Decking?
The substructure will almost surely be constructed with treated lumber – but the decking itself can be wood or one of a variety of composite materials available today. My first deck was wooden, and it looked beautiful – but I found it to be a lot of maintenance. This time, I decide to try a composite decking material.
Need to hire a local deck design & construction professional? Get free estimates online from top pros in your area!
Type of Decking Rails?
I had wooden rails on my first deck. You can get some absolutely beautiful balusters/spindles with wood, but I was really concerned with minimizing maintenance this time. (Painting rails & spindles is absolutely no fun at all.) So, this time, I decided to use PVC rails – not generally as ornate, but neat, clean and lower maintenance.
This is a little more expensive than standard wooden rails and balusters. But look how beautifully these turned out, just below. It’s all about your personal style once more…
Multi-level or Single-level Deck Design?
This is completely personal, but in my opinion if you have a smaller deck – keep it to one level. If your deck is on the larger side, though, breaking it up into multiple levels can add quite a bit of character, and you don’t need to have more than a single step up/down to get this effect. I decided to go with two levels, with a single step – to break it up.
Stairways from the Deck to the Ground?
This depends on your yard layout, of course, and what you need to get to. You’re surely going to have at least one way on/off the deck to the yard. I went with two staircases, one on the left side and one on the right. Simple.
Gates Needed for your Deck?
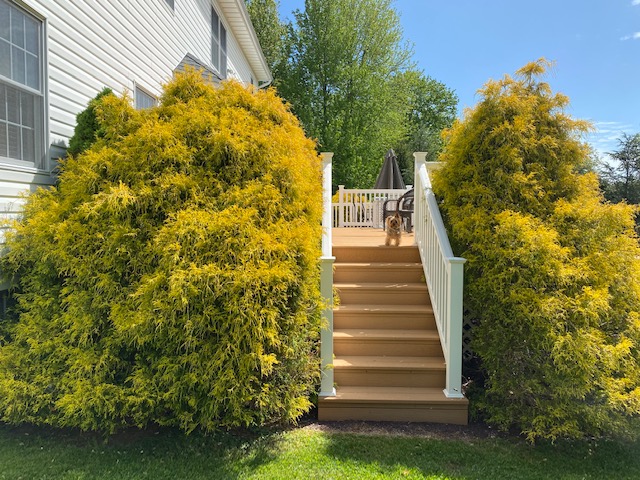
This can be a great safety feature, especially for small children on an elevated deck. Or, as in our family’s case, a very small dog. Can you see him below? (Fortunately, for us, he thinks his legs are too short to walk down stairs.)
Orientation of the Deck in Your Yard?
What do you expect the yard look like in 10 years? Will you add a pool? A garden with a walking path? If at all possible, before making a huge improvement like a deck, have a sketch of what you envision your property looking like 10-years down the road. See if you can accommodate those future nuances in the deck design today. Naturally, you don’t want to add something if you’re not sure you’re going to use it – but if there’s any way you can accommodate without making things look unfinished, then surely try to do so.
Extra Decking Supports: A Future Hot Tub?
This is a *perfect* example of something you cannot go back and do AFTER your deck is built. If you think you might one-day want a hot tub on the deck (even if its part of the 10-year plan), put the infrastructure in place now.
We anticipated this. We never did it. But we could have… and still can.
Need to hire a local deck design & construction professional? Get free estimates online from top pros in your area!
Sun Exposure for your Deck?
Will your deck be baking in the sun all day? Will it be baking in the sun at 4PM when you think you’ll be having BBQs? Before you build, consider carefully the path of the sun and how it might impact your ultimate plans for using your new addition. Should you perhaps anticipate an awning if you have too much sun?
Deck Landscaping Considerations?
As part of your deck construction and contracting? No. But give it some thought even as you’re designing your deck and interviewing/engaging your contractors. My personal preference is for simple, hearty (robust shrubs) and distinctive color contrast in all of my landscapes. With appropriately-colored mulch and/or stone. But that’s just me. Give it some thought. For another project in the Fall season AFTER your deck is built.
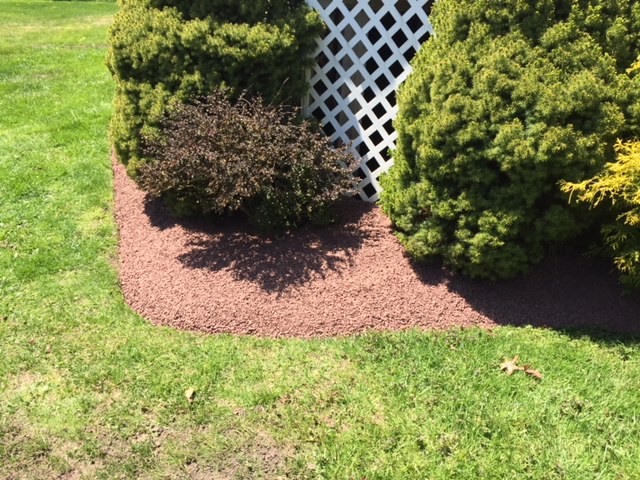
Below is a short list of the shrubs I’ve used around my deck – to create the neat, clean and robust landscape. I’ll also provide Amazon links so you can dive deeper if you’re so inclined, but only when the time is right of course…
My Deck Landscape Shrubs
- Barberry (The red/purple shrub you see above)
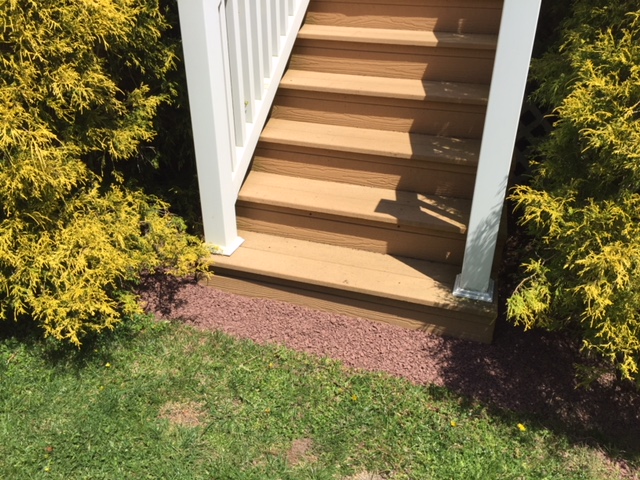
- Golden Thread Cypress (The yellow/green shrubs by the stairs below)
- Dwarf Alberta Spruce (These deep green shrub/trees you see above grow to ~8-10 feet. No pruning required.)
Hose Bibs, Electrical Outlets & Dryer Vents?
When you consider the positioning of your deck, know that any existing items like hose bibs, dryer vents and electrical outlets can be moved – but will you be losing anything you need? Is it really necessary to mess with this stuff, or can you tune the position your deck to avoid this?
Fancy Deck Design Touches on the Cheap?
Finishing touches absolutely make a huge difference in just about any project, and they don’t have to cost a lot. You’ll see in my deck design below, I cut the rails at 45-degree angles on one portion of the deck, as I thought it might look kind of cool. Turns out it did! And it didn’t cost anything extra. I also added lattice. I love lattice… costs a little more, of course, but it really adds so much to the aesthetic especially if you have some significant elevation, as I did.
Removable Panel for Storage or Deck Substructure Access?
Okay – this may sound a little weird, I know. But here’s the thing: I did indeed design in a removable section of the lattice in my deck. And over the past few years – I’ve used it at least 3-4 times. If you can do this, *do* this. You never know when you might need to get underneath, and you might just find you’ve created a nice storage area as well. I didn’t pay a penny extra for this – the crew just needed to know that I wanted it, and where to put it.
Initial Drafts of your Deck Designs
The onus is going to be on you to communicate with crystal clarity what you really want (to the construction crew and to your township when you apply for permits), and the best way to do this is with pictures.
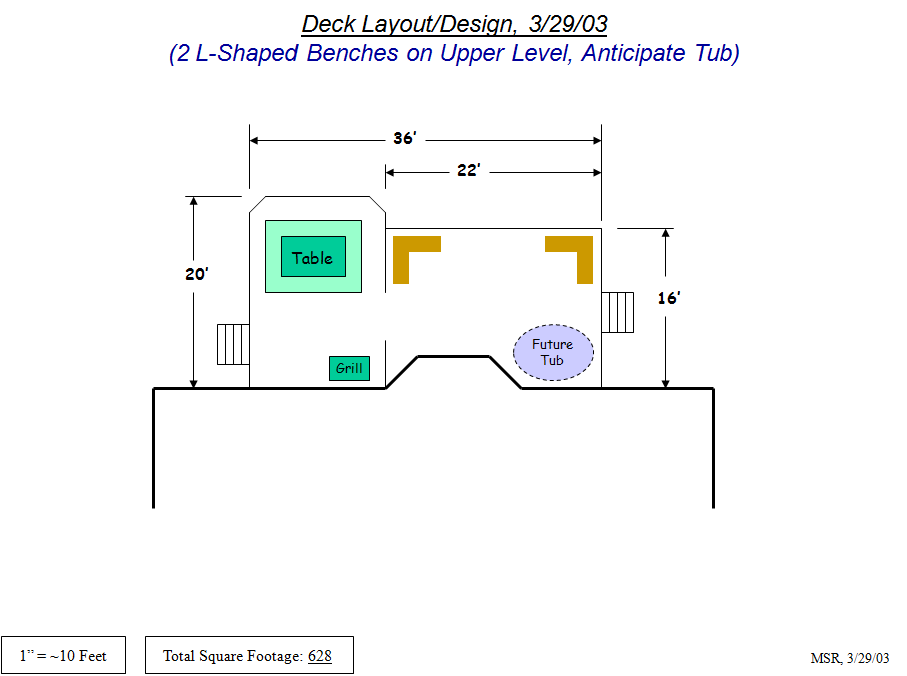
And frankly, once you start drawing some pictures – you’re going to see things yourself that you don’t like and/or want to tune. I started with some basic measurements (knowing where I wanted the deck to be positioned by spray painting lines on the ground and walking the area with my wife), and simply make a slide that I modified about 15 times.
Two of the final versions are below; they’re quite intentionally simple and clear.
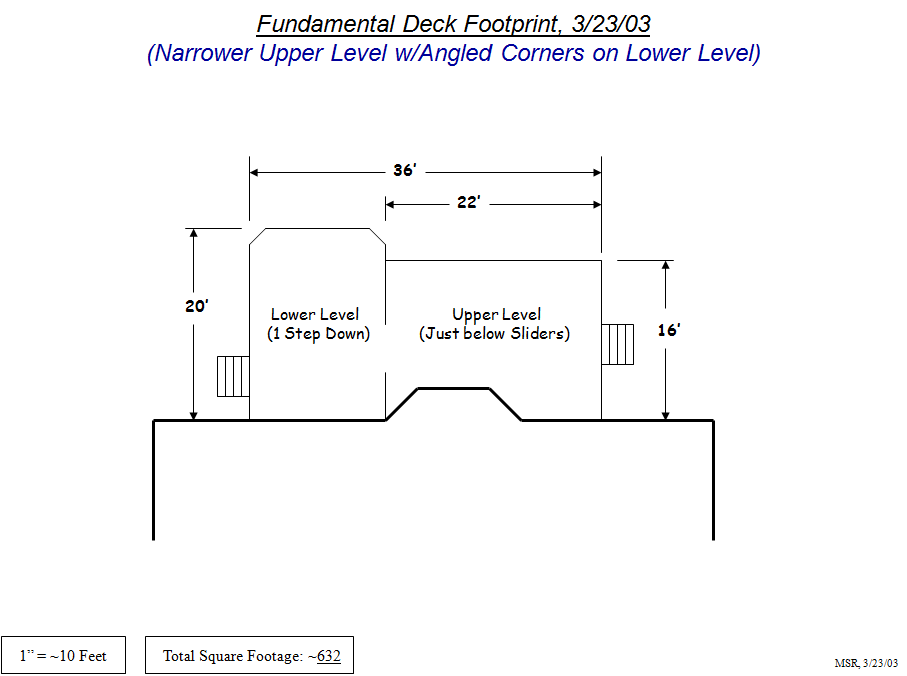
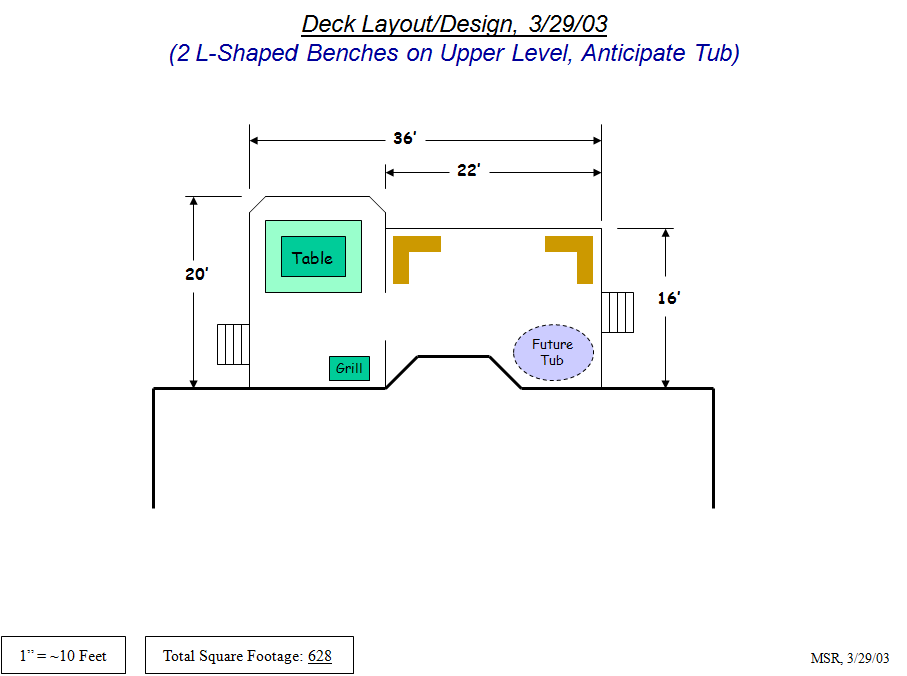
It’s really important to convey that the above did not take 20 minutes. There were multiple versions, even with these simple pictures. I’d say this effort spanned at least a week. Drawing a few versions, sleeping on it, marking up the grass with spray paint in the yard in different ways (with different colors), drawing some more, etc…
There’s no rush here. Get it right. Make sure it feels good to you.
Beyond Drawings: 3-D Deck Software Design
There’s plenty of low-cost software available today to take fundamental designs (like those shown above) and allow you to model them on most any PC. You can add colors and textures, and once you have a design essentially “built” in your computer you can essentially “walk around it” in your virtual backyard.
Here again – this takes *hours* to do right. Don’t think this is easy – it’s true work, but keep thinking about the price tag on that deck. Is it worth going the extra mile and extra hours to make sure you really know what you want?
Below are a few of my renderings – you can see the deck almost coming to life now, and it’s rendered right in your [virtual] backyard. If you look carefully at some of these pictures, you’ll see I even added in a swing set, a play area and a shed… those were really there already – and everything was measured to their precise dimensions.
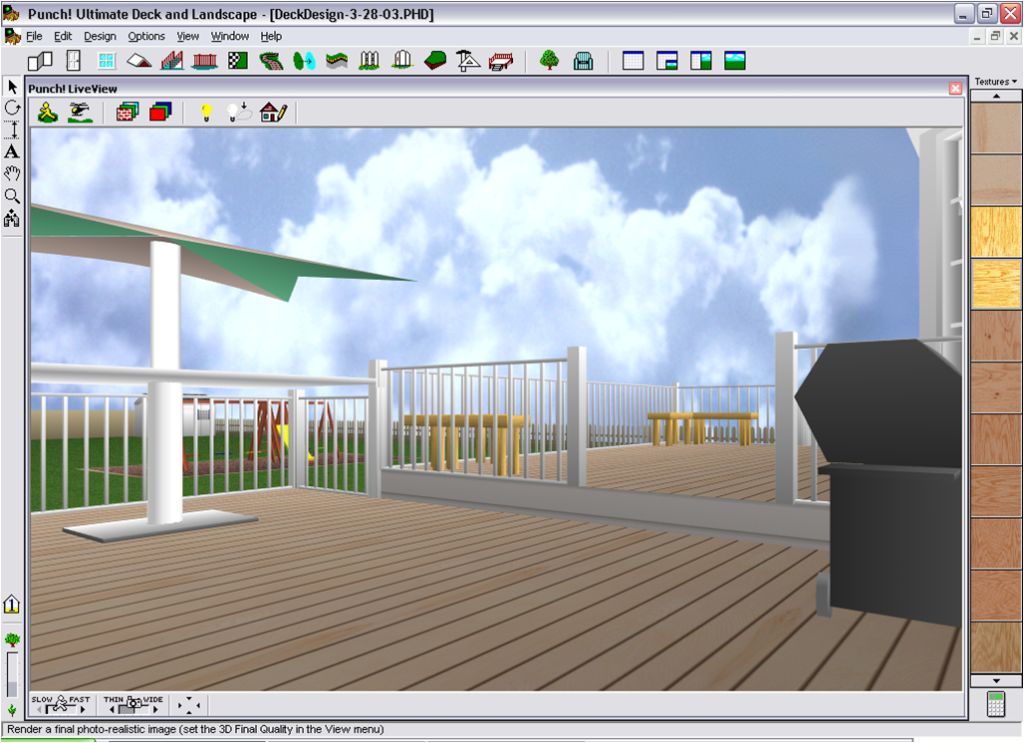
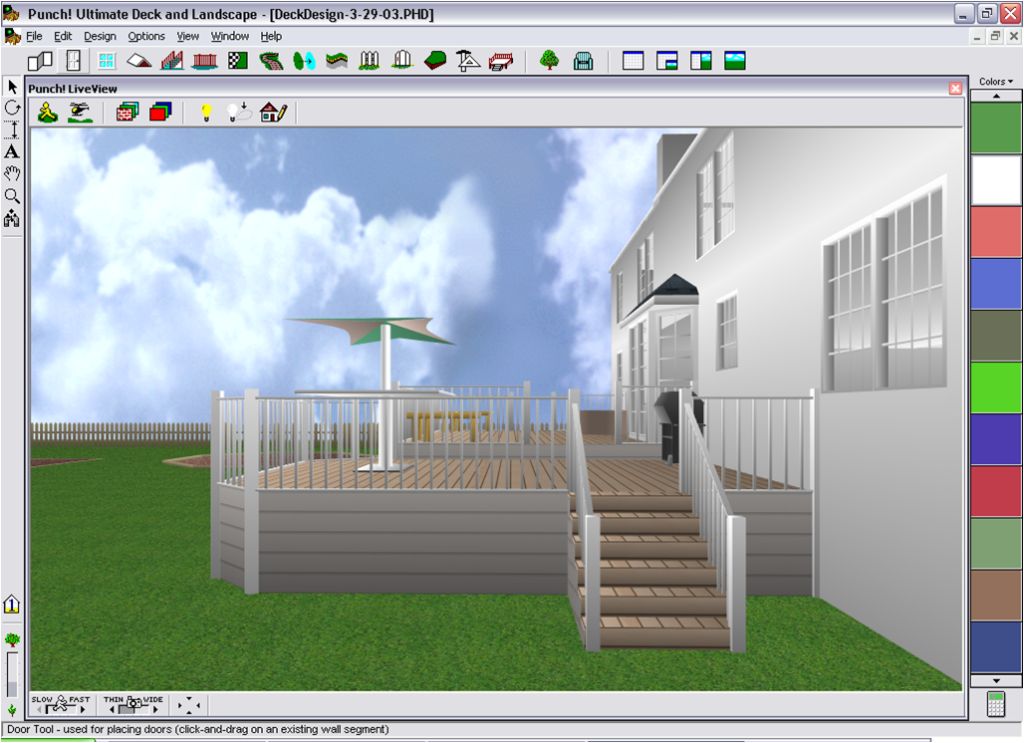
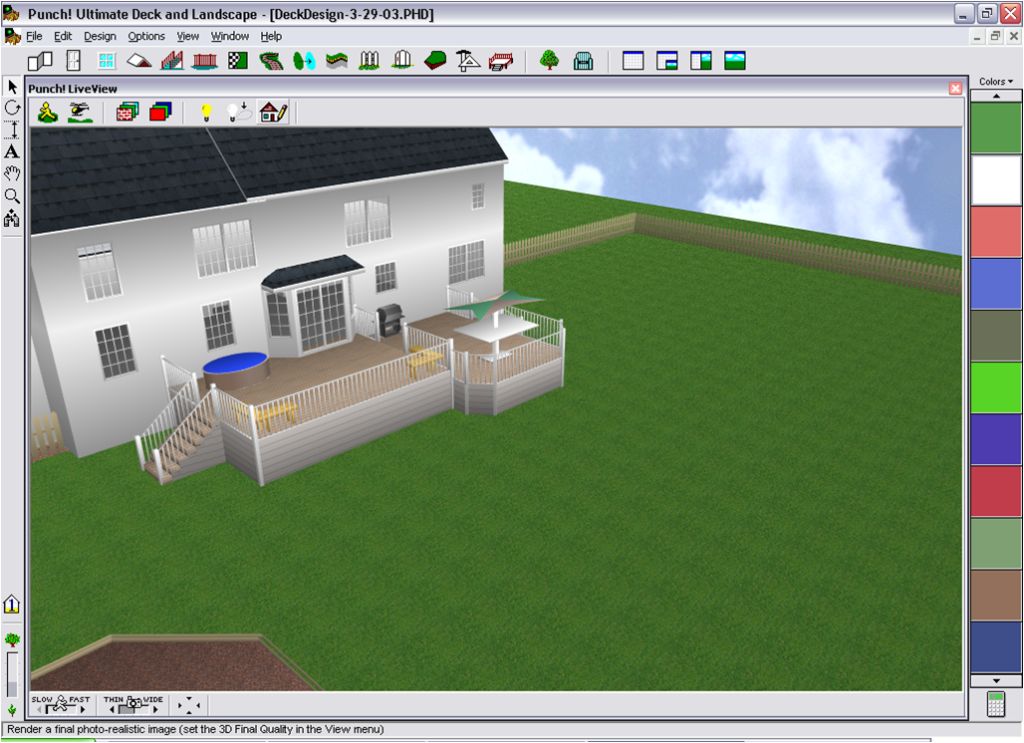
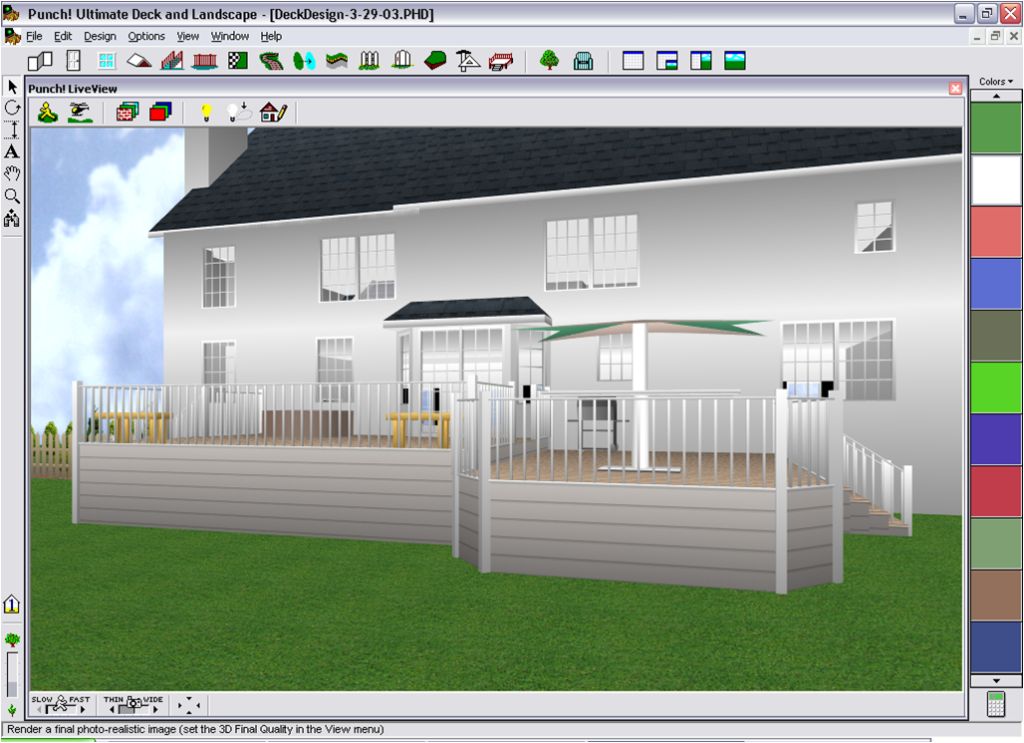
As you can see from the screen shots above, I used a version of Punch! Ultimate Deck & Landscape software to create these visuals. It worked beautifully – and I’ve also used it to model and visualize various landscaping designs at my home beyond the deck. You can take a look at this software tool via the link I provided just above, if you like. This was unquestionably worth the investment for me. At the time, I think I spent $50 or so.
Not only did this software modeling effort allow me to tune the design further, but can you imagine what the design crews thought when I eventually showed them my 3-D illustrations? Two things: 1) this guy knows what he wants, and 2) this is going make our lives easier – we know what will make him happy.
I genuinely find that preparation like this sets everyone up to succeed.
Engage your Deck Construction Crew
Now it’s time to start interviewing construction teams. The best way to find such folks almost warrants an article on its own – but I generally work only with word-of-mouth referrals, and I *always* prefer local folks. Furthermore, I work exclusively with company owners. If I can’t meet all of these criteria, I almost always keep shopping around.
You can use this link here to find local contractors in your area, if it helps.
At this point, you’re going to be in amazing shape – because you’re not only going to tell them what you want, you’re going to hand them a “package” of pictures: some of the 2D shots (with measurements), along with a number of the 3D color rendering shots as well for the more “real-life” look and feel of what you want.
I always end such packages with a slide like the one just below – made intentionally clear and concise, addressing some final questions and logistical concerns.
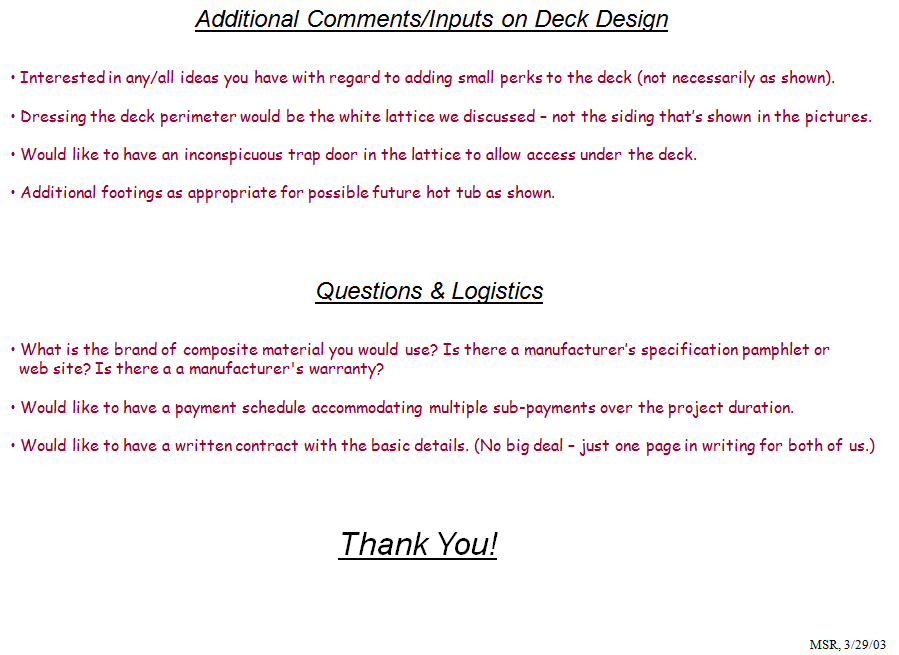
So, given the above, I met with three different companies. The variation in prices I received spanned roughly 100% — in other words, my lowest price was half of my most expensive price. I find this is not-at-all uncommon. Price variation can be through the roof, which is another reason you need to be as prepared as possible and only work with highly credible referrals. Understanding the breakdown for the pricing is also imperative. It might very well be that someone’s price is cheap because they plan to use cheaper materials.
Get ALL detail so you can make the best decision.
And ultimately, go with the person you feel you can trust.
Another key tip at this point with regard to the decking material: get samples.
Once I had decided on my local carpenter and we discussed the various decking materials, I had a choice of three colors. I had the contractor get me three small samples, about a foot long each. I poured oil, coffee, fruit punch and beer on them. And I let them bake in the sun. Why? Well, aside from the fact that this was fun (which it *really* was), I wanted to see how much abuse they could take – and I discovered some very interesting facts:
- Nothing stained the decking except for oil – meaning I had to be careful with grease splattering by the BBQ
- One color in particular remained much cooler in the sun than the other two, and fortunately that was the color I was hoping to use.
I think of this every time I walk barefoot on that deck now in the summer – and definitely anytime someone drops a hot dog!
Deck Construction Photos
Finally – construction begins. The deck design comes to life. It took more than a full week to construct this deck. The time progression photographs follow…
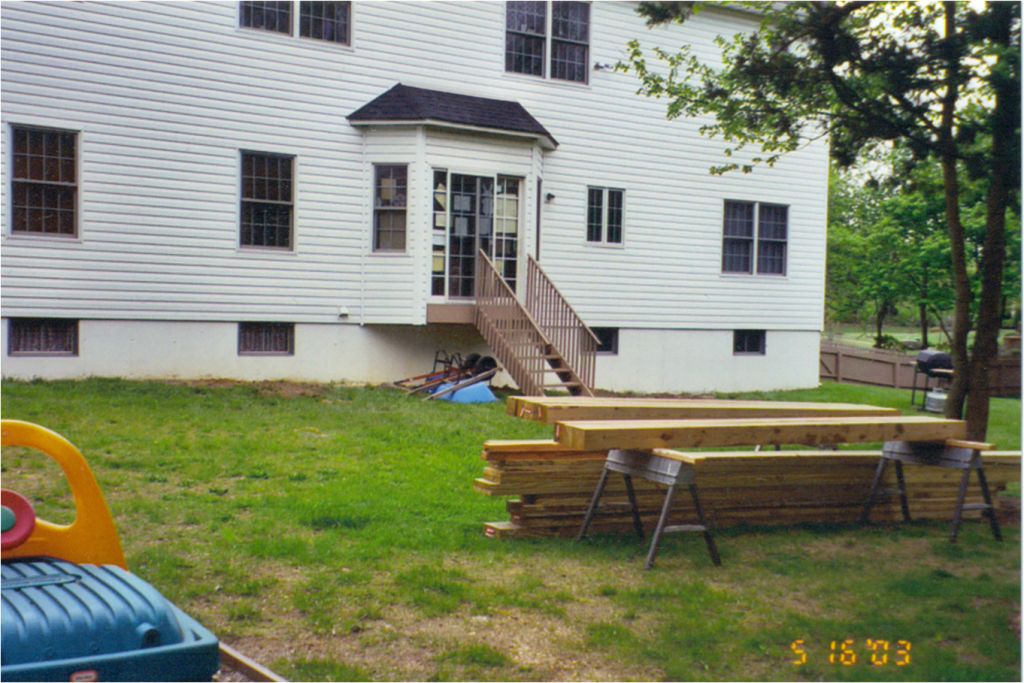
The core materials are delivered…
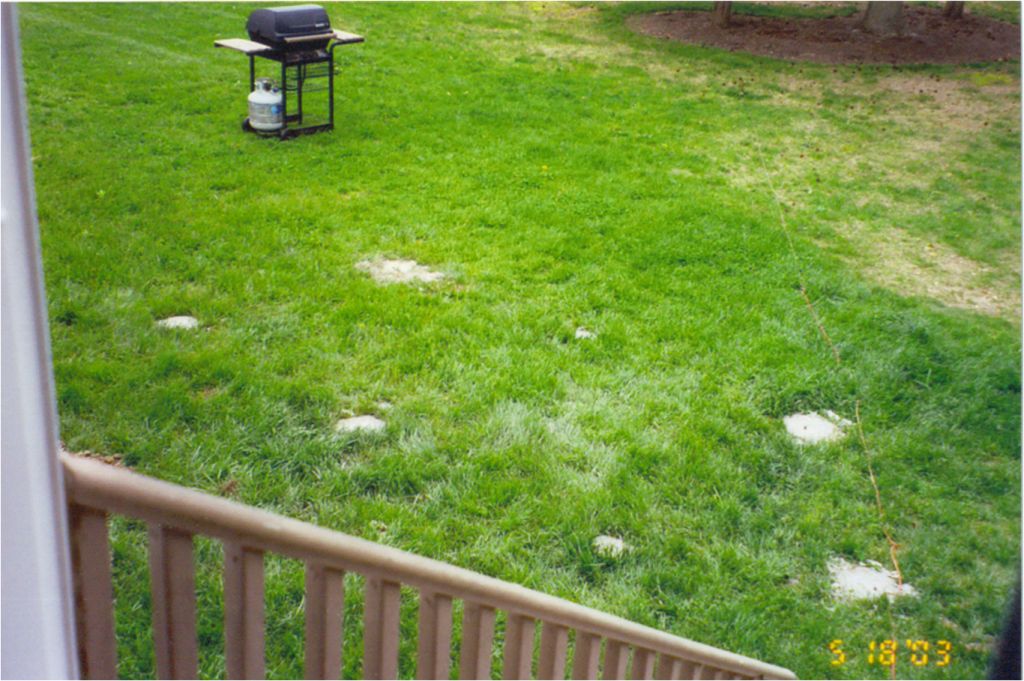
The footings are poured – requiring an inspection sign-off from the township.
And now the substructure starts to take form…
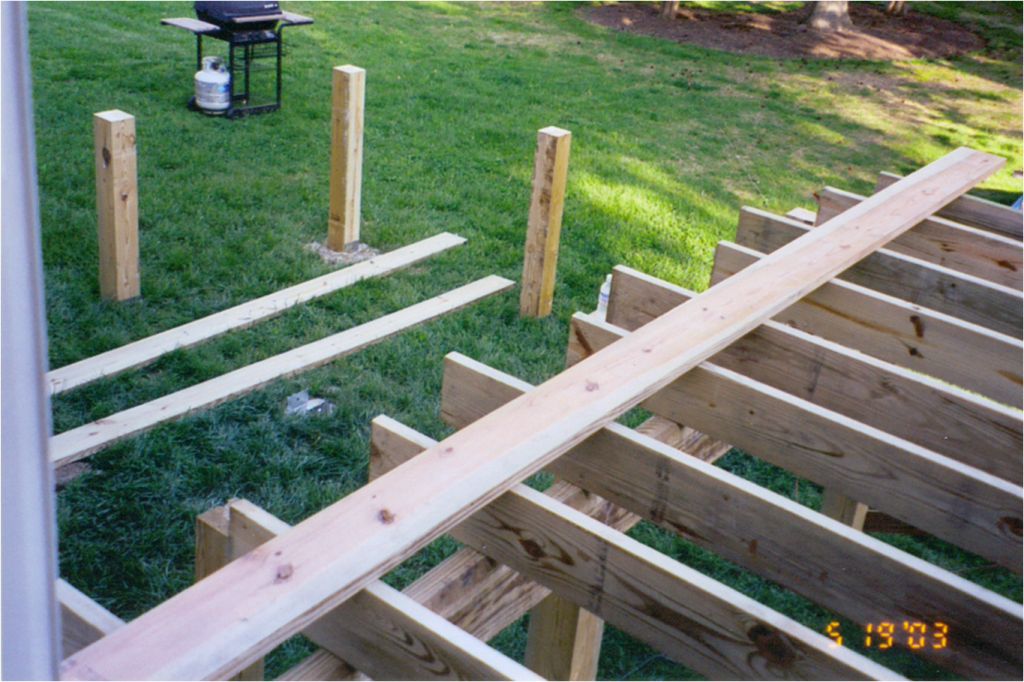
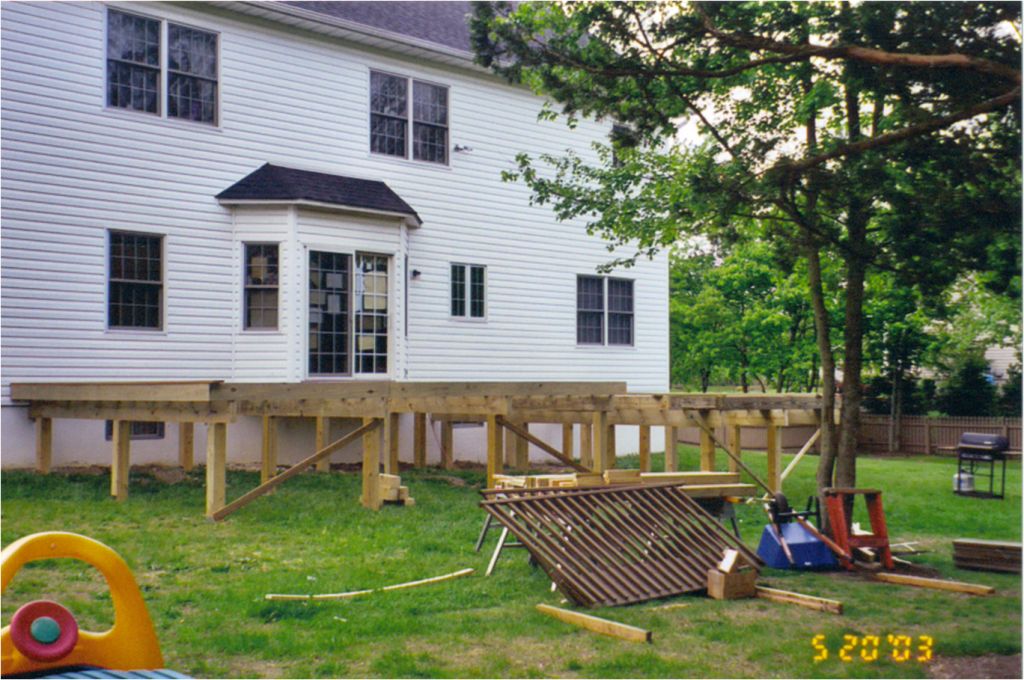
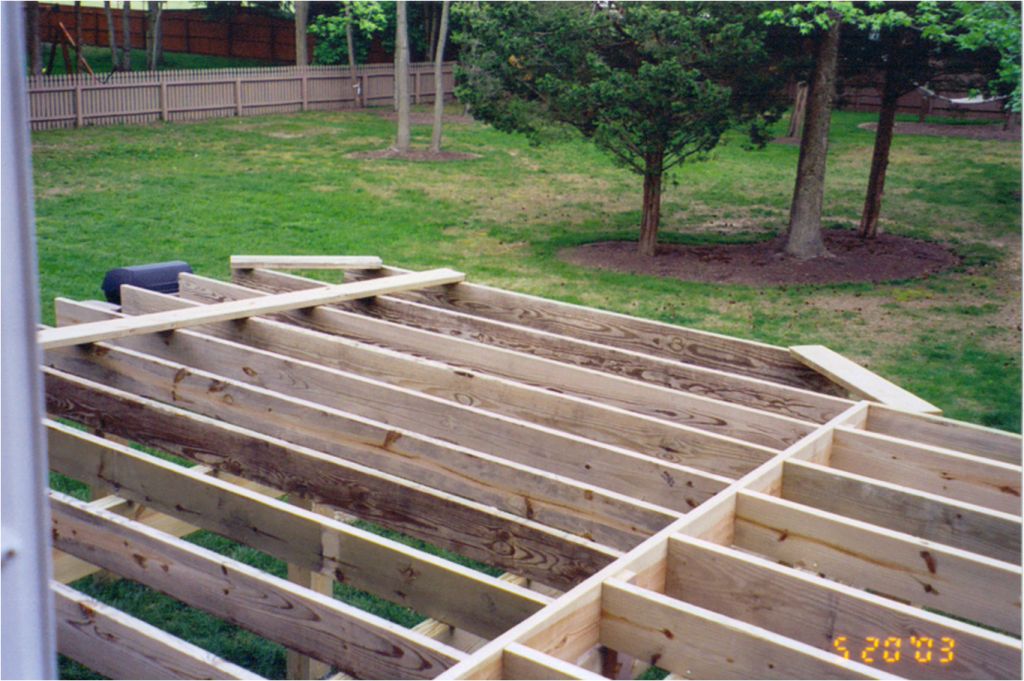
Decking and railing is now added to the substructure. Note that the rail posts have true 4x4s at the core, even though white PVC on the outside – they’re quite solid…
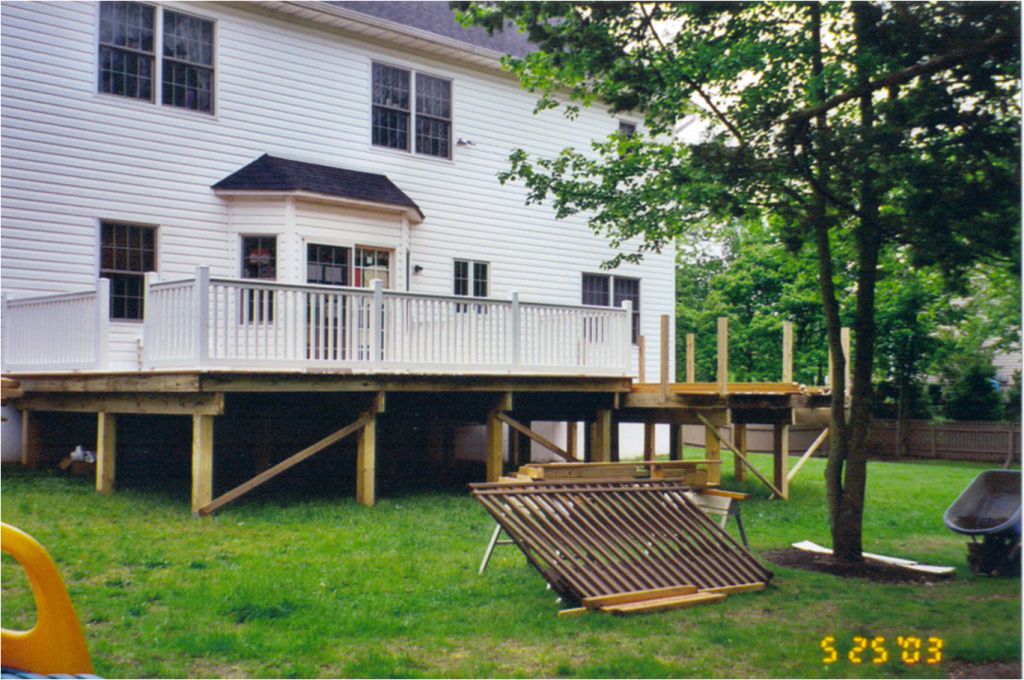
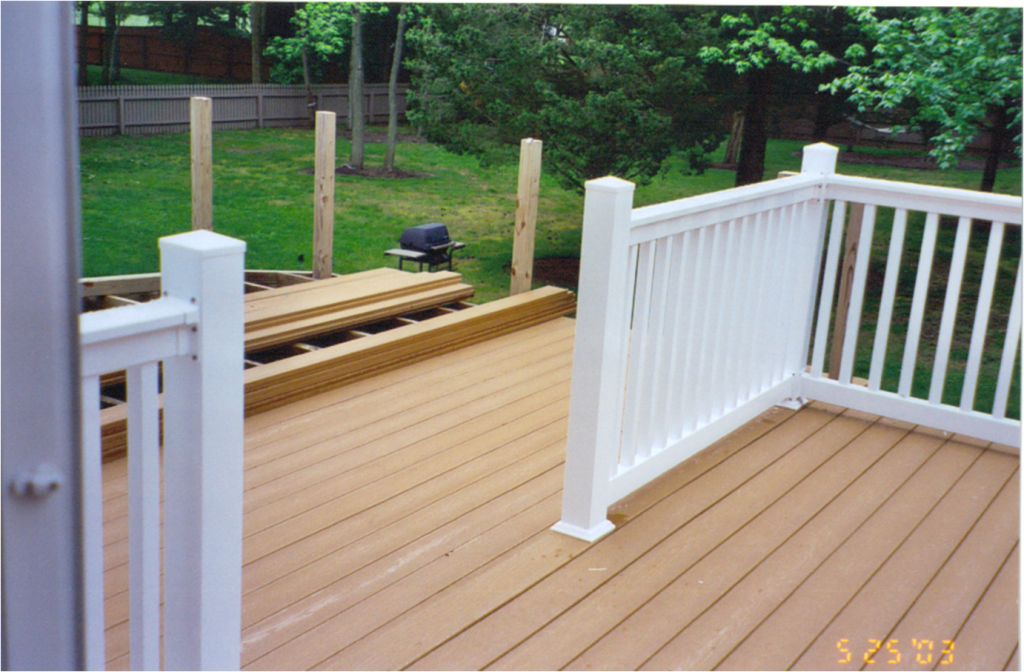
White lattice, cedar-colored flashing and the fancier white post caps (which I added at the very end of the construction in real time), I think, really add final character to the deck…
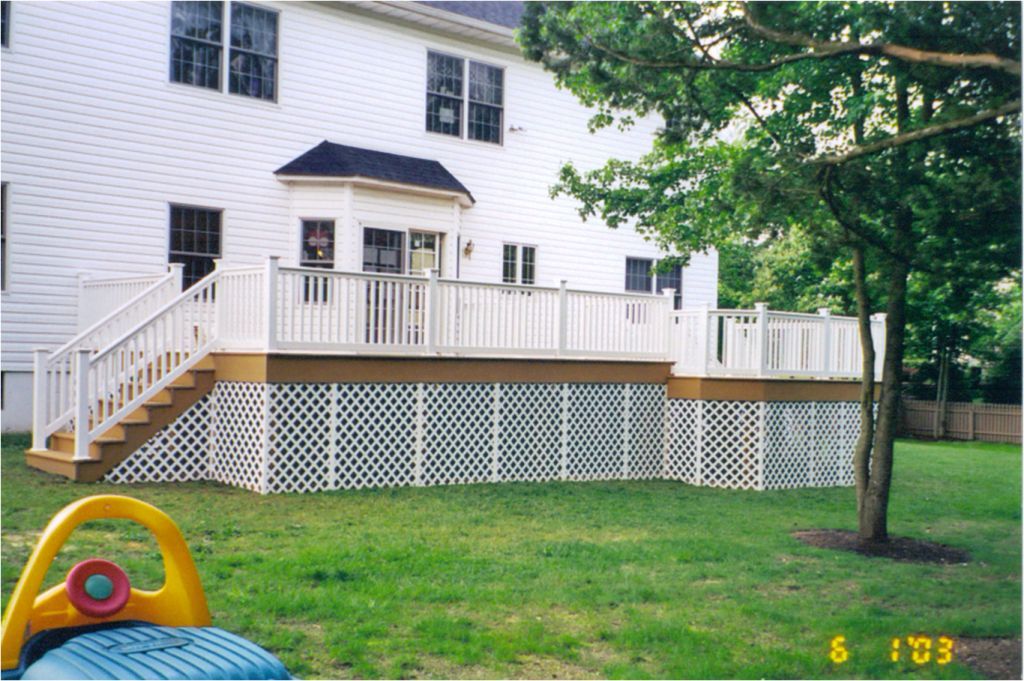
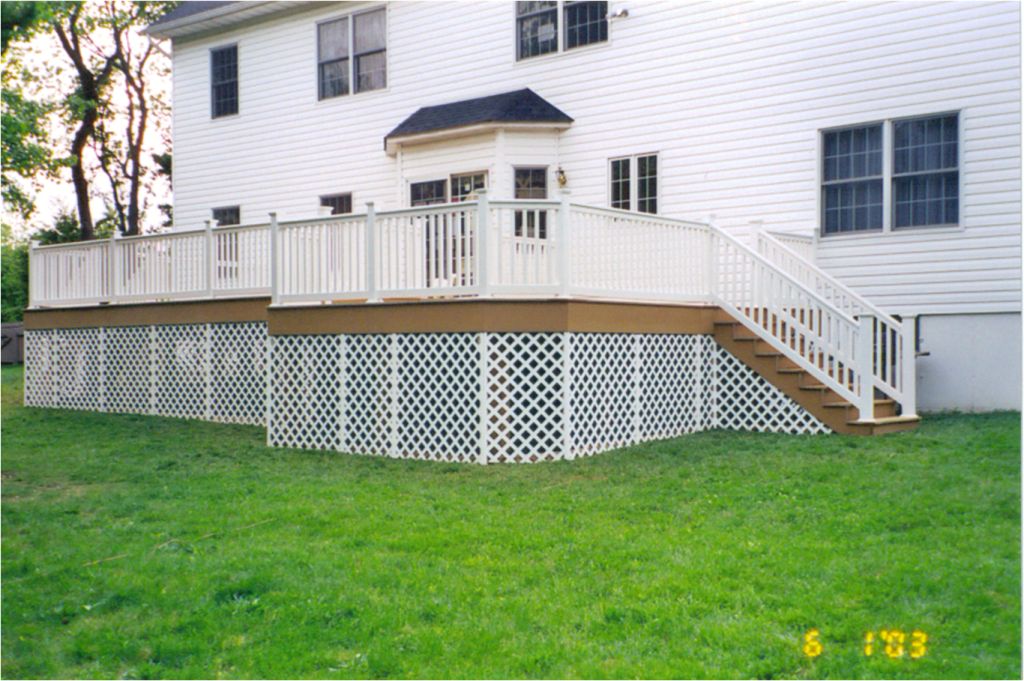
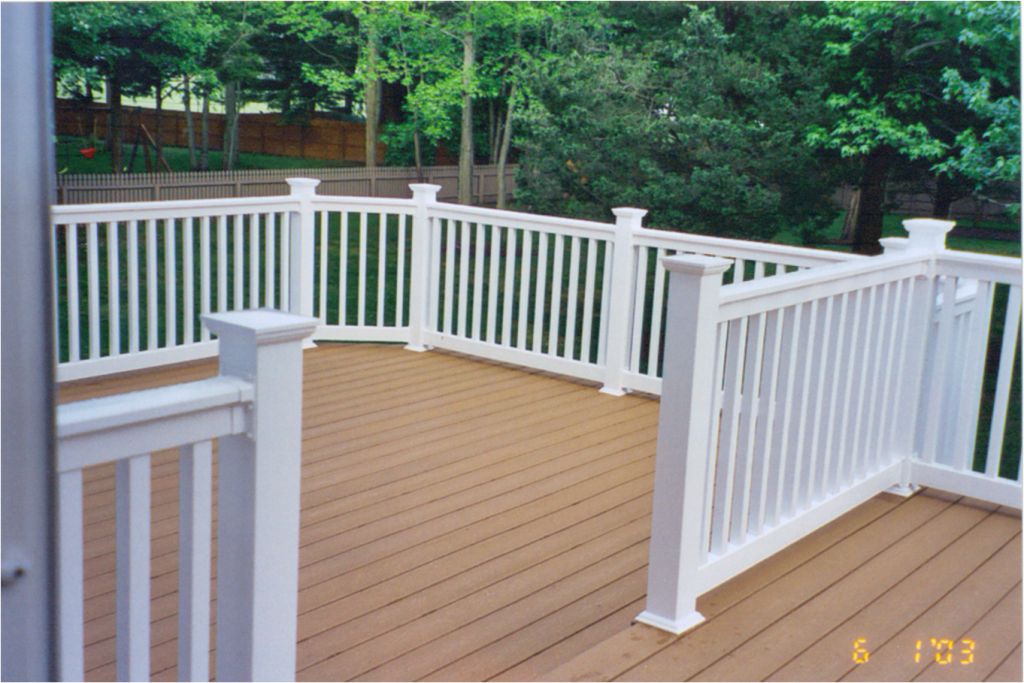
And we’re done – it’s BBQ time.
I’m particularly proud of this deck, and maybe I’m lacking humility in saying that – but what could be better than having something this elaborate turn out exactly the way you conceived and designed?
Oh, and on that note… let me point something else out now too, in case you haven’t noticed. The dates in those designs and construction photos – have look. They’re from 2003. But right up at the top of this article, I mentioned taking that one “after” photo this morning in the misty rain, which I did. It’s now 2020. Seventeen years later!
Please go back to that one photo now up top and have a close second look, if you can. Still looks pretty amazing, doesn’t it? :)

Mark,
I appreciate how thorough you are in your explanations – thanks for that. And, I cannot believe how much the computer rendering in image #2 above looks like the actual finished product in image #3 above – wow!
I realize this article is from a while ago, but keep ’em coming!
Best regards,
Tom
Glad you enjoyed the article, Tom – thanks for the kind words and for calling out those 2 images/photos; they’re two of my favorites as well – 2003 pre-construction design and 2020 present day, spanning ~17 years!
As I see it, the beauty of a careful, well-planned design is that even though it takes some focused up-front effort, it truly has the potential to pay dividends over the long haul. And I’m planning to have that deck there, and maintained as you see it today (via a few tunes/repairs and power washing each spring) for many, many more years to come.
A few more photos I wanted to add-in this morning, without messing with the main article above… focused on the deck furniture and leveraging the deck design to the fullest.
Below is our new [2020] deck furniture – which, even now, aligns with the original deck design plan. I’ll include Amazon links to focused searches for some of the items described and shown to convey the massive variety we had to research and sift through. I find the number of choices can sometimes be a bit overwhelming, frankly…
Deck Dining Set (Table/Chairs) and Table Umbrella – placed right where planned from the beginning, and now with the mature backdrop: the pool mostly, right behind. Exactly as we had planned? No. But pretty darned close, I think!
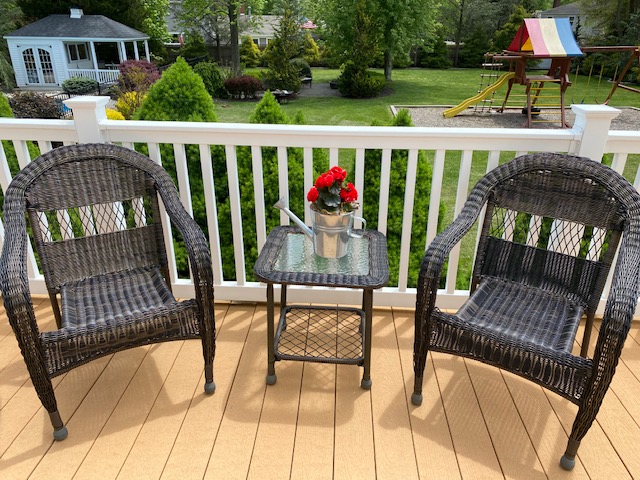
The L-Shaped Benches you can see in my original design above didn’t come to be, but we instead bought straight patio benches and positioned them against the house, overlooking the backyard. Turns out we don’t use those too much, even though they look cool. But particularly nice and REALLY comfortable, are the faux wicker (aka “plastic”) chairs we recently added…
And finally, because my wife REALLY cannot stop taking photos of our [her] Yorkie, here’s a shot of him enjoying the view. I think? Or maybe just posing for the camera? I’m going with the former…
Thank you so much, Jan! I’m glad you find the information helpful – and that’s very kind of you to say! I always find these BIG projects particularly nerve-wracking as you have only one real shot to get the design “just right.” Going back an making changes after (or during) construction is often just so costly and can be really frustrating as well. Best of luck with your deck!!
Hi Mark
I found your site from Mitz’s site – and wow it’s fantastic! We are going to be building a deck one day when we have the finance so I am book marking your site and will send your link to my handy man partner. There’s so much great information here.
Cheers
Jan