All mulch and stone landscape beds require periodic maintenance, well beyond weekly weeding.
Maintaining a stone landscape bed, in my experience, warrants less overall effort than a mulch landscape bed. (And that’s a really good thing because overhauling [or refreshing] a stone landscape bed is a much heavier job!) For me, I’d say I address the stone beds about every 5 years – whereas refreshing each of the mulch beds is more like once every 2 years or so.
What does the maintenance effort entail? In short, and you’ll see all of this in the photos and video that follow: cleaning out the old beds, re-cutting and shaping the borders (with a sturdy, sharp and ever-classic square point shovel) and then adding fresh material to the top. When done right, the refreshed stone landscape bed will look brand new.
But it’s truly heavy work, regardless of the type of stone you’re using. So below, I’ll walk through my recent effort to do this for the stone landscape bed around my backyard deck. One of the wonderful things about this job is that its simple and perfect if you’re looking to do some focused heavy work outside. To clear your head. To enjoy nature. To get a work out.
And if you don’t want to do it yourself, it’s also an ideal job for an experienced local landscaper as well – and you can always find such folks at our find a local contractor page right here. But even if you’re going this route, it’s always best to know what the job entails, of course.
A Video: Refreshing a Stone Landscape Bed
Please have a look now on YouTube below, and I’ll show how I go through my process. And in the remainder of this summary, I’ll break things down in a bit more detail and provide some links for additional insight on some of the materials and tools I’m using and referencing.
This short video summary covers what was about a 4-hour job overall…
Preparing for the Stone Landscape Bed Refresh
Even before I get to the stone landscape bed clean-up efforts, let me say a few words about the routine weekly maintenance first. And this boils down to weeding for me – the only real maintenance I had with this particular landscape bed for more than ten years had been weeding, and I simply use Round Up.
Round up works, and it works beautifully – on grass and dandelions. And in this particular landscape bed, I have three types of plantings: Golden Thread Cypress, Barberry shrubs and Dwarf Alberta Spruce trees. All of these have been tolerant of routine, light and carefully-targeted Round Up applications for many years.
So, preparing for the stone landscape bed refresh was comprised of three tasks.
Task 1: Kill the Grass and Weeds
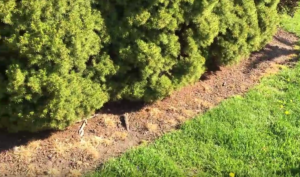
The first task was about 1-2 weeks before the job, when I used my Round Up to target grass patches that had taken hold in the late fall and remained in place through the winter. You can see some of these in the photos below; they’re dead here…
Task 2: Size and Order Landscape Stone
The second task was the acquisition of material: landscape stone. For me, I needed 2000 pounds of 3/8 inch stone in Barn Red. The 2000 pounds (one ton) was a best estimate – and it’s very important not to get too much material unless you have someplace else to use it. So, for sizing the material you need to estimate the required volume. That is – the total area multiplied by the depth of material. Once you have the volume, you contact a local distributor and they can arrange for the delivery of the weight of stone you’ll need.
You’re not going to get this much material in bags at a hardware store, so you really have to work with a local distributor. (And here again, this is where hiring a local contractor for this job can help – as they’ll have these contacts if you don’t; it all becomes ‘turn-key’ by hiring someone, of course. But you pay for that simplicity.)
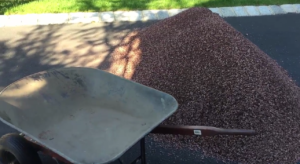
Here’s my ton of stone – looks innocent enough. Almost petite, right?
But no… it’s really 2000 pounds!
So, in summary – I pre-killed any grass and weeds in advance with Round Up, and I ordered the appropriate material (sized for my area) from a local distributor to be delivered the day before the job. (My local distributor, for many years, is right here for anyone in the Jersey Shore area.) I used duct tape to place a huge “X” in the driveway where I wanted the material dumped. And, just-in-case I ordered too much material – I had a place in mind to use the remainder should that be necessary. Leave as little to chance as possible.
Task 3: Assemble Your Gardening Tools & Accessories
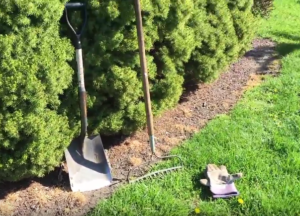
The final task involves collecting your tools and accessories the night before the job, so you’re good to go the following morning. The tools I used for this job are all very basic:
⦁ A square point shovel for removing dead grass, re-cutting the border and applying new stone
⦁ A heavy-duty bow rake for grading the bed and smoothing after new stone application
⦁ Work gloves – as you simply have to protect your hands
⦁ And a solid wheelbarrow to transport the stone
Now, I can definitely add “lots of bottled water” and a hat if it’s particularly sunny as well. Leading to reiteration of a key point: This is a job that’s truly best done, IMHO, early in the morning when it’s nice and cool outside. It’s truly a work out, so stay hydrated and stay cool.
Using my shovel (a small gardening spade would probably work nicely too) – the first thing I do is remove those clumps of dead grass. I make small “discard piles” of material that you can see in some of the photos that follow; I’ll deal with getting rid of that stuff after everything is completed. Once those clumps of grass are gone from the existing stone landscape bed, I do a cursory clean up of any landscape material that may need some trimming back – but my main goal is to is really to have a landscape bed that’s neat, clean and graded (sloped) toward the edge. Because ultimately – I want to be able to toss the new stone onto the existing bed in a way that allows it to roll naturally (via the grading) to the landscape edge. I showed this more clearly in the video above; it’s worth watching if only for this point.
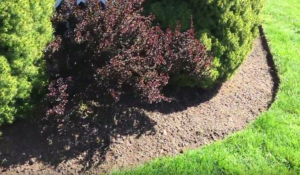
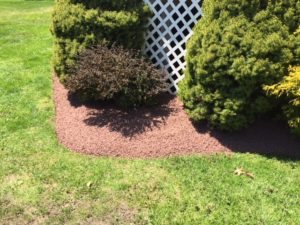
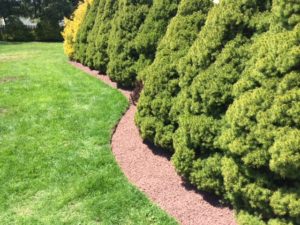
To smooth out the existing landscape bed and shape it to the gently sloped grade I desire, I use my bow rake. Here’s a nice shot of a Barberry shrub sandwiched between Dwarf Alberta Spruce trees on a section of the stone landscape bed I have all cleaned up and graded to that gentle slope…
Re-Cutting and Shaping the Landscape Border
My landscape bed has a grass border; it’s pure and natural. There’s no plastic or metal edge here, and this is a matter of personal preference. Over the years, I’ve found that a grass to stone (or grass to mulch) border not only looks nicer [to me], but it’s also easier to maintain.
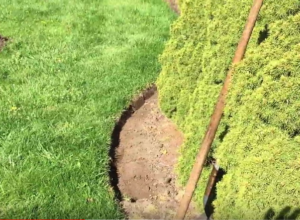
The plastic and metal landscape border materials I’ve tried tend to work their way out of the ground and end up looking a little ratty over time – especially when repeatedly hit with lawn mowers and grass trimmers. With a grass to stone border, I can simply re-cut it (and even re-shape it) as necessary, and that’s exactly what I do now in the picture that follows – using the straight (square point) shovel.
Neat, clean, simple and natural…
Here again, this effort will result in small sections (slivers) of grass being removed – and these go to those piles you’re building up around the perimeter. To be discarded later.
Applying Your Landscape Stone
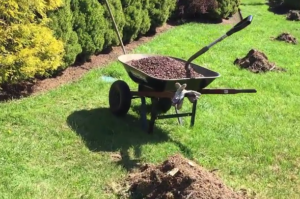
It’s now finally time to apply the landscape stone. In the shot below, you can see one wheelbarrow of my 3/8-inch barn red landscape stone – and even those piles of discard material I’ve been mentioning.
Tossing each shovel-full gently toward the top of the bed, once again, can facilitate a nice “rolling” effect so that the stone naturally finds it’s way right to that crisp new edge.
And wheelbarrow by wheelbarrow, the entire deck perimeter gets refreshed with the new landscape stone – effectively burying the old landscape stone below.
The bow rake can be used to further smooth-out the landscape stone as necessary – but I really didn’t have to do very much of this given the technique I described above: leveraging that stone-rolling with the imposed slope/grading.
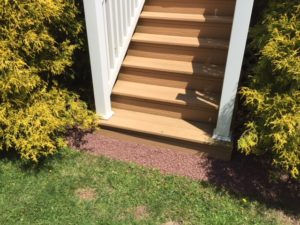
And in the end – this looks brand new because in essence, the top of the stone landscape bed is just that: brand new!
What about Landscape Weed Felt?
The one thing I didn’t mention in this write-up, though I called it out at the end of the video, is the use of a high-quality landscape weed felt; I didn’t use one. The reason may be relatively clear now: I was never at ground level. I buried the old bed with the new bed, so I didn’t want to impose another level of weed felt. Could I have done this anyway? I guess so, sure – but it didn’t seem at all necessary to me.
Now, don’t get me wrong – I do believe in using high-quality landscaping weed felt (here’s an example right here), but for new landscape beds, primarily. Where you’re starting right at the dirt. Or perhaps if I had a crazy-horrible weed problem from years of neglect with this bed – but I wasn’t starting with a huge mess. I was starting with a landscape bed that needed a mini-makeover. Or rather, a makeover that probably burned about 1500 Calories and definitely made me sore for 2 days!
Yet again – another project that leads to a well-deserved steak dinner afterwards.
Any other insights, experiences, thoughts or ideas to share?
Steakhouse suggestions?? ;)
Need Professional Help from a Local Contractor?
⦁ Visit Our Find a Contractor Page
Related Posts
⦁ Refreshing a Swimming Pool Landscape
⦁ Creating a Natural Stone Landscape Border
⦁ How to use a Submersible Pump to Remove Excess Pool Water
⦁ My Battle with Surface Water Runoff
⦁ Building a Removable Wood Fence Section and Gate
⦁ A Rookie Carpenter’s 5-Step Guide: How to Build a Playhouse
⦁ 7 Tips for Maintaining a Redwood Swing Set

Leave a Reply