GFCI Outlets, often referred to as GFI outlets or just GFIs, are used to reduce the risk of significant electrical shocks and injury. If you used a hair dryer this morning, you probably plugged it into a GFCI outlet.
We’ve all seen GFIs in our homes – they’re the electrical receptacles with the ‘test’ and ‘reset’ buttons in the bathroom and kitchen (near the sinks), and they’re generally found in other places where there’s a risk of water presence… near a sump pump in a basement, for example. In my case, the most recent GFCI outlet that failed on me was outside by my pool equipment in a weatherproof covered outlet box.
In the sections to follow, I’ll walk through my repair with lots of photos and show the tools that I used (with a decent multimeter pretty-much topping the list) – and even lay out the replacement parts, so you can see it all.
But as always, when it comes to electrical projects, if you’re not experienced or comfortable tackling this yourself – you surely want to hire a licensed reputable electrician. Period. This link will take you directly to our ‘find a local contractor’ page; it’s free, easy and very helpful if you don’t already have someone in mind. But even if you do contract-out a job like this, it’s still important to know what they’re going to be doing so you can have a good conversation and be confident that you’re having your job done right!
Some GFCI Outlet Fundamentals
Let’s start by talking a bit about what a GFCI outlet is, how they work and how they’re used in various ways in a home. If you want to jump right to the repair – just skip ahead, of course. :)
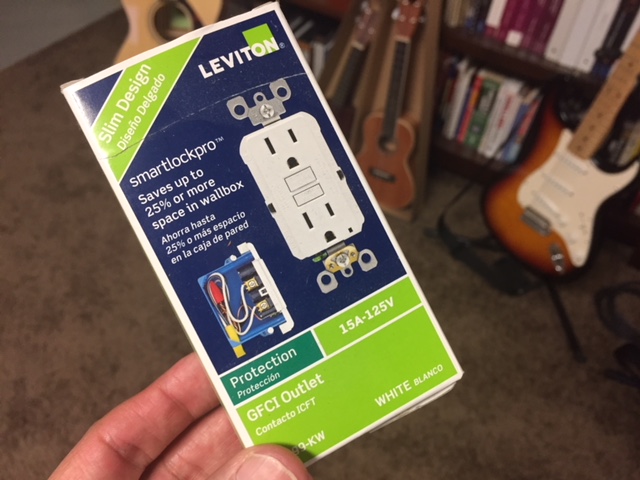
GFCI outlets are a little different than standard electrical receptacles, and in some cases – a single GFCI outlet can be protecting and entire circuit where the other outlets are non-GFCIs, but are protected nonetheless; this warrants a little bit of extra explanation. The photo below shows the GFCI outlet that I’ll be using for my repair (a Leviton 15Amp GFCI Outlet), and we’ll use this as a reference for the sections that follow right after…
How does a GFCI outlet differ from a standard electrical receptacle?
A “GFCI outlet” (Ground Fault Circuit Interrupter), used interchangeably with “GFI outlet” or just “GFI,” provides additional safety protection – focused on minimizing risk of serious injury or even electrocution near wet or damp areas. The GFI is designed to monitor the flow of electricity in two directions and ensure that it’s balanced. If a non-balanced current flow is detected, this implies a ‘ground fault’ (electricity may be ‘leaking’ and possibly risking a person’s safety) – leading the GFCI to trip and quickly stop the flow of electricity.
Then isn’t a GFCI Outlet just a circuit breaker?
Well, no and yes. It surely stops the flow of electricity and does so very quickly when a ground fault is detected. So, in that sense, it does interrupt/break the circuit. But GFIs are focused on human safety and very fast response. The standard circuit breakers (or older home ‘fuses’) you find in electrical service panels are there to prevent larger scale short circuit overloads which can lead to fires. The difference may seem a little subtle, but they’re both very important! (And the National Electrical Code [NEC] explicitly requires GFCI outlets in all wet or damp locations such as bathrooms, laundry rooms, kitchens, basements, garages and workshops.)
How do I identify a GFCI outlet in my home or on my property?
The tell-tale characteristics are the “test” and “reset” buttons that you see right on the front. It’s recommended that GFCI Outlets be tested periodically, on the order of monthly. You push the “test” button, which causes the GFI to trip and the outlet should no longer work. Pushing in the “reset” button should then restore functionality.
If I don’t see a GFI outlet, does that mean I have no GFCI protection?
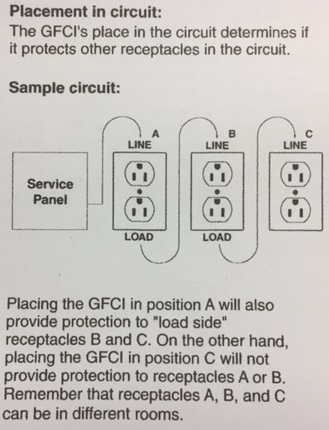
Not with certainty, no. There’s no need for every electrical receptacle in a circuit to be a GFI. A single GFCI outlet, when wired properly, can protect an entire circuit. There’s a nice picture and description that I’ll include just below. It’s a little technical, but even if you hate this stuff – you’ll get the idea. This comes right from my Leviton GFCI Outlet installation manual…
How do I know when I have to replace an existing GFCI outlet?
When the GFCI outlet stops working, and the “reset” button no longer restores power – there’s no ambiguity: it’s time. If the “test” button stops working, also no ambiguity: it’s time. And this brings us right back to my repair now…
Replacing My Damaged Backyard GFCI Outlet
I’ve written quite a lot about my backyard pool; we really love it and it’s beautiful – but the maintenance can be a bit of a… well… pain in the butt sometimes!
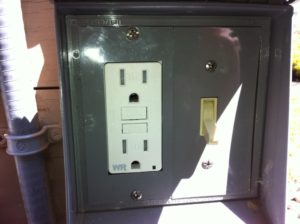
Earlier this season, we had to replace much of the filter. That was painful in that it was pretty expensive and it took time to assess and coordinate. But replacing a GFCI outlet (whether inside your home or outside) isn’t a terribly time-consuming or costly project; it can surely take an hour or less once you have everything you need. Here’s a shot of the weatherproof covered outlet box that houses both the GFCI outlet along with the switch we use to turn on the pool light…
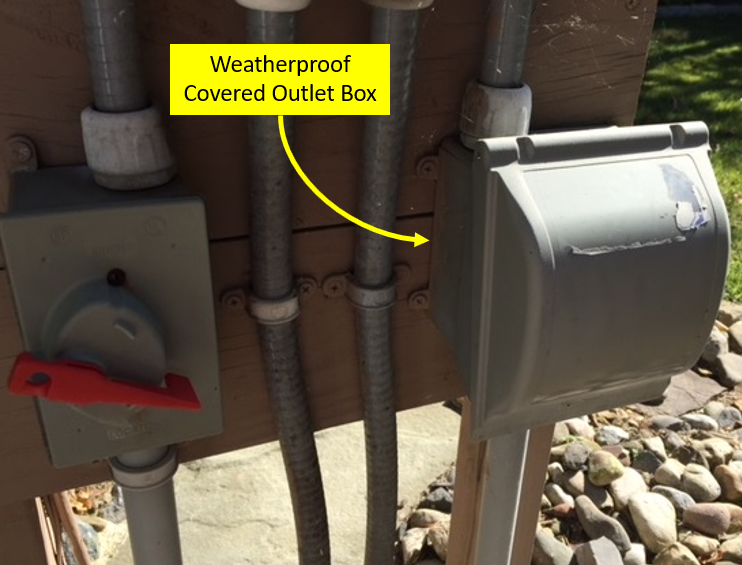
And with the cover open, the GFCI outlet and switch are accessible, as you can see in the next shot. Now, while it’s very hard to see in the photo, there’s a small green power LED (light emitting diode) in the bottom right corner of my outlet, and it’s off; the GFCI outlet is dead. If I push in the “reset” button, it does nothing. This GFI must be replaced.
What Tools will be needed to replace the GFCI Outlet?
Not too many, really. The most important, from my perspective, is a multimeter to test voltage. Now, we’re naturally going to turn off the voltage at the electrical service panel before we start. But I’ve learned not to trust anything from some past experiences, so there’s no way I’ll do anything electrical without having a multimeter in hand. You can also use a simple voltage tester – but having one or both is absolutely imperative [to me] for doing any electrical project.
Aside from a device to test voltage, you’ll need a couple of screwdrivers (straight/slotted and Philips head) to remove the outlet and wiring, and possibly a wire cutter and stripper as well.
Turning Off the Power at the Service Panel
In the two photos that follow, you’ll see my electrical service panel and the labeling showing me which breaker controls the GFCI that I’m replacing; I’ve subsequently toggled that breaker to the off position.
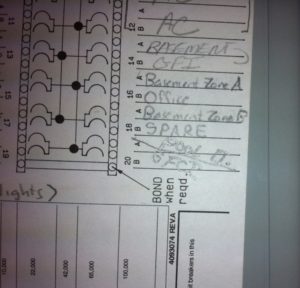
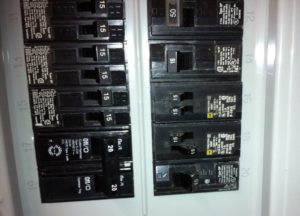
Now, with the power to my GFCI outlet turned off at the electrical service panel – I unscrew the GFI from the outlet box out by the pool and gently pull it forward, taking care not to touch the screws on the side of the outlet which will be ‘hot’ [electrically live] if the breaker at the service panel hasn’t been turned off.
“But wait – didn’t we already turn that power off at the electrical service panel?”
We did. Or rather, we “believe” that we did. Trust nothing until you test for the presence (or absence) of voltage explicitly with your multi-meter or voltage tester!
And wait a minute… what is it that we do again if this is something we’re not comfortable doing ourselves? We call a licensed and reputable local electrician!!
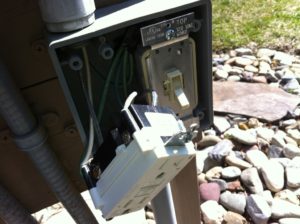
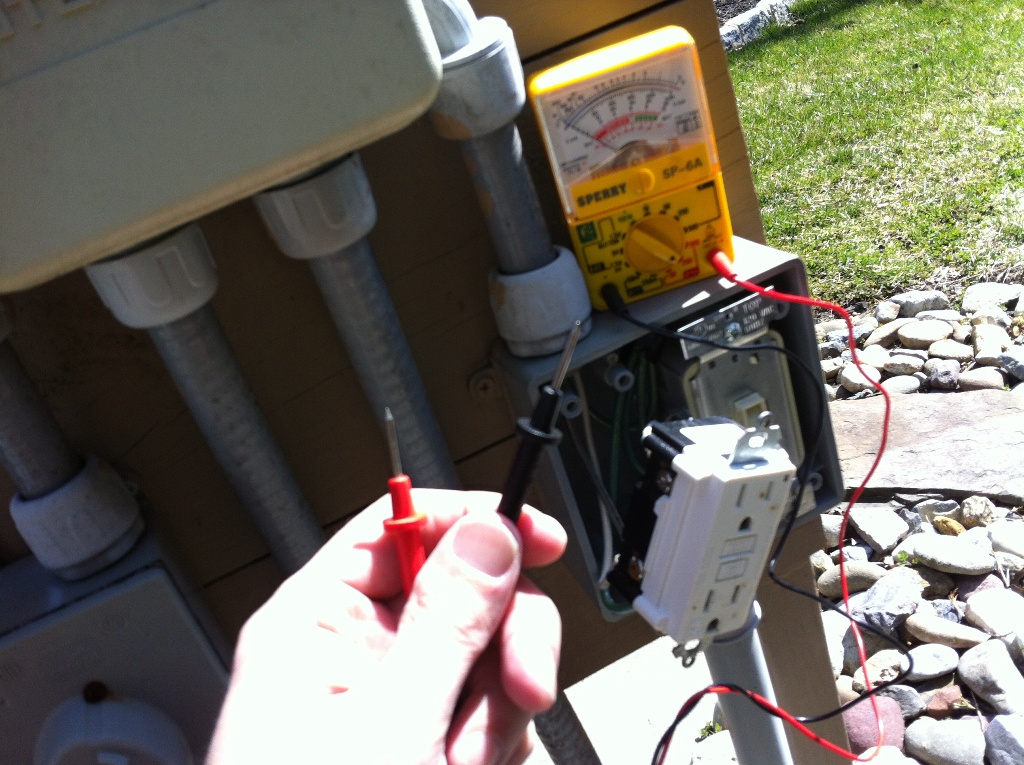
Below, I’m testing for voltage now with my inexpensive, little (and exceptionally useful) multimeter.
I test with the red probe to the brass screw (connected to a black [hot] wire) and the black probe to the silver screw (connected to the white wire.) And I specifically do this test to the black and white wires connected to the “line side” of the GFCI outlet, which will be explicitly labeled on the back of the GFI receptacle itself.
(I know that the GFCI outlet isn’t working, but this doesn’t mean the voltage being supplied by the service panel is truly off – it only means that the ground fault interrupter has tripped within the outlet itself, as it’s designed to do. So, I’m being ultra-careful!)
And happily, I find that the electrical service panel voltage is indeed off.
Determine the Wiring Configuration and Label Line Side Wires
Now, for my particular GFCI outlet, it turns out that the GFI is also supplying power to the pool light switch receptacle downstream. I know this because there are more than 3 wires connected to the GFI, two of which tie right to the ‘load’ side of the receptacle, powering the pool light controlled from within the same weatherproof outlet box.
Let’s refer back to Leviton’s GFI circuit placement picture from earlier, which I’ll replicate here…
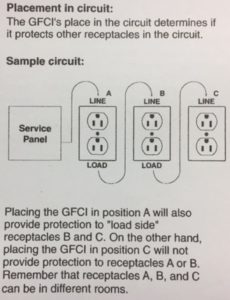
My GFCI outlet is wired into a Position A/B configuration, with wiring to both the “line” side and the “load” sides of the outlet. In this scenario, it’s important to clearly label the black and white wires connected to the Line side of the dead GFCI outlet before disconnecting them, as they’ll have to be connected to the Line side of the replacement GFI as well.
If I had found my GFCI outlet had only 3 wires connected to it – a single black to the “line” side, a single white to the “line” side and a single bare copper ground; this would have been the Position C configuration. Fewer wires to worry about.
Replacing the GFCI Outlet
So finally, with the voltage off at the service panel (which we’ve validated with our multimeter) and the line side black and white wires labeled (if the GFI is used in a Position A and/or B wiring configuration), loosen the terminal screws on the old GFCI outlet to remove the wired connections, including the bare copper ground wire(s) – and reconnect to the comparable positions onto the new GFCI outlet. (You may want to cut the wires a tiny bit and strip off a little of the insulating covering if they look a little ratty in any way.)
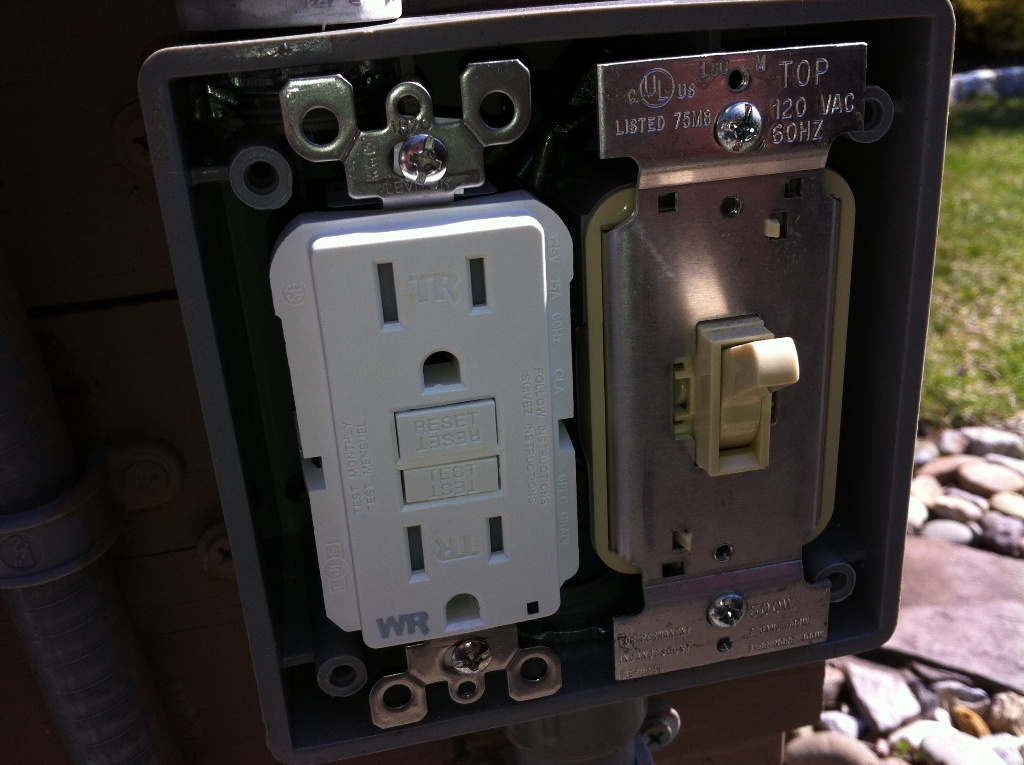
Then carefully place the new GFCI outlet (below you now see my Leviton GFCI) back into the outlet box, ensuring none of the wiring gets compromised while doing so – that everything remains securely connected as depicted below. Nice, neat and clean…
Now, it’s time to re-apply power at the service panel. And after that, you’ll likely have to hit the reset button on the new GFCI outlet as well. Then, all is good to go!
For me, now I can once again plug in my weed whacker and the sump pump I’ve rigged for use to drain all the excess water build up from the pool over the winter months. Did I mention that all of this maintenance, while sometimes kind of fun, can also be a bit of a pain in the butt?? Yes, I think I did!
Need Professional Help from a Local Electrician?
• Visit Our “Find a Local Contractor” Page
Related Posts
• Installing a Home WiFi Range Extender
• Troubleshooting and Repairing a Broken Doorbell
• My Wireless Waterproof Doorbell Epiphany
• Phantom Dinnertime Doorbell Ringing
• My Battle with Surface Water Runoff
• Redwood Swing Set Maintenance Tips

Thank you, this was very well done. Even though I’ve replaced a few GFIs years ago, I thought I should review the steps to refresh. Simple Google search led me here.
I like the conversational tone you’ve used and while being very detailed, it isn’t at all belittling. Your gentle and funny reminders to call a professional if your reader isn’t completely comfortable with the project would appeal to some with even the largest of egos.
I also appreciated the explanation on why and how GFCIs work and stressing that they only offer downstream protection. You have a new fan in me.
Stay safe and well ~ Angela
Thank you so much for your kind words above, Angela, and I’m so glad you found this helpful! Happy New Year 2022 to you and your family!!