I really hate those metal, industrial-looking air vent covers the builder installed everywhere in my house.
Working on a crown molding installation recently, I had one of those ugly heating and air conditioning vent covers dead in the way. I decided to completely ignore it and add a large crown molding anyway (which is what we wanted) and deal with the HVAC vent cover later, even if I had to custom create something myself. Turns out my wife found a pretty cool selection of artistic, decorative air vent covers. I still had to deal with a bit of customization to fit it to the wall – but I think it worked out beautifully.
Just how aesthetic can a vent cover be, you may be wondering?
More than I expected! I think it’s really quite nice…
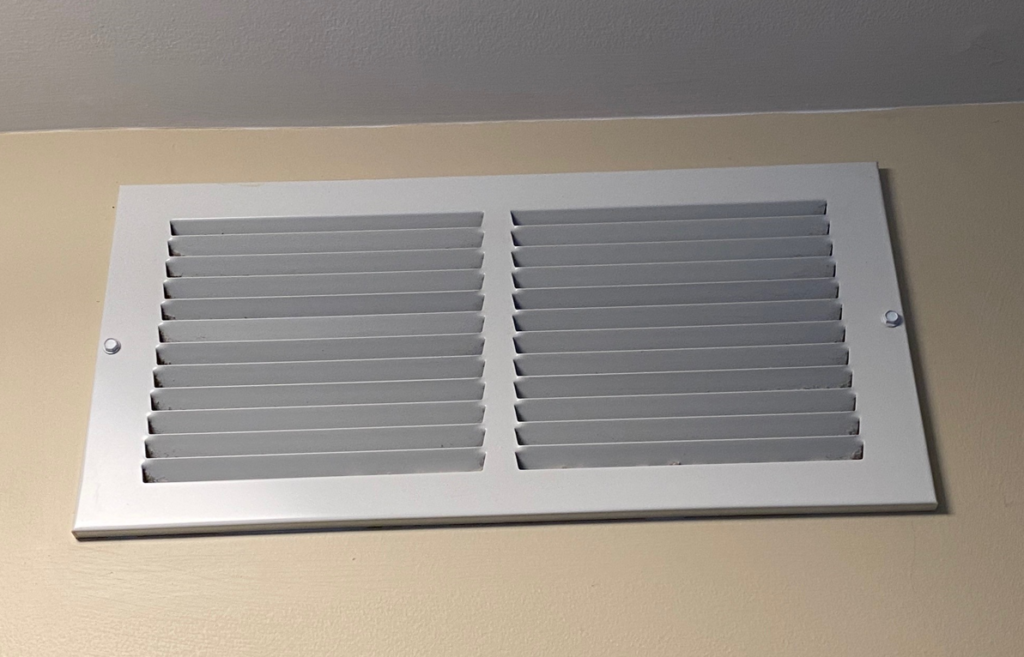
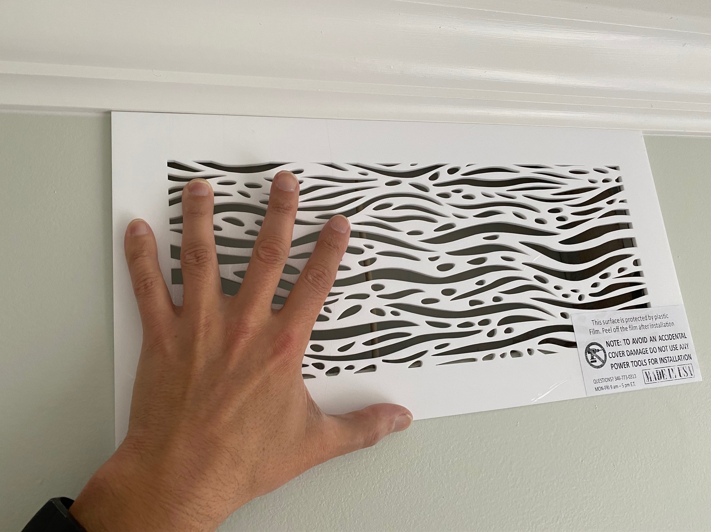
Below I’ll show the effort and the overall aesthetic outcome via a series of photos.
In essence, I had to reshape the wall via some sheetrock and flashing ‘trimming.’ And to finish it all off? Some caulking ‘artistry’ [tedium], but caulking is a critical part of crown molding installation – so I didn’t really see that as particularly ‘extra’ effort. Beginning to end? Maybe 90 minutes. And since I was transforming this room overall, this was a welcome addition – because now even the vent cover went from an industrial-looking necessity to an added aesthetic positive.
My Crown Molding Vent Cover Collision
Below you can see where I was marking out the wall studs and ceiling joists (attic truss supports) for my crown molding installation. I had already painted the walls, and you can see how that HVAC vent intake is directly in the way. So, I just plain… ignored it. I installed my crown molding with complete, apathetic disregard!!
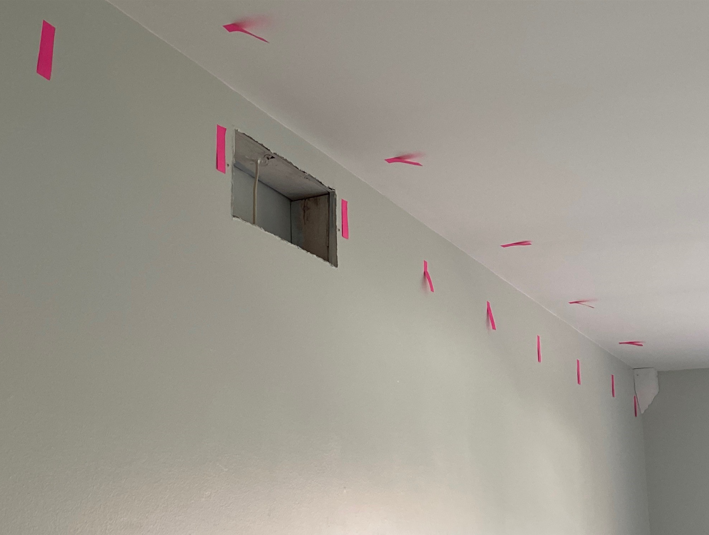
Now, after my crown molding was installed – that opening you see above was a bit smaller. (Because the crown molding covered the top part of the opening.)
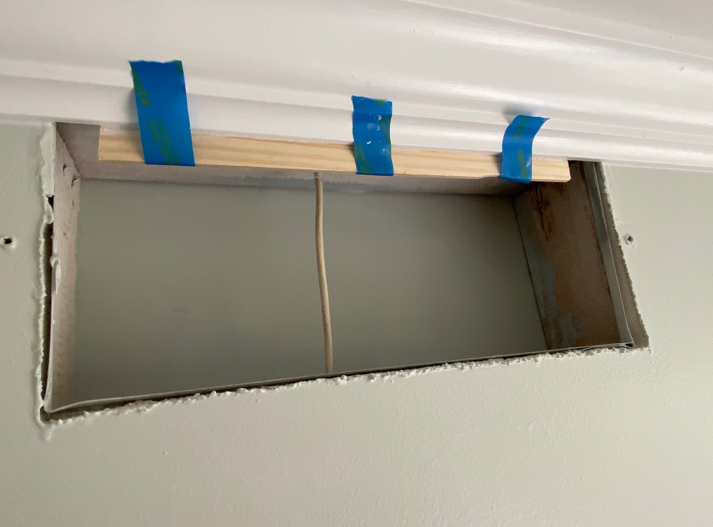
In the two shots that follow – the first is a stock photo of the decorative vent cover my wife found on Amazon. What was cool about this particular design was that it simply gets glued (with silicone caulk) to the wall. No screws. Plus, it’s thin and so would mate quite naturally to the bottom of my newly-installed crown molding. The downside? I had nothing at the top of the ‘new’ opening to glue it to.
So, I ‘repurposed’ a paint stirrer as you can see in the second shot. Fun, right?? 😉
Decorative Vent Cover Installation Tools
I needed hardly anything, really.
A razor knife. Some good silicone-based caulk. I always go with phenoseal caulk – I’ve been using it for years, you can get it anywhere – and it’s what I was using to finish off the crown molding as well.
And of course the appropriately sized decorative vent cover – there were a number of options (sizes and styles) on Amazon. Good reviews too.
Below, you can see my ‘paint stirrer’ faux wall. (I glued it to the back of the crown molding. Fake wall!) I also had to extend the opening below as you can see via the mark-outs on the drywall. Once I opened it up, there was some flashing in the way. So, that had to go too. So, one more tool I needed: a tin snips. Cut right through that flashing. No problem at all.
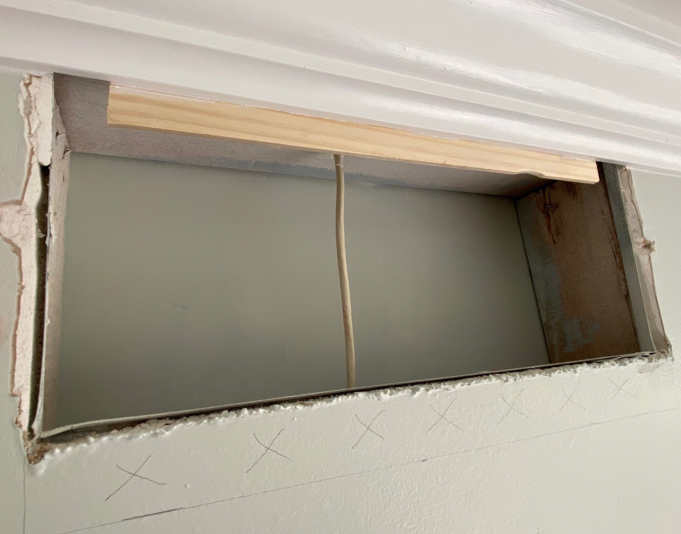
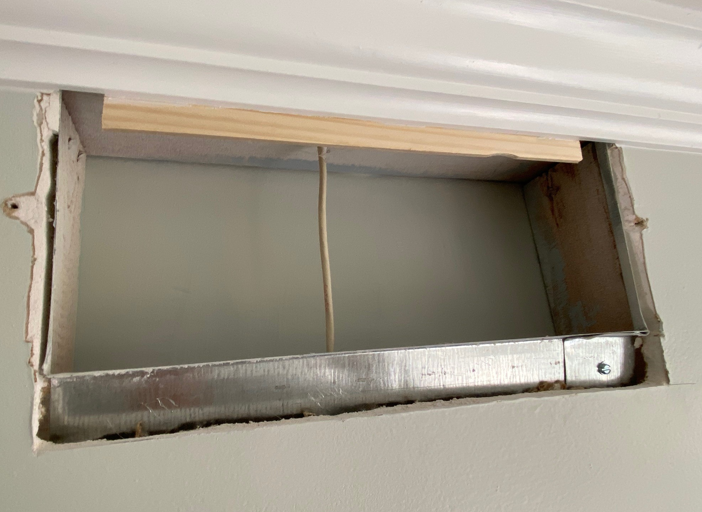
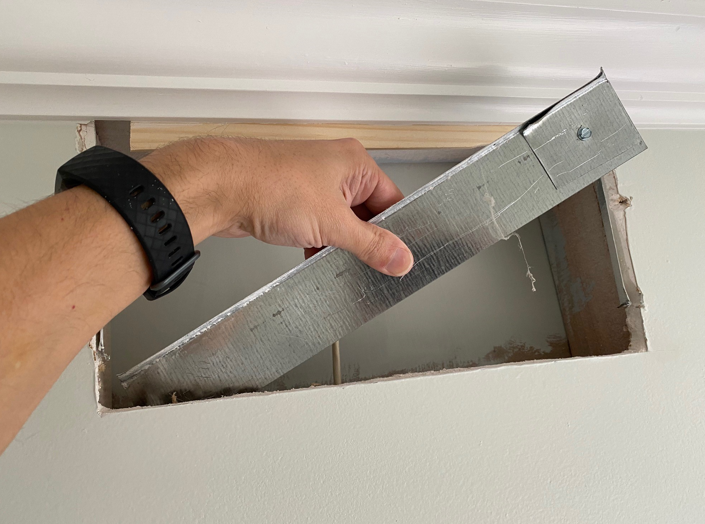
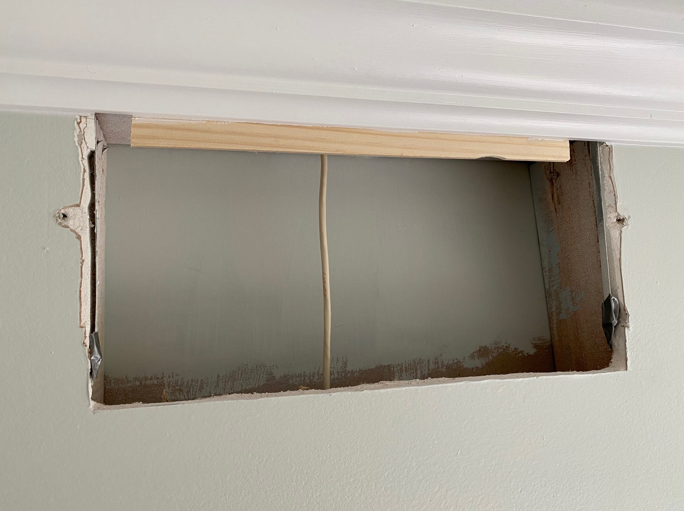
Note also, in the shot below, how I used the razor knife to ensure there was a nice clean edge around the entire opening.
Absolutely nothing was allowed to be bumping outwards as the new cover was going to be glued; the opening needed to be perfectly flat…
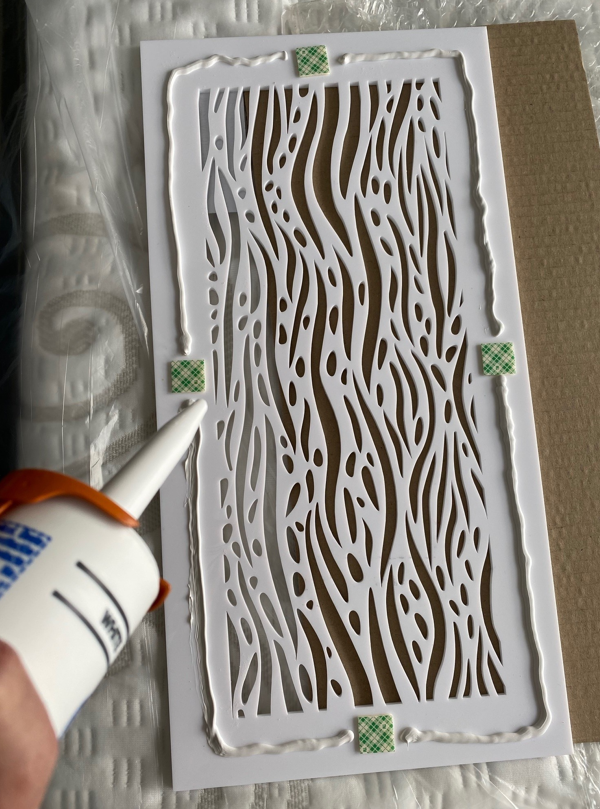
Silicone gets applied to the back of the decorative vent cover – and you see those four stickers as well? They’re there to give you some relief while the caulk gets tacky for the first 5-6 minutes. You hold the vent cover in place for that time, but there’s some additional help from the stickers while the phenoseal (silicone caulk) cures completely over the next 12-24 hours.
I opted to add even more ‘extra help’ while the caulk cured, as you can see via my blue masking tape…
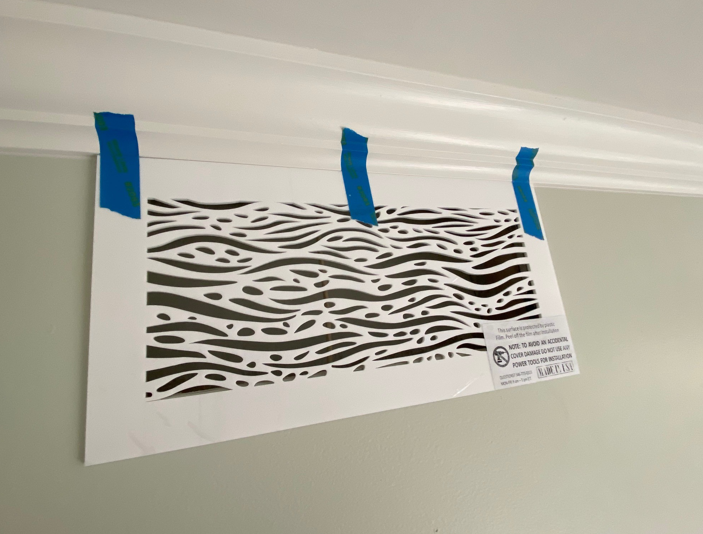
The next day, I remove my blue tape and the protective plastic cover from the new white HVAC vent cover – and as you can see: it actually looks NICE!
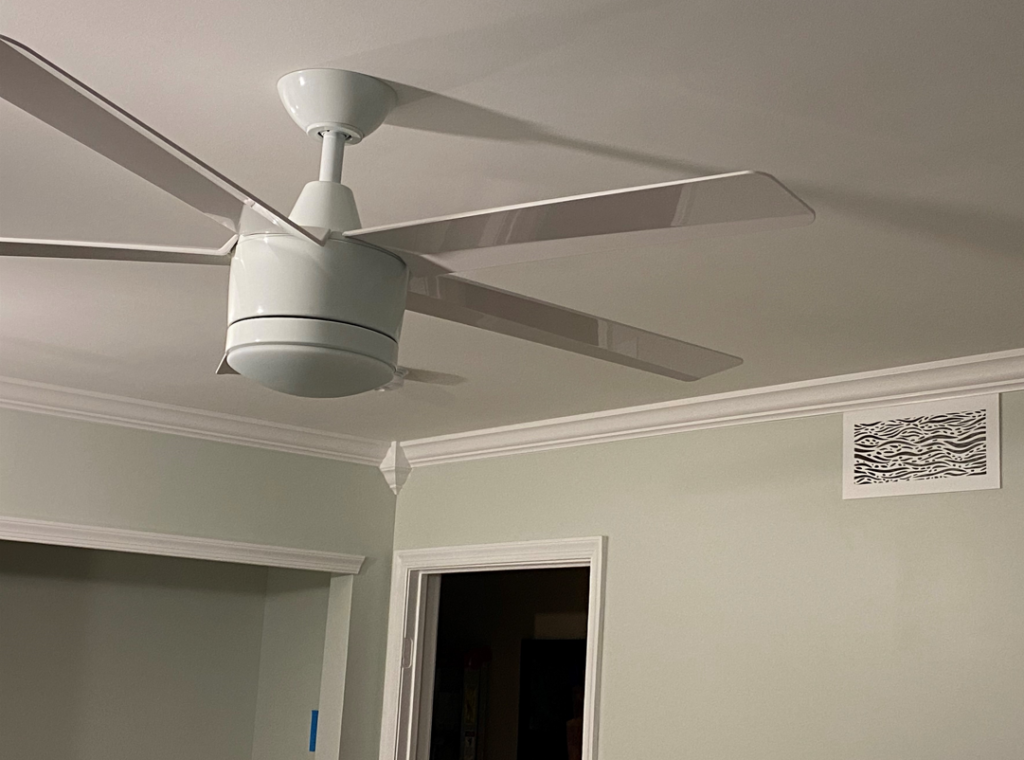
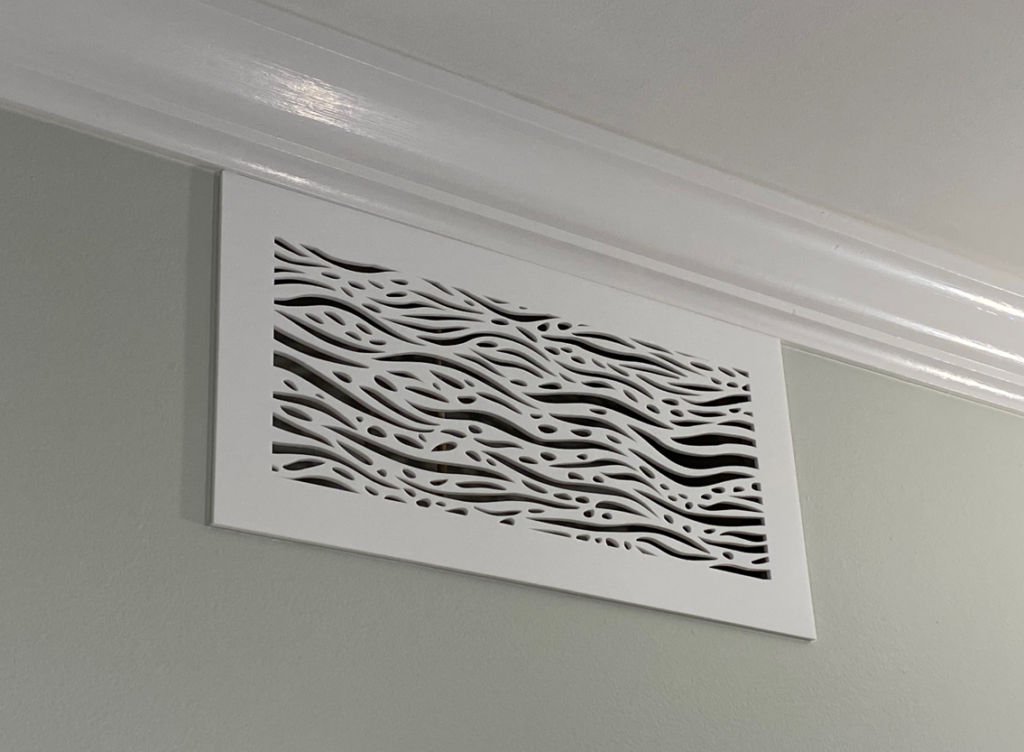
To really finish this off, though, I also caulked around the entire perimeter of the designer vent cover after it was securely in place.
Here again, this (to me), is an imperative part of any crown molding job. It’s surely tedious – but the finish becomes MUCH more beautiful. Uniform. Everything blends with the drywall.
And for a small vent cover like this, it’s ~10 minutes of work. (In contrast to caulking the perimeter of an entire room with new crown molding – at the seams on the walls and at the ceiling edges too.) In late 2018, I did a crown molding job like this with two childhood friends – the entire downstairs of a home we all grew up in and around. A family home. The two of them? They cut and nailed-in the molding. (That’s the fun part.) Me? Me they left with all this caulking and putty finishing work. The entire downstairs. Now, as I see it – they STILL owe me dinner for that. A 5-course dinner. Somewhere… expensive!!
Need Professional Help from a Local Contractor?
• Visit Our Find a Contractor Page
Related Posts
• My DIY Powder Room Rehab
• How to Convert a Fluorescent Fixture to LED Lighting
• Master Bath Renovation – Do it Yourself for Half the Cost
• Rehabbing My Crappy Fire Pit Patio
• Replacing a Bathroom Toilet: Mostly Easy, Not Too Gross
• How to use a Submersible Pump to Remove Excess Pool Water


Leave a Reply