So, I just discovered a new favorite project: installing wafer LED lighting – which I’ll convey mainly in pictures, below, as I continue with the construction of my new upstairs office…
Now, this is a working space – and it’s not huge, but the dimensions for the lighting layout matter a lot. Since it’s not a large area (about 10’ x 15’), and because I have a ceiling fan in the middle (which I installed about 2 weeks prior), I followed two rules: a) keep the lights at least 18 inches from the ceiling fan blades to avoid strobing as the blades spin [it’s not a dance club – it’s an office], and also b) keep them at least 30 inches from the walls to avoid harsh down-lighting onto the wall surfaces.
So, in my new little rectangular office space? 30 inches by 36 inches – with four 6-inch wafer LED lights at each corner. That worked as a design layout nicely!
LED Wafer Light Ceiling Installation
To start the installation, I measured and marked the ceiling holes really carefully (like ‘crazy anal-retentively multiple times carefully’) and used blue masking tape to get everything just right on the ceiling surface; then I inserted a small dimple with my awl as a pilot hole for the drilling.
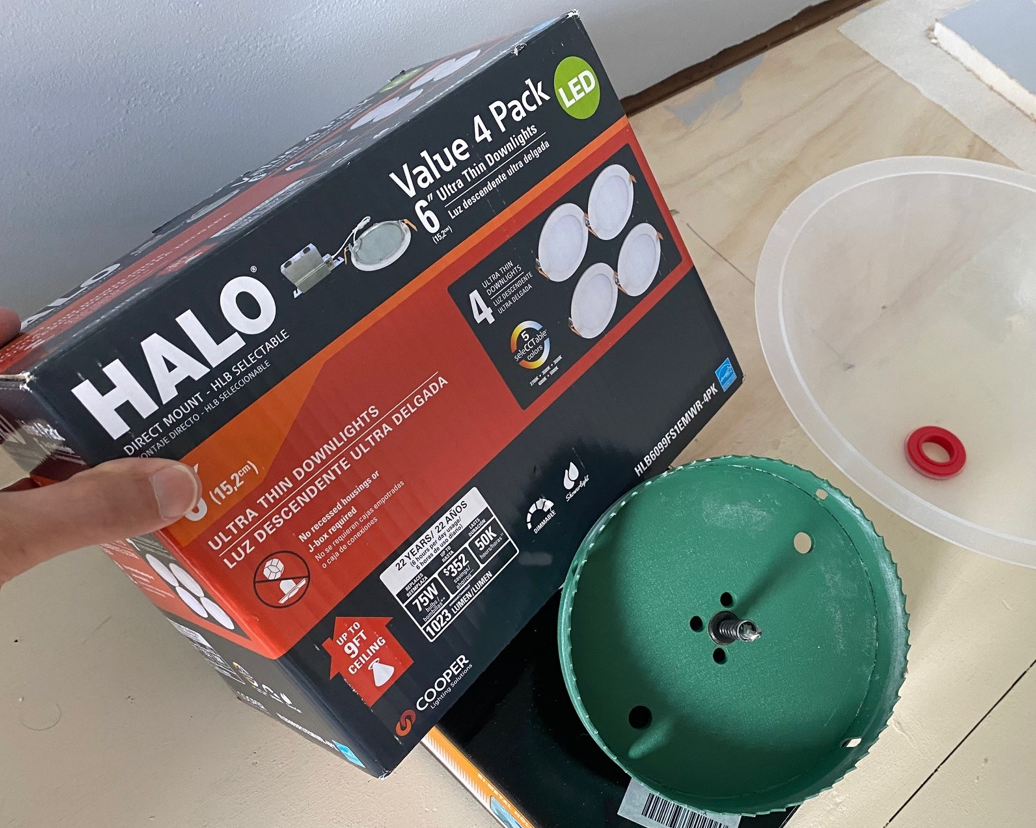
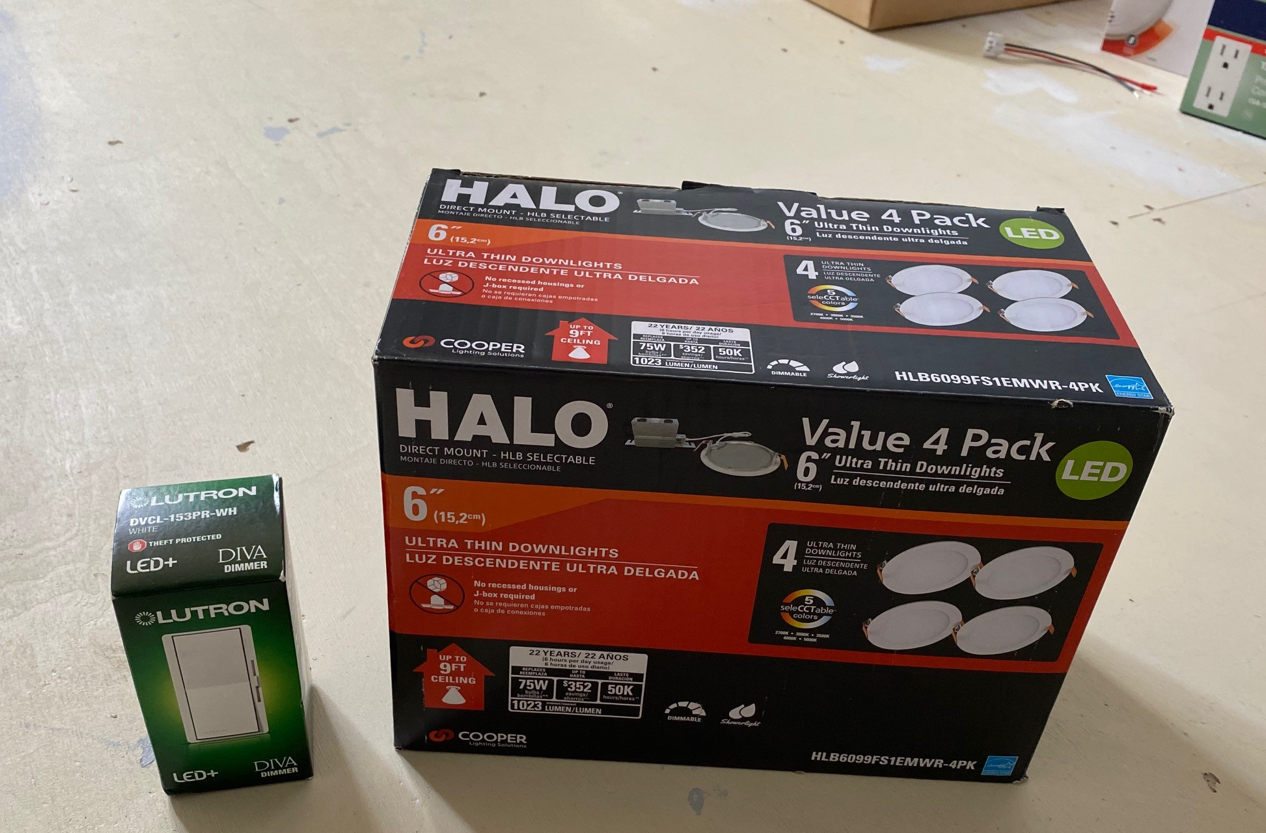
The lights I purchased? Image is above. And an Amazon link is right here as well. (I’ll include links to some of the key items I’m using and describing.)
For this job, I chose to go with super thin wafers – and the beauty of these, I’ve been told, is that even if you hit a joist… it doesn’t matter. Now – I’ve heard this over and over. But I believe nothing; that’s how I roll – so I did a test first. On a piece of scrap drywall, I use for patches…
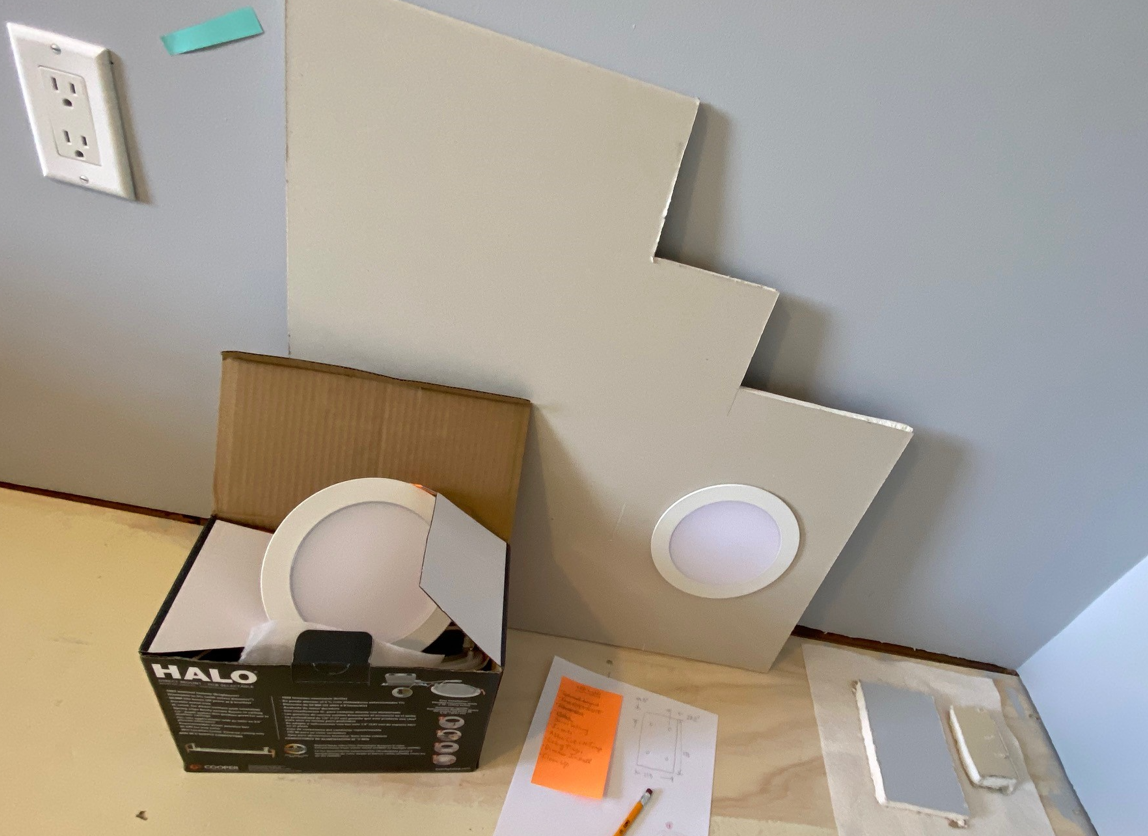
And from this test, I could see that the spring clips that snap through the back (the ceiling when I’m really installing) needed very little space – and even if I hit a joist above my desired 30×36 corner locations – I could rotate the wafer LED light; I couldn’t see any reason why it wouldn’t work. (I was 98% sure it would be fine.) But how best to cut those ceiling holes? Two possible ways: a) A drywall key hole saw or b) a custom drywall hole cutter drill attachment. I’ve used a key hole saw many times for getting through drywall – it was an awesome use of $12; I’ve gotten my money’s worth no doubt. And it would surely have worked fine.
But I wanted to try the drill-attachment hole cutter – for nice clean holes. (Plus, to be frank, it seemed like it would be fun and cool to try.)
So, I bought one – and I tried it.
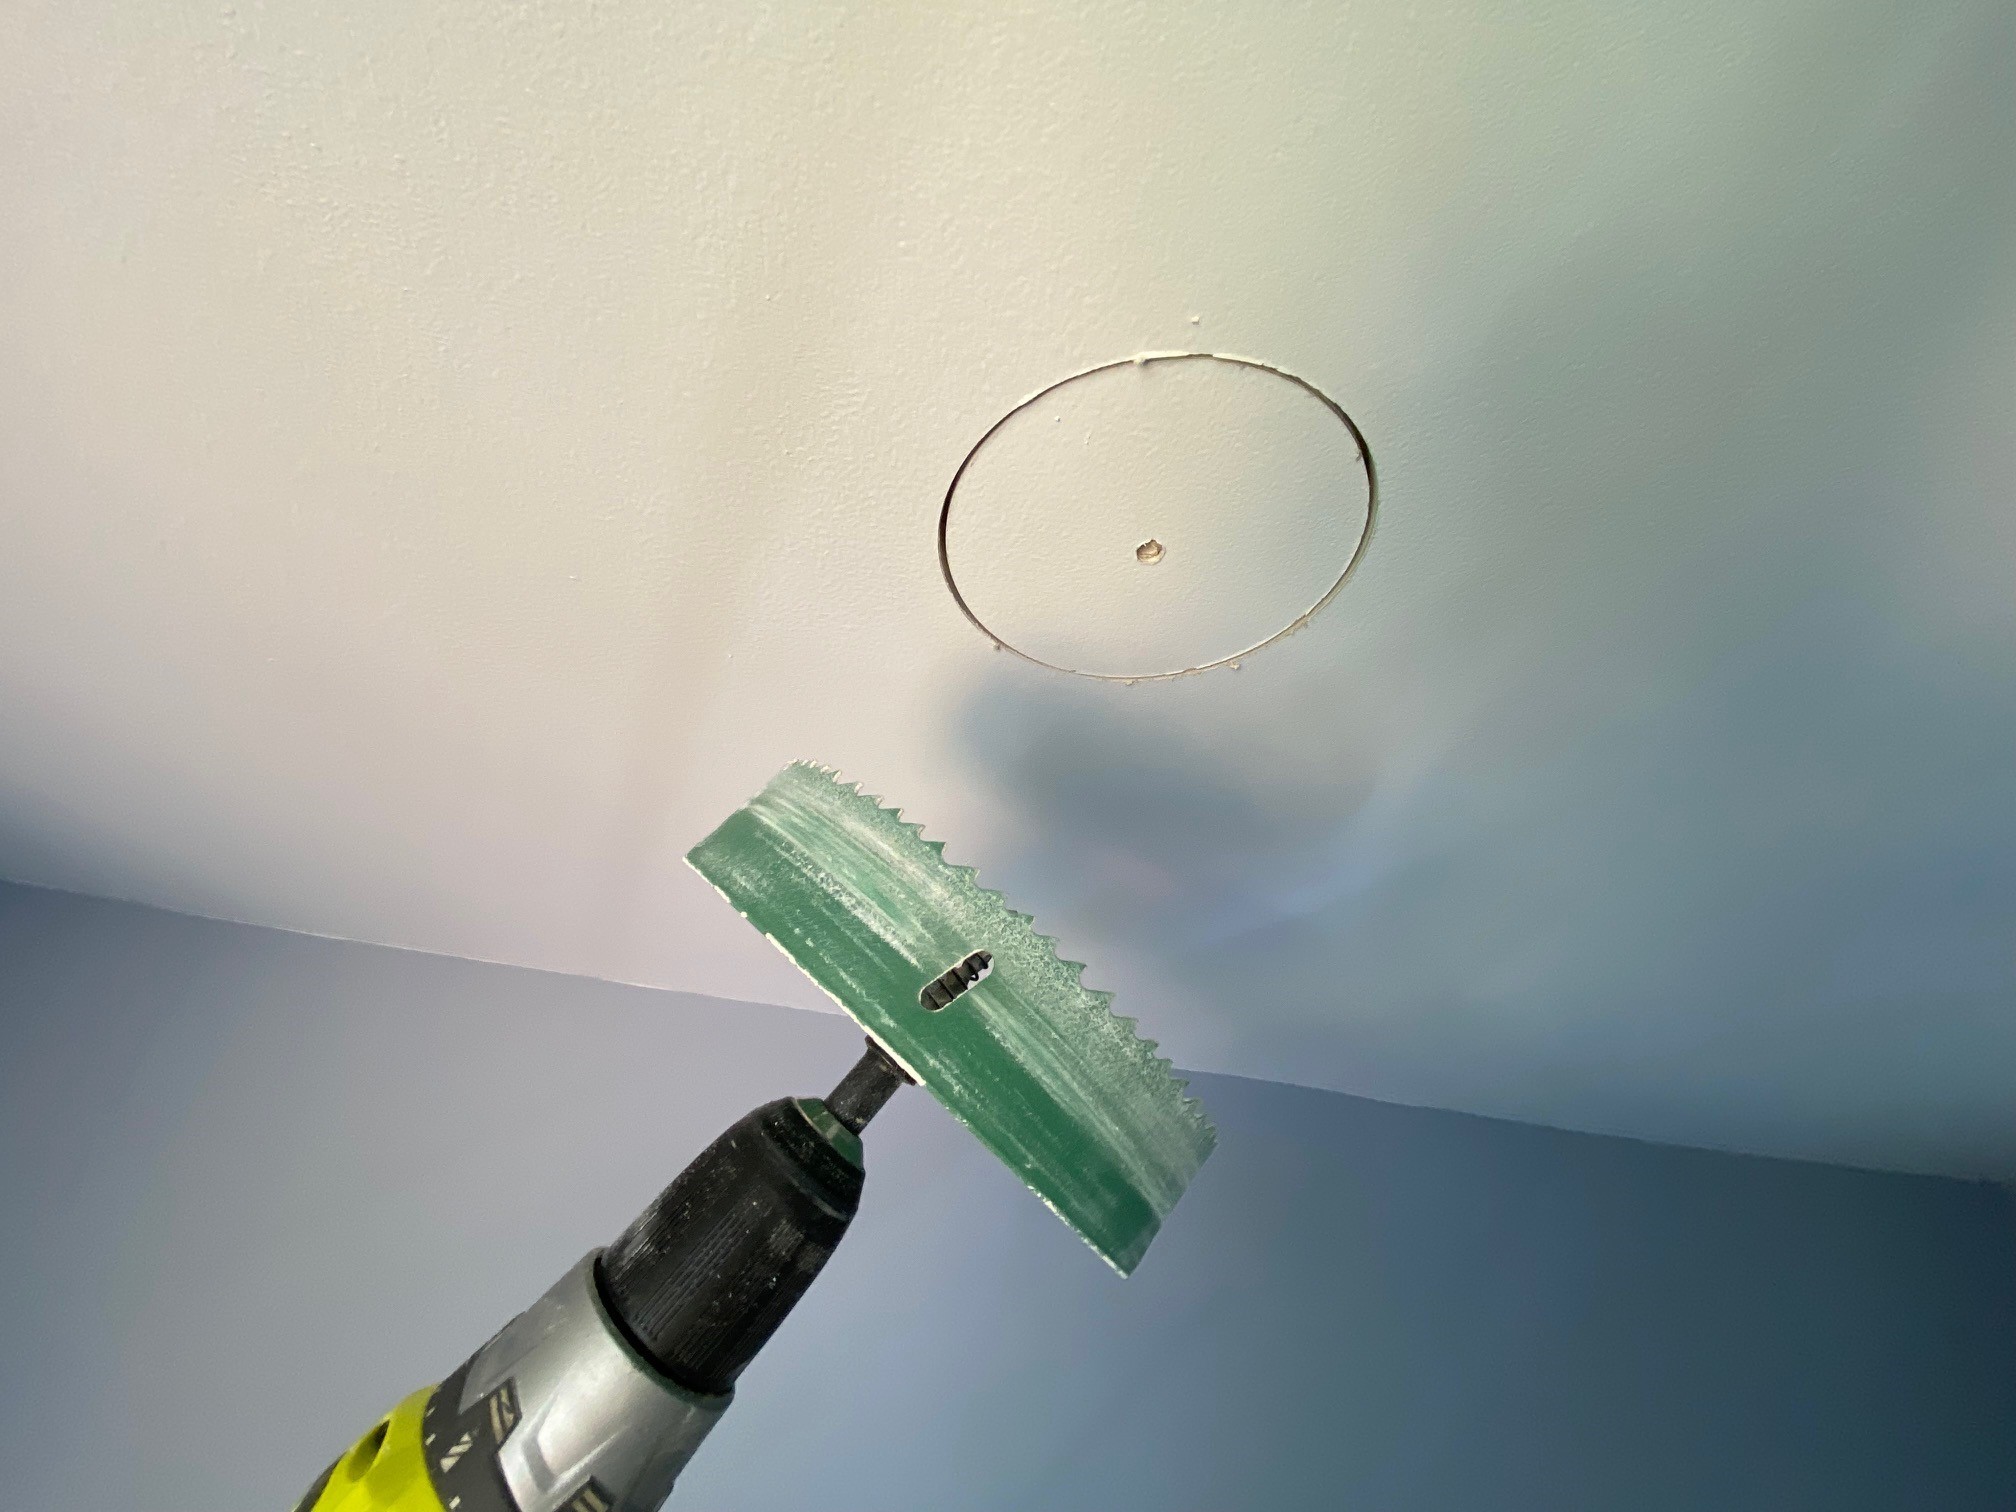
My two observations:
- It’s super cool and super fun… but also super dangerous. The one I bought worked perfectly… until you slowed down the drill, and which point it ‘unscrewed itself’ (angular deceleration, impulse, torque, all that) at a high rpm. Seems like a glorious death potential right there. So be REALLY careful if you go this route. It makes beautiful holes as you can see… and here again: test first on scrap drywall: Make sure your lights fit into those holes. And make sure you get an idea of how to use that drill attachment before you’re doing this on a ladder right near your face.
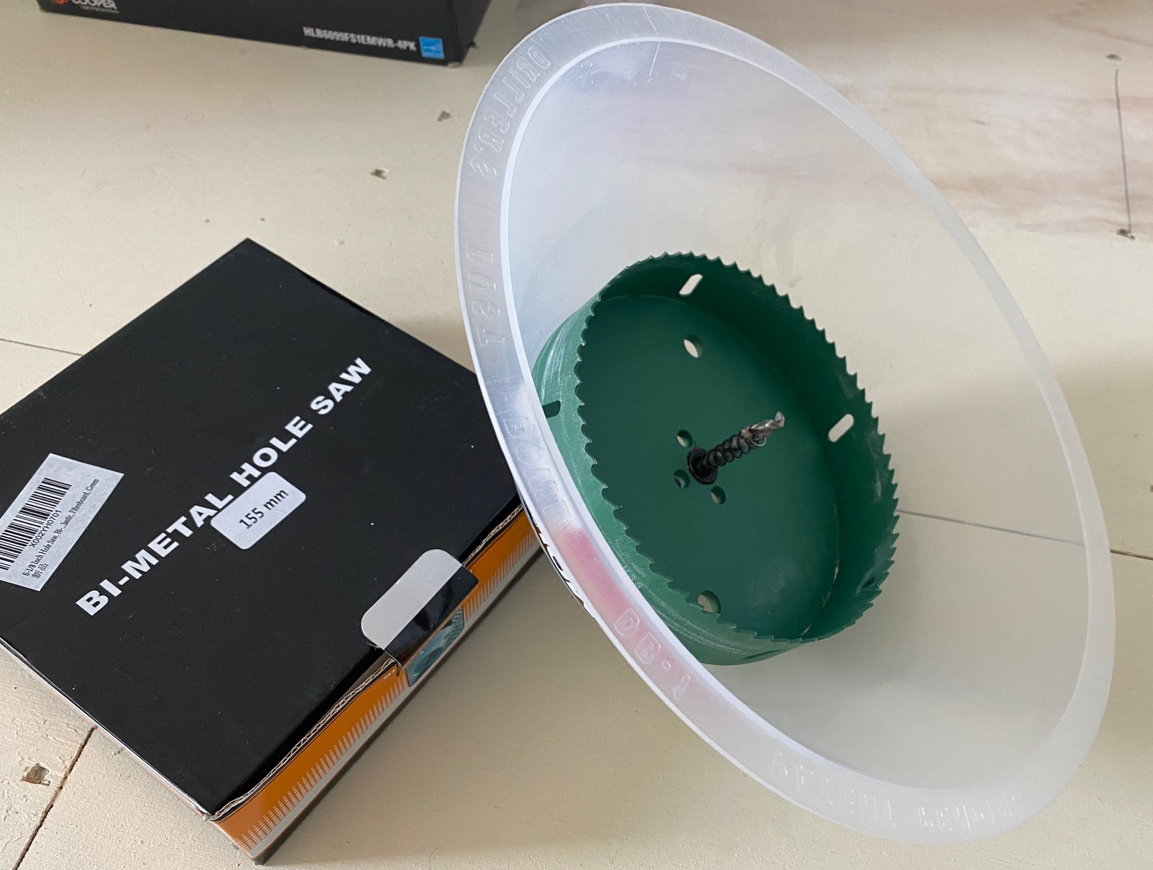
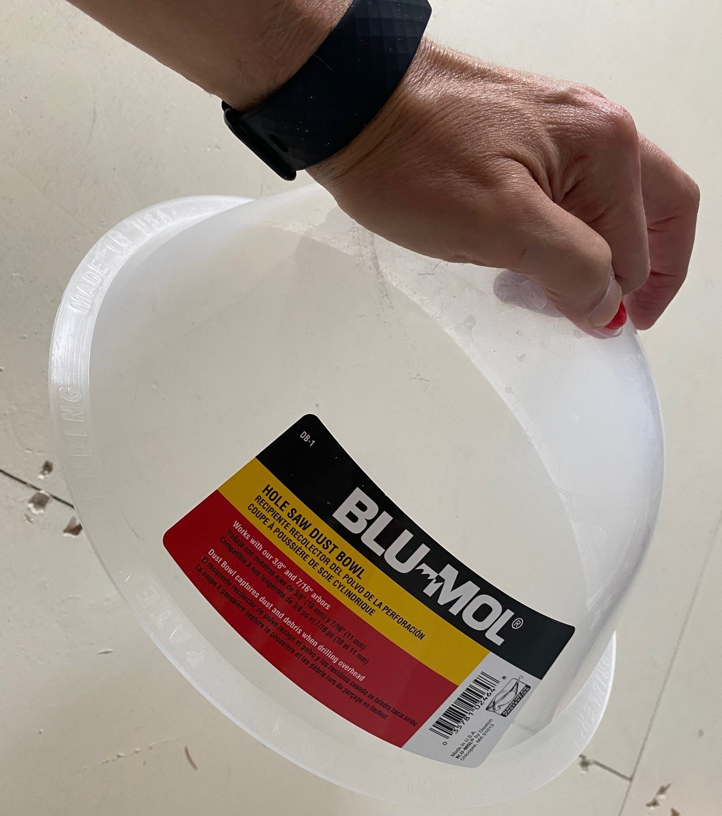
- Get one of these plastic dust-catcher bowls to save a huge, HUGE mess, and which also happens to put a barrier between that high rpm drill attachment, and you face. WELL worth the money on all fronts. Frankly, borrow one from a friend, if you can. (I’m not sure I’m going to use this again. But you really need one of these.)
LED Wafer Lighting Electrical DIY
Next up? Running the wires though my attic above.
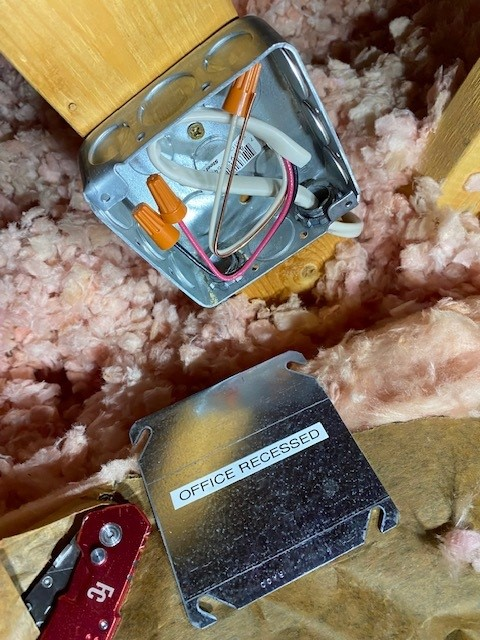
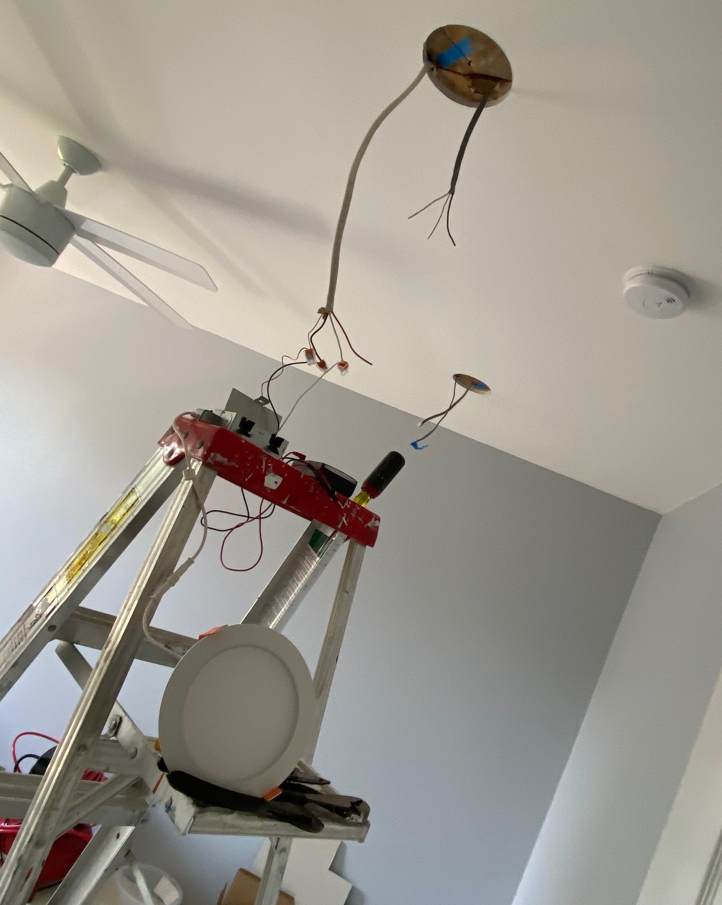
Now in the shot just below, I had electricity to a switch in the room that was tied to an existing ceiling fixture. So, I stole that. You can see the junction box I installed and ‘labeled’ OFFICE RECESSED. (I think label makers are right up there with duct tape, zip ties and Velcro. I just love to label things, as you’ll always know what they are down the road. Especially wiring and junction boxes.)
So, the Romex that was energized by the switch to the previous ceiling fixture? I took it into this new junction box right here. This will soon control my office recessed lighting…
Oh, and is the electricity off while I’m doing this? OF COURSE, IT IS!!
(Please always use an electrician if you’re not comfortable with doing electrical projects; this goes without saying, of course. But I’m saying it anyway. If you need a local electrician to help with an effort like this, word of mouth references, I find, are always best. But you can search for one right here as well, if you like.)
Now, let’s run some additional wiring though the attic space for the LED wafer lighting – using the mark-outs made in the ceiling earlier.
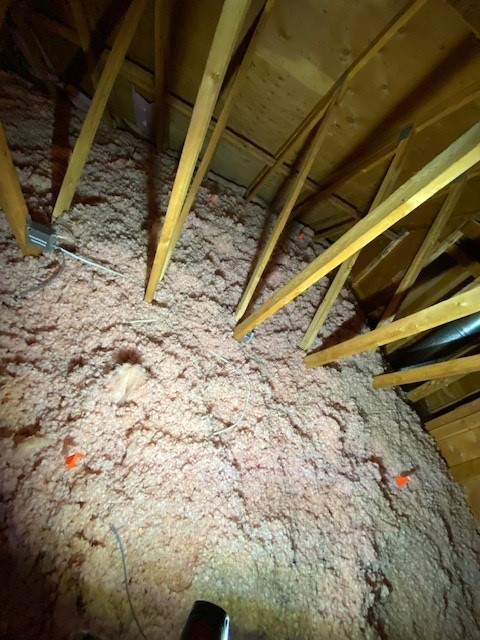
But how do you find these tiny holes from within a dark attic with 2 layers of insulation? By using cheap lawn flags. That’s how!
Have a look above. Can you spot the 4 lawn flags that I poked up into the attic from below? It’s a “Where’s Waldo” exercise – and frankly kinda fun.
(Once again, though, walking on top of beams in a poorly lit attic can be dangerous; please engage a professional electrician if you’re not comfortable with an effort like this.)
And from those lawn flag markers, I run Romex from the junction box to each of the four LED wafer lighting holes in my ceiling below…
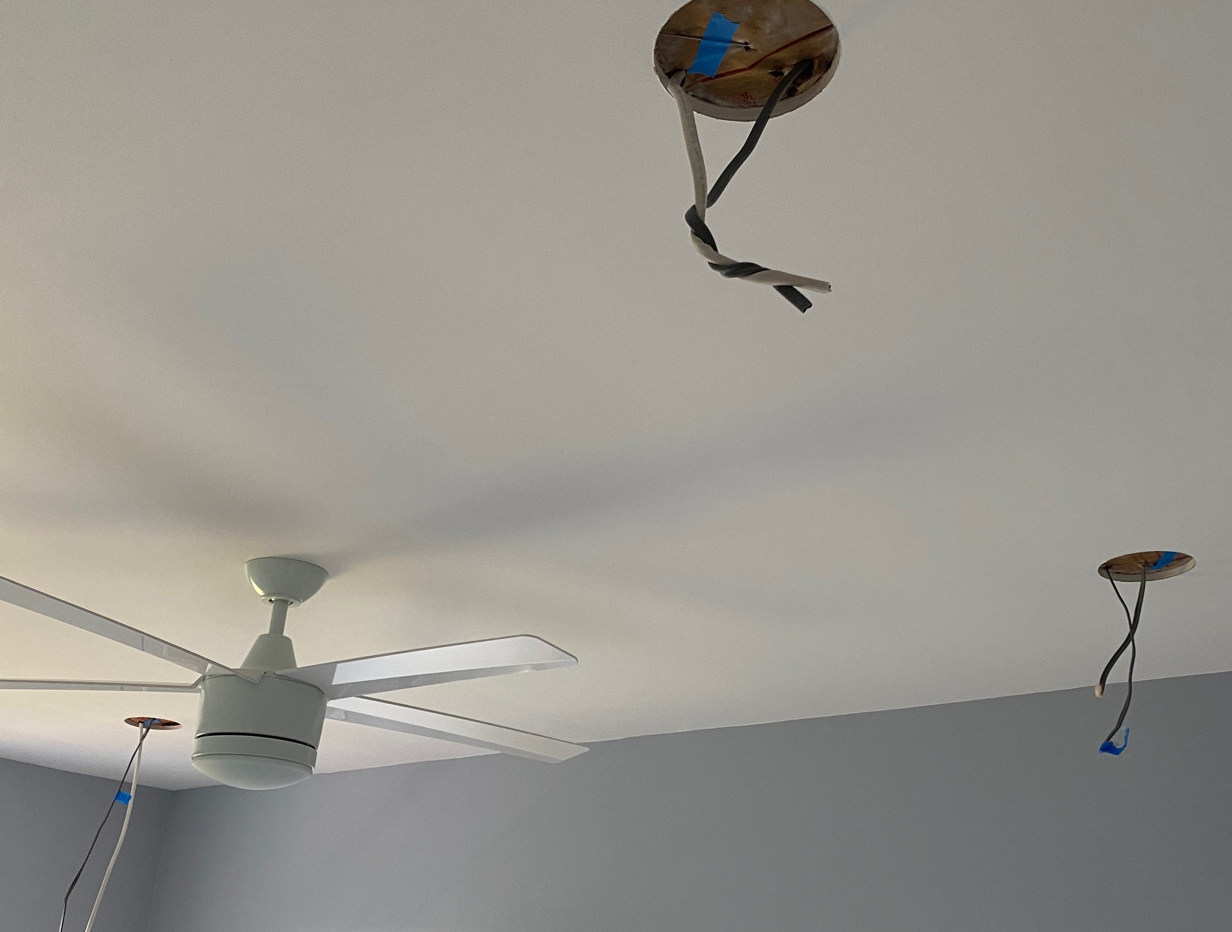
The LED wafer lights I purchased each come with their own internal junction both with electrical connectors – so doing the wiring (now from below in the office as opposed to the attic), is quite straight forward.
You can see the detail from the two photos that follow…
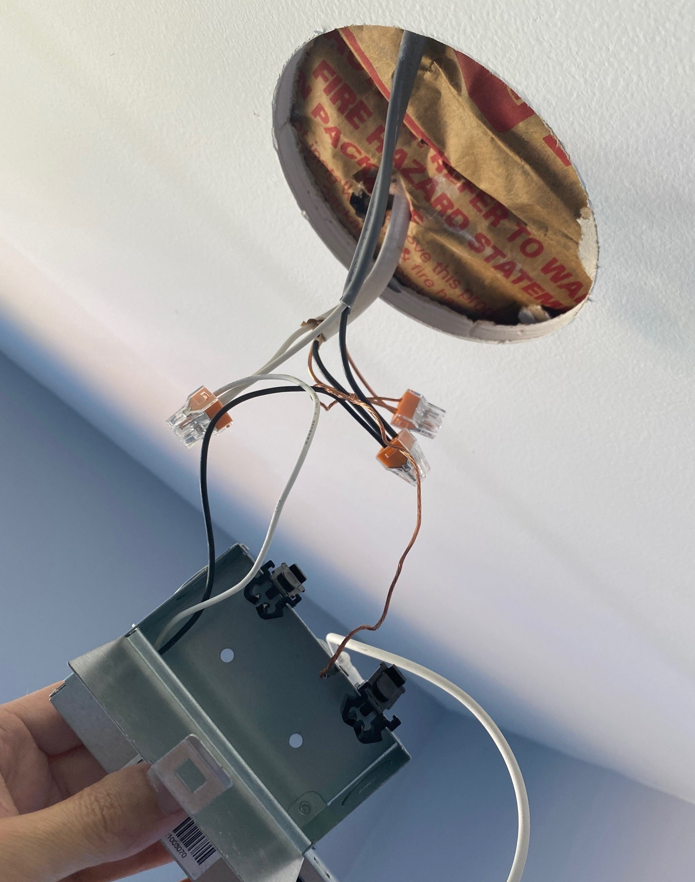
The LED wafer lights each ‘quick connect’ to their respective junction boxes.
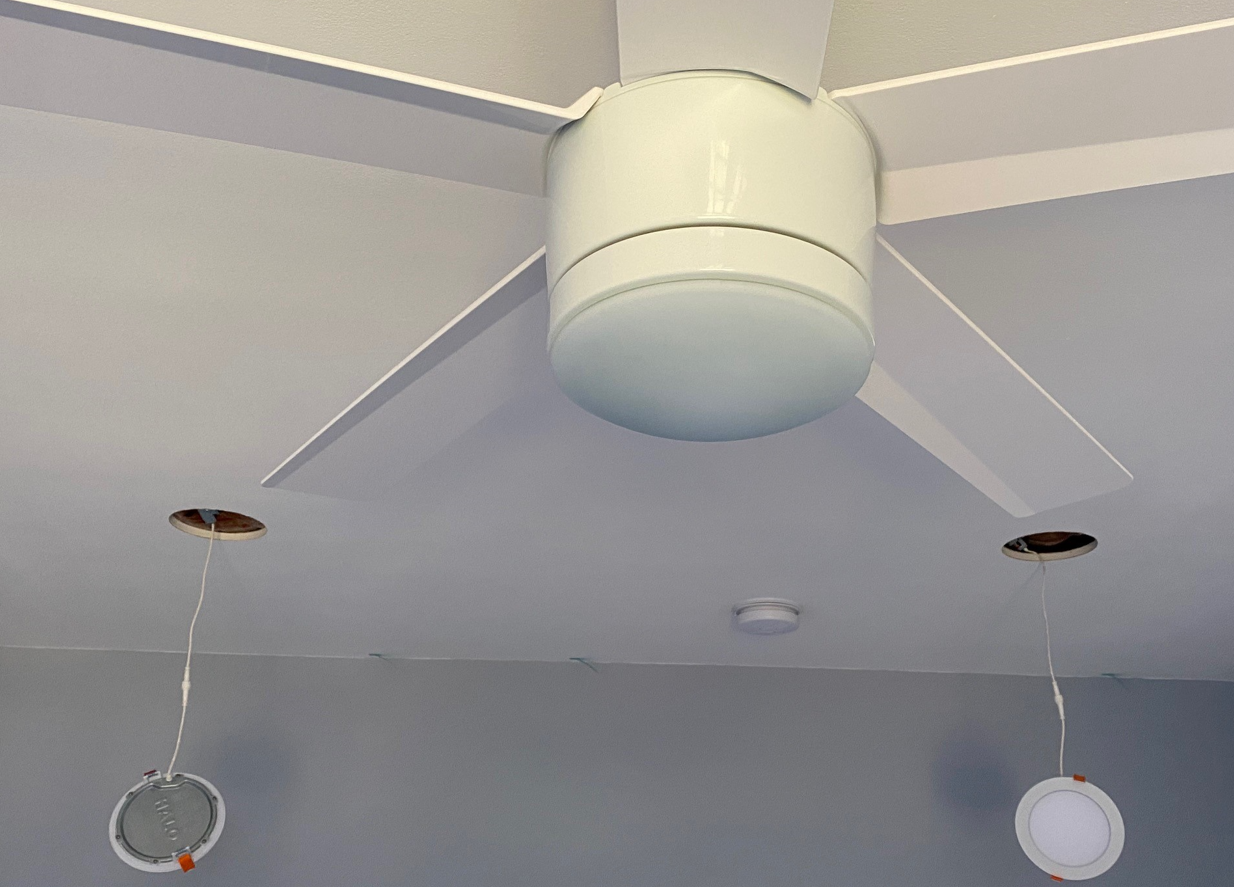
Zoom in to the shots both above and below; you can see the connectors if you zoom carefully.
For the two you see hanging from the ceiling, I’ve already tucked the mini junction boxes onto the drywall above: but you can still zoom into to see the connector between the LED wafer and that mini junction box…
Set the LED Light Color Temperature
Now, at this point I turned on the power.
I didn’t want to pop the LED wafers into the ceiling until I was sure everything was working and I had a chance to tune the color temperate of the fixtures so they ‘felt’ right in the room.
These fixtures came with five color temperature setting and I went with 3000K for this room. (This is a personal preference. I ‘feel’ that a setting of less than 3000K is a little too yellow. Above 3000K, to me, starts to feel like an ‘operating room’ or ‘clean room environment – just a little too harsh. I’m a ‘3000K guy.’)
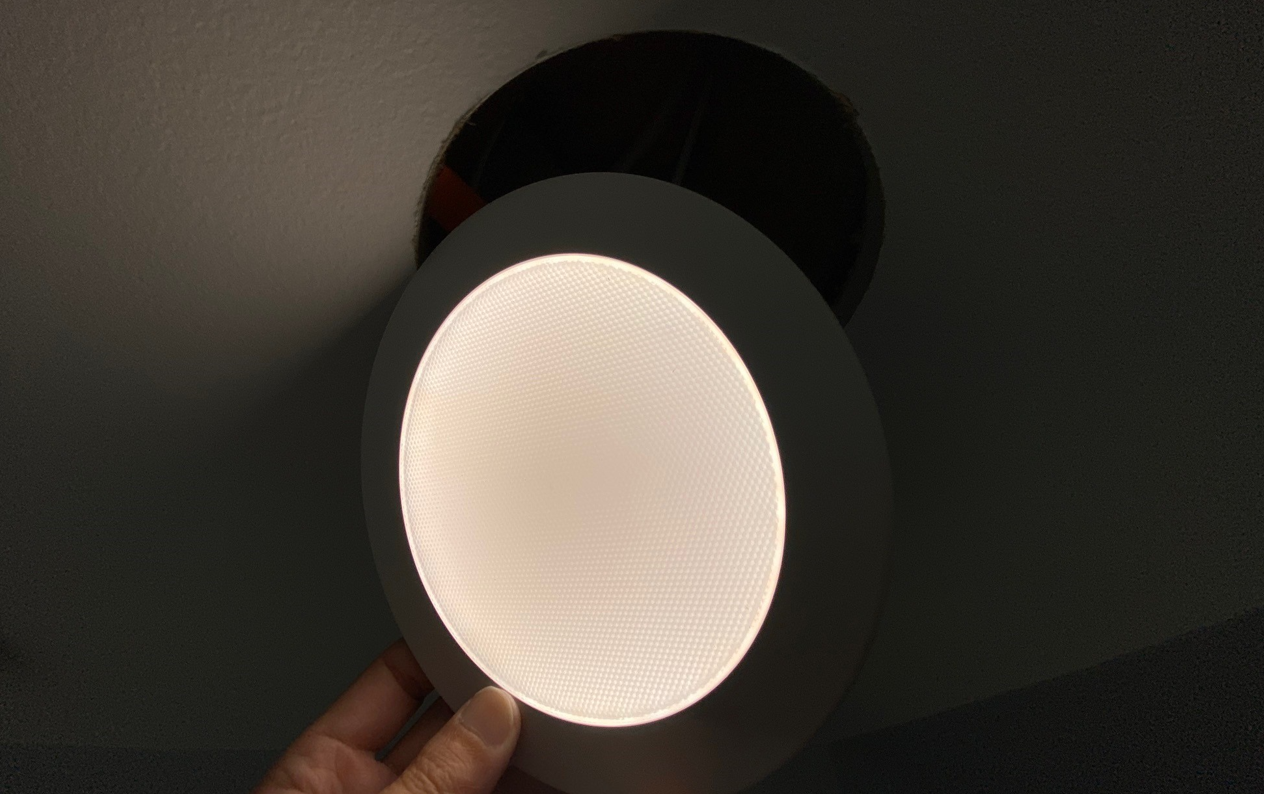
And we’re good to go!
Install an LED Dimmer Switch
Well – wait. Not quite yet… I also wanted to install a dimmer switch so I could control the brightness (or ‘luminosity’) of the lighting. Not the color, which is set at 3000K – truly the brightness.
I did this after the lighting was installed and working with a standard switch. And for this, I used an LED dimmer switch. I’ve found the Lutron Diva to be the ‘one to use.’ It costs a little more than some of the others, but for me – it made the LED toggle on much smoother. (I saw distinctive ‘bouncing’ with one of the other name brand LED dimmers that cost about $6 less – which I returned.) I’ve now installed a couple of Lutron Diva LED Dimmer switches – one in this room, and one in another.
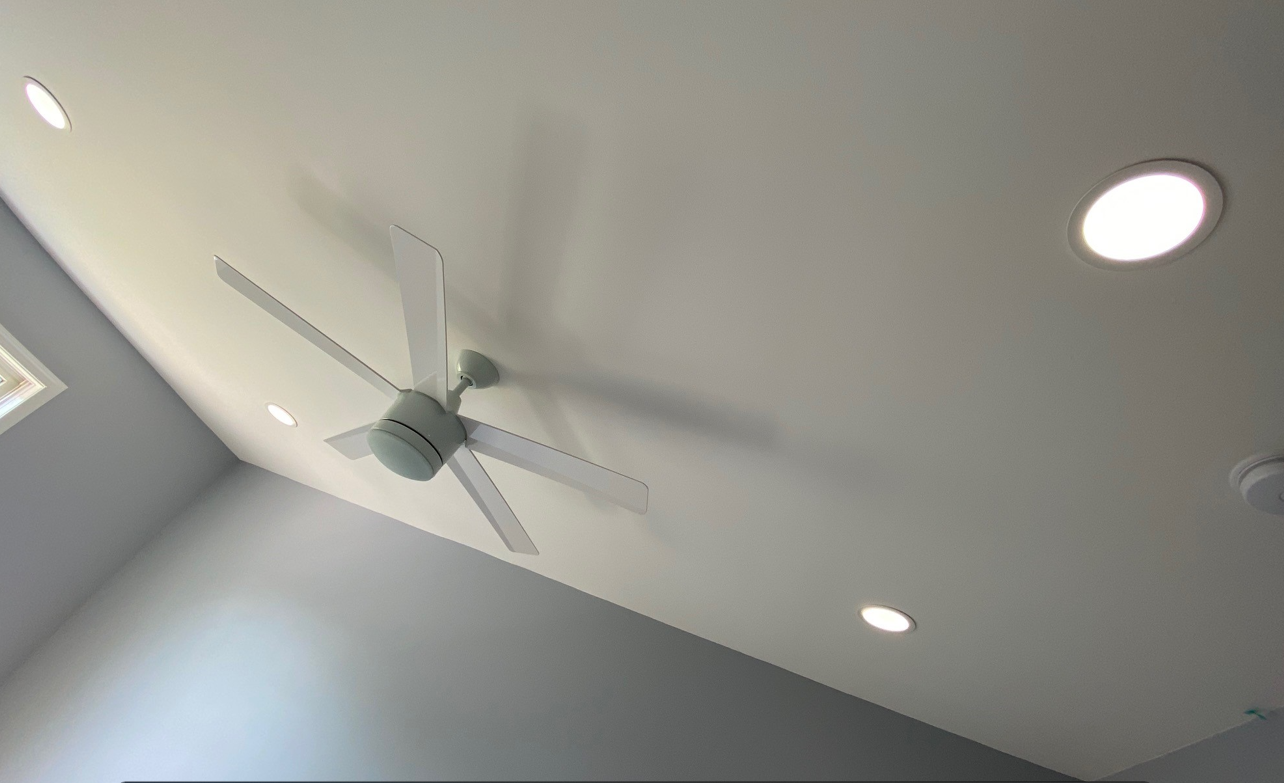
Okay – NOW, we’re good to go.
So, next on deck – get the flooring installed in this room. Then buy a desk and computer. And then… I guess I have to get to [office] work in there??
Need Professional Help from a Local Electrician?
• Visit Our Find a Contractor Page
Related Posts
• How to Replace a Ceiling Fan
• Installing a Bathroom Ventilation Fan
• My DIY Powder Room Rehab
• How to Replace a Dead GFCI Outlet
• Quick & Easy LED Light Fixture Installation
• How to Convert a Fluorescent Fixture to LED Lighting

Leave a Reply