2024 Update – This time it was a perfectly shaped and well-established blue spruce that took the hit. The wind knocked it to an awkward angle, and I could almost certainly pull it the rest of the way down by hand had I wanted. We had to secure this focal landscape tree to save it, and we were going to do that with a landscape anchor and guying kit.
I can never seem to predict the damage the weather is going to do to my property. The roof, gutters and fascia are always at risk naturally, but certain trees with surface roots can easily get damaged (misshapen or blown over) by the wind; I think immediately of arborvitaes. And then there are the inflexible maples, white pines, Leyland cypress and fruit trees as well; I’ve had each of these crack in heavy winds and ice storms in the past.
Lightning strikes, while rare, can’t be ignored either. I had the most pristine maple in the most perfect location – all pruned to perfection… and then the lighting. A dramatic explosive crack. Followed by a little bit of smoldering and fire. Then me, outside with the chainsaw the following weekend. No more maple.
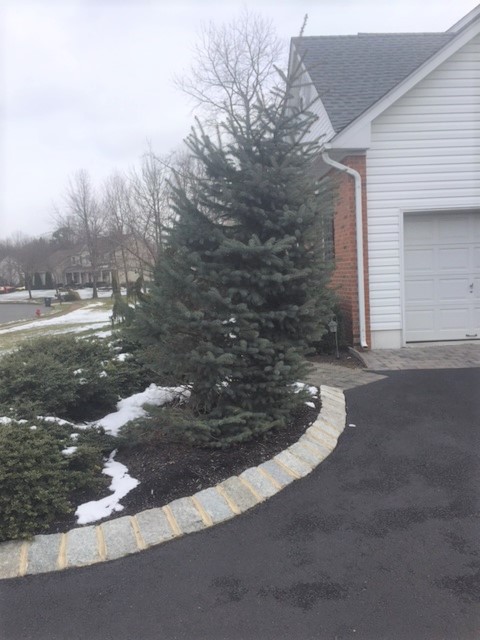
But lightning-obliteration aside, repairing weather-related landscape tree structural damage usually involves pruning and/or staking up the tree for a year or more so it can re-root itself securely. The typical approach for staking up a tree is the use of a single stake and some type of wire along with a piece of hose or rubber around the tree to protect the bark. This is fine for small trees, and I’ve done this with 1-inch caliper (diameter) fruit trees and the like – but my blue spruce was much bigger (about a 4-5 inch caliper) and I wanted to do something much more secure.
The blue spruce was actually tilted a bit further than you see above, touching my truck the morning I found it. I cringe looking at this, even now.
Landscape Anchors for Established Trees
I never had to secure a tree this big before, so I consulted with someone who had – a local landscaper and friend, Tom, who I’ve known for years. I’m a firm believer in getting help when you need it, and also in working with local professionals you can trust whenever possible. He immediately said we needed landscape anchors.
In fact, he texted me – “Duckbill Earth Anchors.”
Now, here’s a photo of the tree support (and guying) kit we purchased below – but I’ve also linked the above to Amazon so you can take a look at the reviews on this product there. Because reviews from real people are worth a LOT. As of this writing, I’m seeing very positive reviews on this product (especially if you read the specific experiences people have written) and as you progress through my summary here and see the end result, I can tell you right now that I feel the same way. This kit worked for me. There have been heavy winds since the tree was secured, and it hasn’t budged.
But I’m getting ahead of myself.
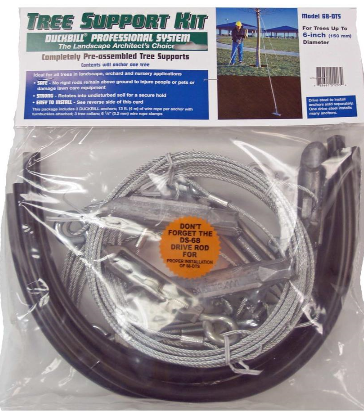
Tree Anchor Kit Contents and Tools Needed
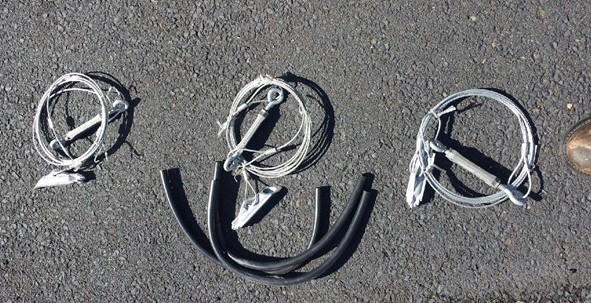
The tree anchor kit includes all hardware required to stake up one tree – with up to a 6-inch diameter. If you lay all of this stuff out on the driveway, you have the following: 3 anchors, 3 turnbuckles, protective tree collars (so the wire doesn’t cut into the bark when under tension) and the wire cable.
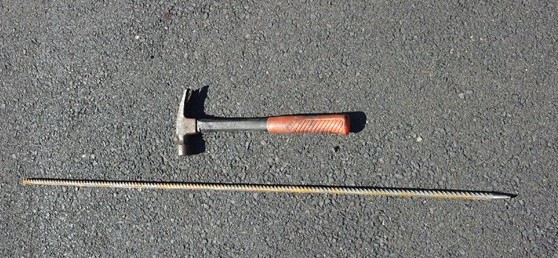
In addition to these items, you also need a drive rod – which will be used to hammer the anchors into the earth. This is something else you may need to purchase (or borrow), so you need to be aware. You frankly may be able to improvise with any type of comparable metal rod you may have handy as well. The official manufacturer drive rod can be viewed here if you’re so inclined, and below is another photo on my driveway…
How the Landscape Anchor and Guying Kit Works
The way these anchors work, in essence, is that you drive them deeply into the ground (with the drive rod), and then you pull back so that they rotate 90 degrees underground creating a very solid anchor within undisturbed soil… sort of like a toggle bolt “expands” within a wall, the subterranean [I really wanted to get that word in here] rotation into a perpendicular orientation yields the same basic effect.
Here’s a graphic that I took right from the manufacturer’s documentation that shows very nicely what I’m trying to describe above…
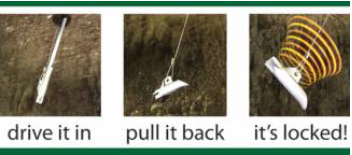
Three such anchor installations provide 360-degree protection around the landscape tree, and then the wire cable (or “guy wire”) gets connected and tension-adjusted to the bark via the included turnbuckles. The tree collars are imperative to protect the bark as well.
Quick Aside: As you may know, the only living portion of any tree’s trunk is in the organic material just under the exterior bark – the center, or the “heartwood” of the tree, is not alive. So, a tree’s bark serves to protect this thin layer of living “tissue” – if that’s the right word to use. If the bark gets cut, and that underlying tissue gets cut, the tree will be injured. Here’s a nice article from the US Forest Service that lays out the Anatomy of a Tree which you might find an interesting read on this. But for our purposes here, mindful of the above, the use of the tree collars for bark protection (from the guy wires) is quite important!
Guying My Damaged Blue Spruce
So, now below, I’ll wrap this up with some shots of my Blue Spruce – how it looks right now, anchored.
I’ve already conveyed that we’ve had some very heavy winds of late, and the tree has remained secure. Knowing that the root structure is significantly damaged – this is really quite impressive to me. But another key consideration is that this is a very focal decorative landscape tree for my home. So, it needs to look good too.
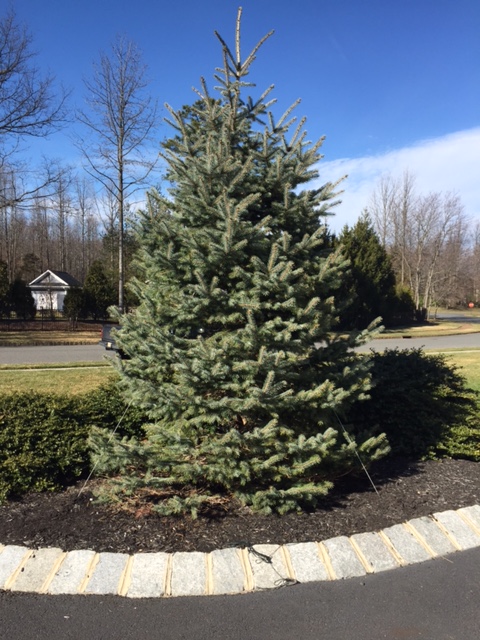
With those items in mind, the first photo shows the Blue Spruce in total – looking away from the house toward the street. Can you see the anchors or cables? Click on the picture to make it bigger – you’ll see the hardware when you look for it, but I’m very happy with the overall aesthetic here. The tree is not only straight and secure, but it looks terrific!
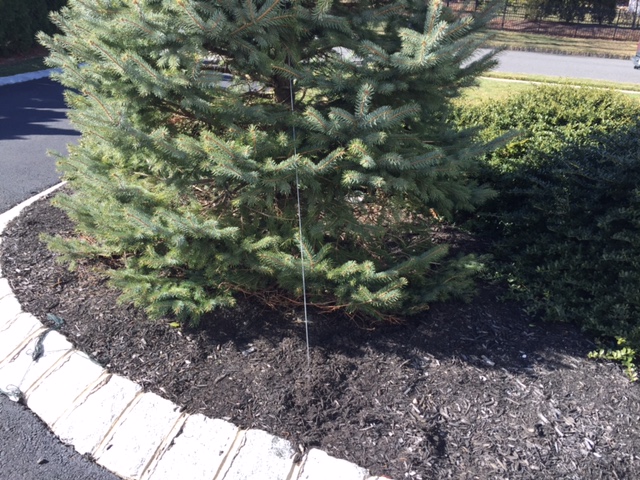
Here’s a shot of the landscape anchor kit’s wire cable (guy wire) above the ground; this is all that can be seen as the anchor is significantly underground. There’s no ugly, eyesore stake anywhere with this design.
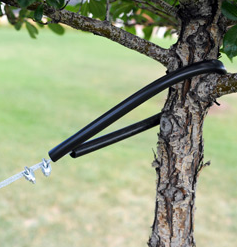
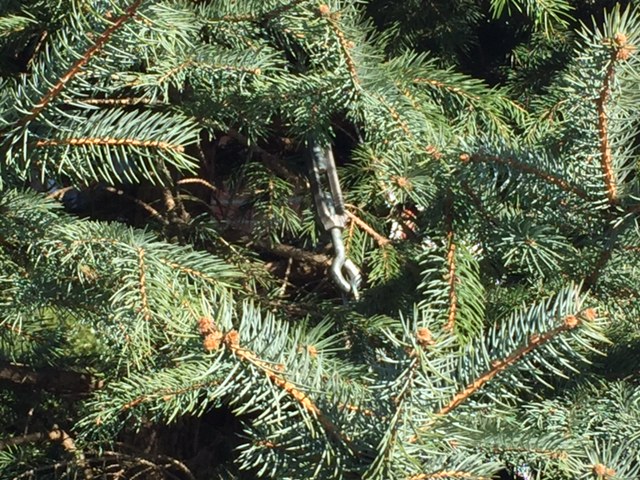
Finally, here’s a shot of the turnbuckle which is used for tension adjustment once the anchors are in place and the wire cables are attached (with the bark-protective collars) to the tree. As you can see, I had to really get in there with my iPhone camera to get this shot; it’s quite naturally hidden.
Landscape Anchors and Guying: Final Considerations…
I’m very happy with all of this. This landscape anchor and guying kit worked on all fronts for me.
It made me pretty sick to my stomach the morning I walked outside to discover that blue spruce leaning as it was, thinking I might lose it. I planted that tree myself when it was about 4-5 feet tall, and I don’t think I’m going to lose it now. Frankly, I wish I had asked Tom (who ended up installing this for me over about 2 hours) to shoot some video of the tree anchoring so I could have included that with this summary, but the photos above still show things quite clearly.
As with all trees that undergo root damage like this, watching it carefully over the coming year will be imperative. It surely has to have more water than it did before, so I’ll be doing deep watering (when it doesn’t rain) almost as if it was a new transplant.
In addition, keeping watch on the anchor installation will be critical too.
The tension may need to be adjusted using the three turnbuckles over the coming months for one thing. In addition, this anchor system cannot be left on the tree forever. How long will I leave it there? I’m not sure yet – this is going to require some ongoing oversight. A year at minimum for sure. But possibly two or even three; it’s a big tree after all!
And what will happen next hurricane season?
Well, that remains to be seen – but why look for more trouble before it comes, right??
Need Professional Help from a Local Contractor?
⦁ Visit Our “Find a Contractor” Page
Related Posts
⦁ Tree Planting 101
⦁ My Wireless Waterproof Doorbell Epiphany
⦁ My Battle with Surface Water Runoff
⦁ Repairing A Backyard Trampoline
⦁ Switching from Mulch to Ground Cover
⦁ Building a Removable Wood Fence Section and Gate

Leave a Reply