Every few days, right around dinnertime – my doorbell was ringing.
And nobody was there.
It wasn’t a repetitive ring, or a ring followed by the sound of laughter and kids running away; it was a very sensible single ring – beckoning for an answer. But nobody.
While I wasn’t really sure what the cause of the problem might be, the consistency of the time of day (dusk) seemed a nice clue. With dropping temperatures, the copper wiring could easily shift a small bit (temperature-related contraction) – perhaps causing a momentary short. Or maybe some condensation formed, hitting both posts of the outside doorbell button.
Or maybe it was a dinnertime ghost, of course.
With the exception of our dog (who this was driving insane), the rest of us were starting to learn to ignore the doorbell. But, it tuned out there were occasionally real people out there – and so it was time to make some time to fix this!
Intermittent Doorbell Ringing: A Video
Below is a video that shows how I addressed this issue – which was resolved with a new doorbell button, a replacement diode (more to come on that below) and some particularly important silicone caulk…
Electronic Door Chimes, Diodes & Foreshadowing
My current doorbell is an electronic door chime system – one that plays various songs, as opposed to a mechanical (and perhaps more conventional) “ding dong” type of system.
House-powered electronic doorbell units, in particular, often require a “diode” be connected between the terminals to continue providing electricity to the circuit after the push-button is released. Have a close look at my electronic door chime manual – and the extra diode the manufacturer provided in the picture below. [Fortunately I kept both of these.]
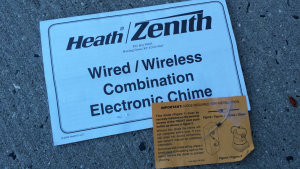
You’ll see this diode used in the replacement effort photos that follow.
In fact, if you’re having a problem similar to this – it’s well-worth reading the little orange insert paper you’ll see in the previous image as well; this was provided directly from my electronic door chime manufacturer, and it shows diode installation on two very common types of doorbell buttons.
A Little More on Diodes
You can think of a diode as the electrical equivalent of a check valve in plumbing.
Diodes allow electrical current to flow in one direction only, and since this is a low voltage but still AC (Alternating Current) system, the diode is quite critical. In fact, in some systems – the diode may even need to be installed in a specific direction as well.
In the image below (which I’ve annotated slightly from the Georgia State University Hyperphysics website), you can see the output of the diode (acting as a half wave rectifier) is only the top portion; the bottom part of the AC voltage from the transformer gets clipped right off.
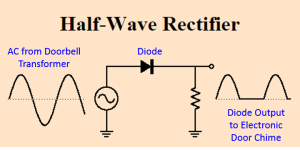
So, the diode is there to ensure some of the electricity is always making it through to the electronic door chime system, whether the button is pushed or not.
The above is included here for information only; it’s not necessary to fix the doorbell.
And Now the Doorbell Repair Foreshadowing
As you’ll soon see, with the two doorbell wires and the diode – it can get somewhat tricky to wire all of this because there will sometimes be only a very small space between the screws inside the doorbell button. Plus, even if you get it right, you still have to stuff everything back onto (and possibly into) the casing by your door. It’s quite easy to cause a short.
If you have an electrical short, you’ll know it because your doorbell will keep ringing.
If you need a diode (for an electronic doorbell unit) and it’s not connected, you’ll know it because the doorbell song will start playing and then quickly stop as soon as the button is released.
The Replacement Doorbell Button
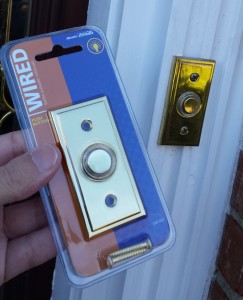
Before I even opened anything up, I picked up a replacement doorbell button – you can see both the original as well as the replacement in the picture below.
I opted to get the exact same button. I didn’t have to do this – but I generally find that sticking with one manufacturer can work out a little better than mixing & matching when possible and practical.
Electronic Door Chime Button Repair
First things first – this is a live electrical system.
It’s a low voltage system, which means it’s not as dangerous as the outlets in your home – but it’s always best to turn off the power (at the circuit breaker for your doorbell transformer) before starting.
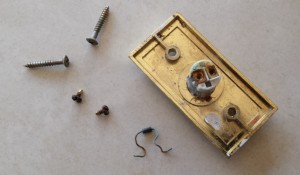
As soon as I remove the doorbell button – signs of corrosion are obvious.
Click on the picture below and take a very close look. Note the red and white wire to the doorbell button posts. Note the diode wired across the posts as well. Then note the rust on the screws, the corrosion on the diode – and even the green flaking where the copper wires were clearly wet and oxidized.
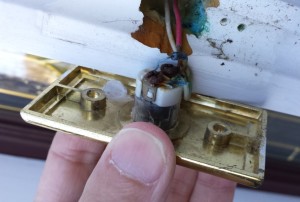
Everything in here needs to be replaced – the button and the diode. And then the button will need to be water sealed to the door casing as well – with a nice silicone caulk.
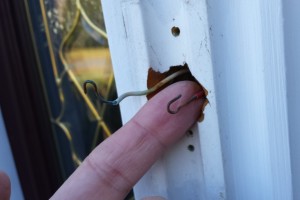
In my case, I had very little wiring to work with – which makes this a bit tricky. The red wire (shown below) barely made it out of the hole in the casing.
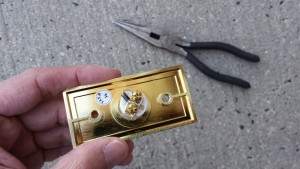
I started by wiring the new diode onto the new doorbell button. The screws are opened nicely (for the red and white wires eventually), but here I used my long nose pliers to connect the diode tightly and carefully across the two posts.
It holds in place securely even without tightening the screws – which I cannot yet do.
Two shots now follow, showing the red and white wires fastened to the doorbell button posts (with the diode undisturbed). This was tricky. Very tight work – and again, if anything touches where it’s not supposed to, you’ll end up with a short. And the doorbell will ring and ring and ring. If you watched the video above, you’ll see that indeed happened!
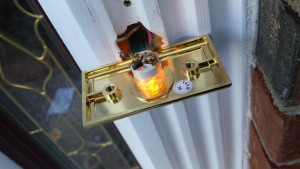
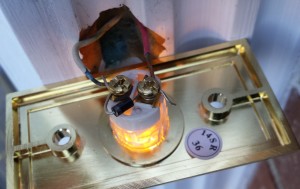
You may have to make some additional room (as I did) within your door casing if your doorbell is inset as mine was. This isn’t the case with all doorbell button types as some are mounted outside of the door casing, but no matter what you have – getting the doorbell button into final position (without again causing a short) is another area where care is required…
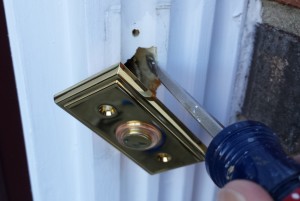
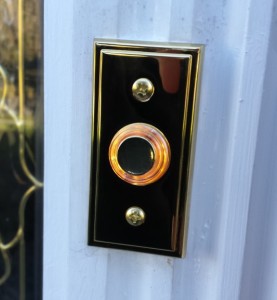
The doorbell button is secured to the casing, and then (extremely important) – I sealed the entire unit to the fluted casing with a silicone sealant. The entry of water into the back portion of the doorbell button is almost surely what caused the corrosion.
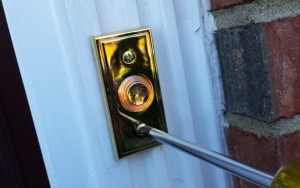
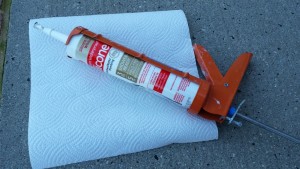
And furthermore, a drop condensation running down one of the channels of the door casing (when temperatures drop at dusk perhaps) could easily have caused a momentary short – causing my phantom dinnertime doorbell ringing.
That’s my theory at least – it seems the most likely cause at the moment.
(Unless, of course… I really do have a dinnertime visitor from the great beyond?)
It’s been three days now, and no more phantom doorbell rings yet!
Need Professional Help From a Local Contractor?
• Visit Our “Find a Contractor” Page
Related Posts
• Troubleshooting and Repairing a Broken Doorbell
• My Battle with Surface Water Runoff
• Installing a Bathroom Ventilation Fan
• Carpet Tiles for a Quick Rehab
• Rehabbing a Redwood Swing Set
• Combat and Clean Mold from your Wood Deck

Thank you for this article! I have the exact same problem and was wondering how to wire the diode. Really appreciate all the photos and the video!
Love it! .. and regards from the ghost of Christmases past!