2024 Update – When we enclosed my yard with a cedar fence 11 years ago, it seemed like a good idea to create a removable section using a single (but ultra-sturdy) removable fence post so we could get a truck inside. You never know when you might need to get back there, right? So I built one. And as it turned out, this came in handy time-and-time again. (At one point, lightning actually struck and destroyed a 45-foot maple tree, and we were able to easily get the equipment back there to remove what was left of the tree before it fell on my house!) But recently, while in the midst of a huge backyard renovation project, this access wasn’t even enough – and everything had to get ripped out.
And so I had the chance to build it again.
My driveway is a bit over 13-feet wide, and it leads right into the backyard. This width is great for pretty much anything (including a cement truck), and while I had previously created a 10-foot access, this time I decided to “go for the gold” and design for the entire driveway width.
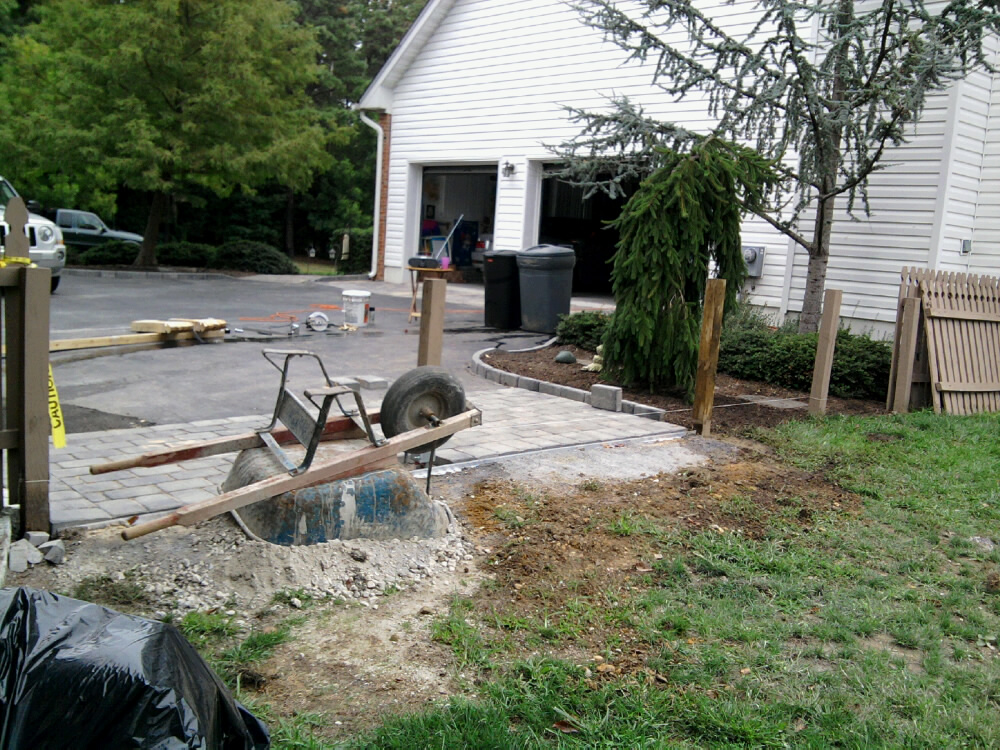
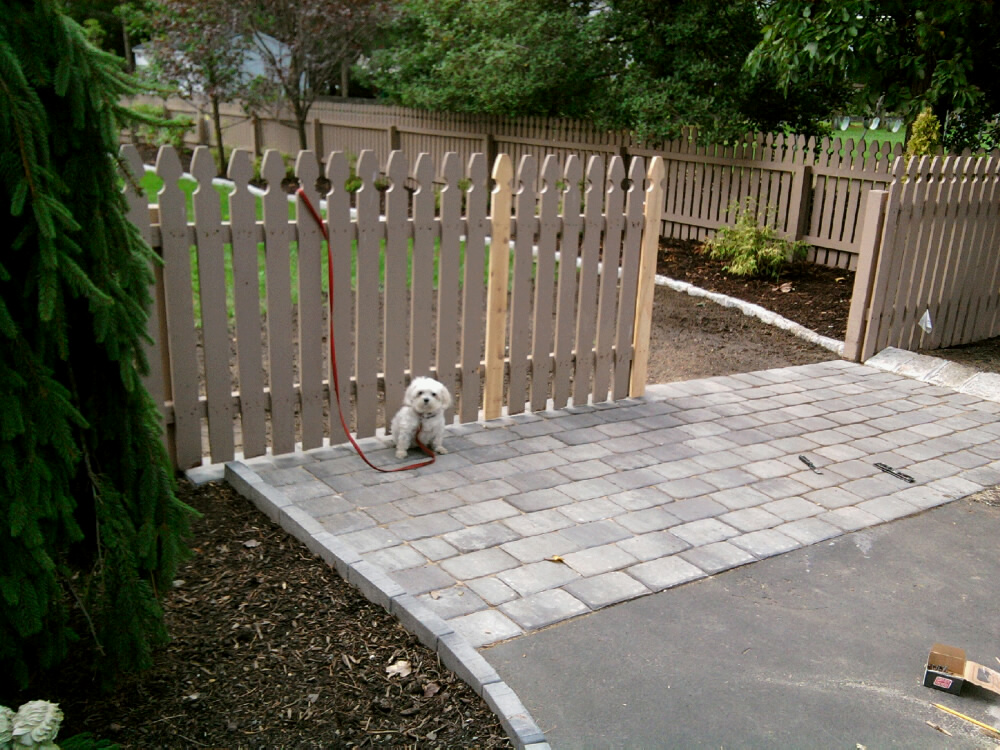
You can see what I had to work with above and below…
My renovation activities destroyed not only my original fence access, but also part of the driveway itself! Trying to salvage what I could, I was working with a mason to add the gray paver apron you can see leading into the yard; the asphalt was completely falling apart up there. I also had the original fencing material. I broke down what I could for reuse, but much of the wood was old and “tired,” breaking as I tried to disassemble the pieces – so I needed to buy some new cedar backers and additional pickets. In the past, I had manufactured some replacement pickets using a band saw, but this time I was working with a fence contractor on another project, and he was most helpful in doing some small-quantity custom picket creation for me.

So, the basic objectives were clear – but, as with most projects, things always seem to get a bit more complex when you start breaking down the details…
Removable Fence Section and Gate Design
The ultimate goal: When everything is assembled, the fence should look perfectly normal. But when I need to open everything up for truck access, it needs to be like a big erector set, easy to break down in about 10 minutes or so.
Part of my 13-foot access was going to be a removable fence section, and the remaining portion would be a large gate for ride-on lawn mower access. To accommodate both of these, I was going to need to create a “removable” fence post in the middle. I’ll show you how I did this below, but for now it’s important to point out that using a removable fence post works fine for a stable section of fence, but it should not be used as a hinge anchor for the gate; it’s not as strong as a regular fence post.
Given the above, a couple of very specific items had to be considered:
1. How to size the gate? My gate was going to need to be oversized for weekly mower access. For me, this meant a minimum of 61 inches – but you have to be careful here. When a wooden gate is open, the opening won’t necessarily be the same as the width of the gate itself. If the gate only swings through 90-degrees (like mine), the resulting opening can be close to 2-inches smaller. (This is due to the width of the backer and picket by the hinge.) I decided to play it conservatively. I designed for a 68-inch gate (physically), and this resulted in a ~66-inch opening when at 90-degrees.
2. Where to hinge the gate? It’s imperative that the gate be hinged on a rock-solid fence post. In addition, the grade must be considered. If you note my driveway above, it pitches downward to the right, and my gate needs to swing outward. If I hinged the gate on the left, it would get stuck on the driveway due to the pitch mid-swing. It needed, therefore, to be hinged on the right.
Taking all of the above together, my design required three items:
- A solid removable fence section on the left – about 90-inches wide, plus or minus
- A removable fence post to the right of the removable fence section
- A 68” gate, hinged on the existing post to the right of the driveway
If you’re reading this and considering doing something similar, the most important point is that it’s *so* important to think this all out in advance. Every design is different. I’m not talking about 5 minutes of thinking – I mean really laying it out on paper and considering the nuances, especially if there’s a gate involved.

Setting the Fence Posts
Aside from renting a power auger (which often requires 2 people to operate), digging fence post holes is no fun at all. If someone finds a way to make this easy, they’ll make lots of money. Since the post to the right of the driveway was already in place, I needed to install only two posts.
The first thing I had to do was run a line (with string or twine) between the existing posts. This was necessary to keep the sections I was about to build in line with the rest of the fence, and so it needed to be tight and tangent to the front of the existing posts. You can see this above and in several of the shots that follow.
Installing the First [Non-Removable] Cedar Fence Post
In the photo above (with me looking very grumpy), I’m digging the first of my two post holes. Measure the height you need above ground (from any existing post) and mark your post hole digger with masking tape on one of the handles so that you’ll know when to stop digging. If you can dig these holes in 10 minutes, you’re very lucky. Normally, you can expect to hit roots, stones and shale. If the ground is very dry, it sometimes helps to add a little water.
Once the hole was finished, I dropped in the post and added concrete mix as initial back-fill. I then threw in rocks and broken bricks – anything I could find to further solidify the post, along with the original dirt I had removed as well. I tend to alternate between layers of concrete, rocks and dirt when installing fence posts, and I wet this all down as I back-fill for maximum packing density. While doing this, though, it’s really important to use a small (torpedo) level to ensure the post remains vertically true – while always watching to you keep the front of the post aligned with the guide line. It sounds like a lot to consider, but you just do it slowly and carefully. Keep concrete away from the top 4-5 inches of the hole if you want grass to eventually grow there.
My Fence Post Installation Video
While not made specifically for this project, the following video shows the installation of a replacement cedar fence post for the same fence – you may find this worth a watch as well if you’ve never installed a fence post before; sometimes it’s best to watch a video of course. I use my sawzall (reciprocating saw) in here as well to trim the post(s) to size before installing, which is something I didn’t explicitly call out above as well.
Now, Installing the REMOVABLE Fence Post
Now that I had the regular post installed, I needed to work on the removable fence post.
I used a “fence post sleeve” to create the base for the removable post. You can see mine on the ground behind me in the photo above.
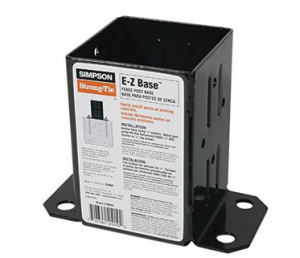
These can be found in the fence section of your hardware store or on Amazon, of course – several options right here. I recommend getting the longest one available for as much strength as possible. The fence post sleeve will be set into the ground like a regular post, but once set – your post will then be installed into the sleeve and secured with a couple of bolts.
(So, while my fence post sleeve will always stay in the ground, the post can be removed afterwards by loosening two bolts: simple and effective.)
QUICK ASIDE: You can also get fence post sleeves that aren’t dug into the ground, but can instead be affixed to concrete or decking. The image below is a link to some options like this on Amazon with more detail and pricing if that’s more aligned with your needs.
For me though? I was digging, of course…
I now set my sleeve in essentially the same way as the first fence post – but I went heavier on the concrete and reinforcement here as there was just less to bite onto. And did I mention to be very careful about being sure to keep the front of the post (now the fence post sleeve) aligned with your guide line as well as vertically true? ;-)

Next, I cut the removable post to the appropriate height an even pre-painted (to keep everything nice and neat), but I wanted to hold off for a day to let the concrete set a bit before taking this too much further.
Once this was more stable – the removable post was bolted into the sleeve, and it was then time to begin construction of the removable fence section.


The Removable Fence Section
This section of cedar fence will be secured to the posts with countersunk lag screws, facilitating easy removal with a socket wrench and deep socket. That’s the essential approach. But first things first – let’s start with the backers…
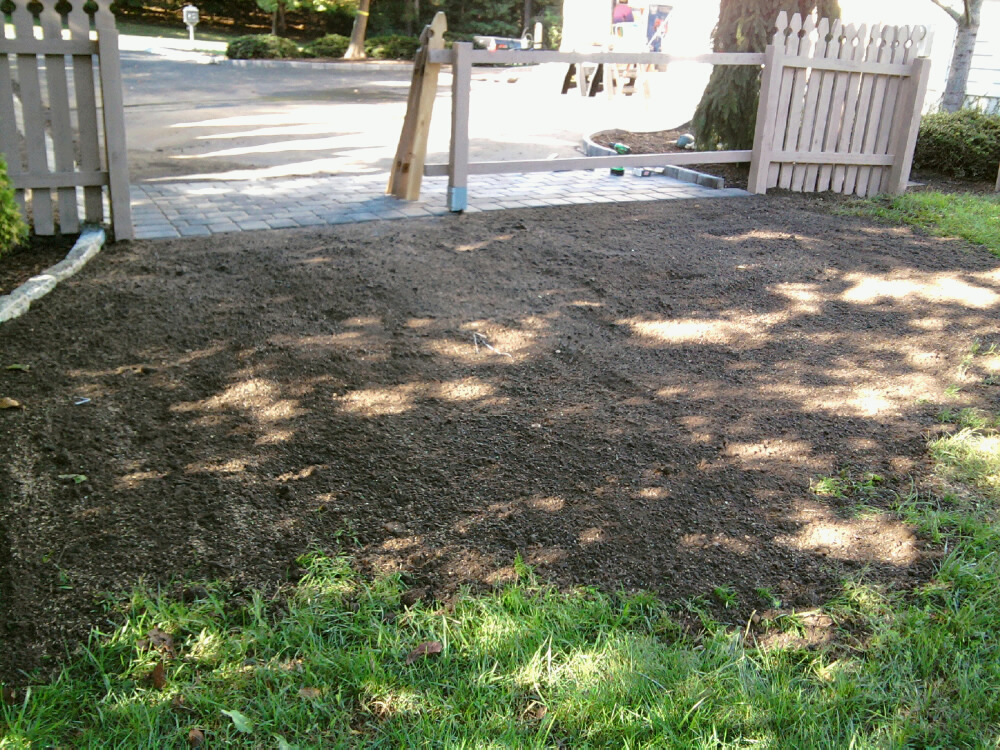
I took two backer sections, salvaged from the original fence, and temporarily nailed them into place. I determined the required overall backer lengths by running these from their desired positions adjacent to the connecting backers on the left – and taking them all the way to “just shy” of the right side of the removable post.
(I went “just shy” to allow for swelling of the wood with humidity and rain. Remember, to the right of the removable post will eventually be a gate that needs to be able to swing freely. We cannot have the backer from the removable gate section pass the right hand edge of the removable post or it will interfere with the gate.)
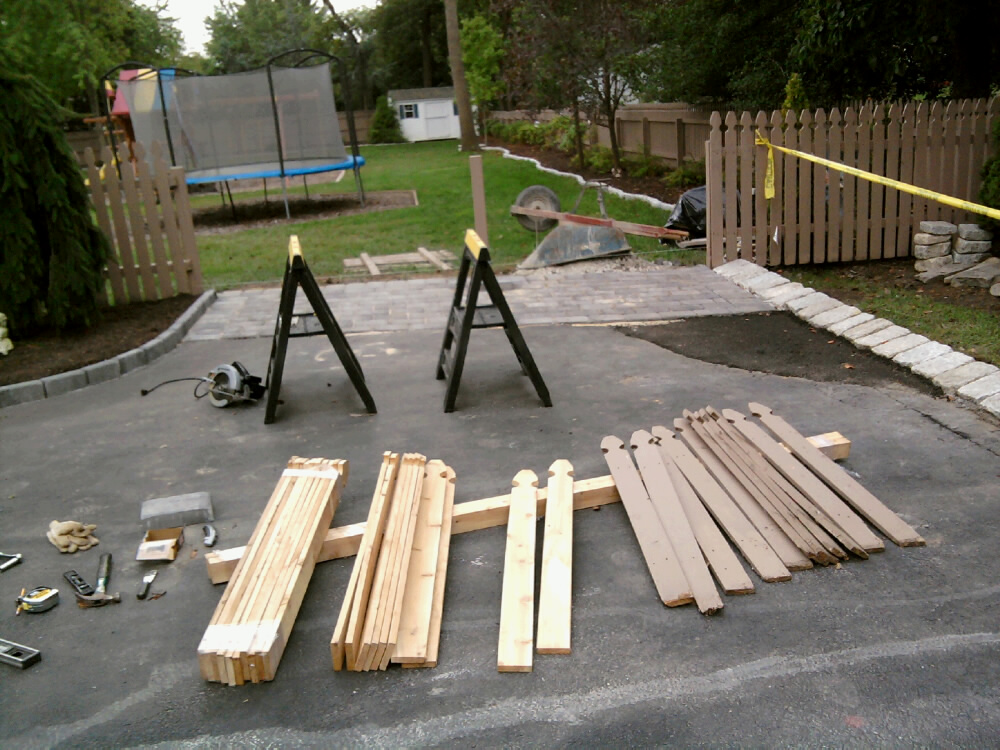
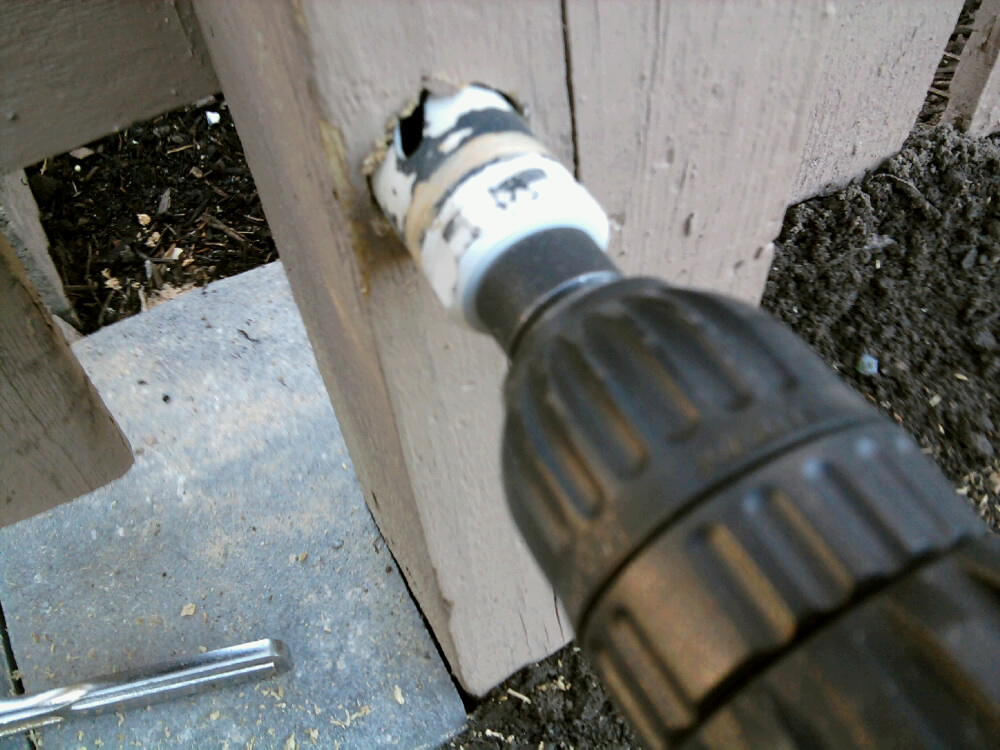
Once the backers were sawed to the correct lengths, I again temporarily nailed them into place – and now began to attach them [for real] via four galvanized lag screws, one at each side of each of the two backers. I started with a 1-inch bore at a depth that would ensure my screw would bite hard into the backer without piercing to the outside. Then I drilled a pilot hole, just a little smaller than lag screw itself – through the post and into the backer. Once this is all done, the lag screw gets installed. And after all four are in place, we now have removable backers.
TOOL NOTE: The sawhorses I use (in the photo above) have been particularly outstanding on multiple projects – simple to use and rock-solid stable. For a few years in my first home, I was actually using a ladder on its side or the tailgate of my truck to secure wood while I was sawing. That’s imprecise and it’s dangerous. If you don’t have a nice set of sawhorses, I definitely recommend you make the investment: you’ll likely have them for decades. I’ve been trying to link to specific tools and supplies throughout this article where it makes sense, and you can view many sawhorse set options here. Each with Amazon user reviews, of course. Once and right.
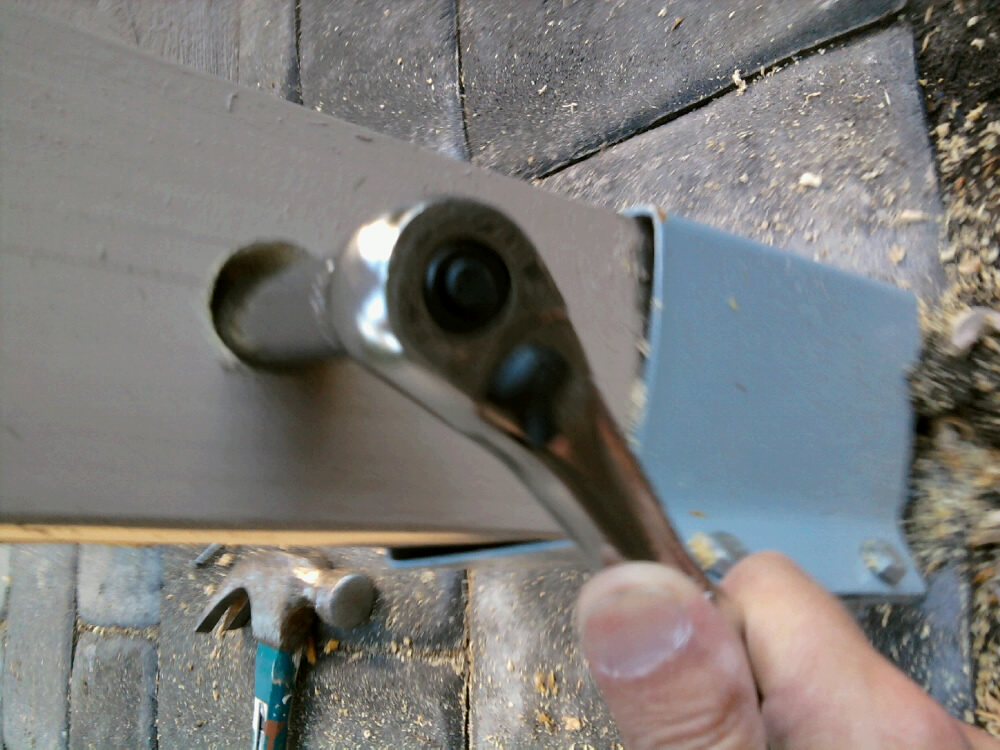
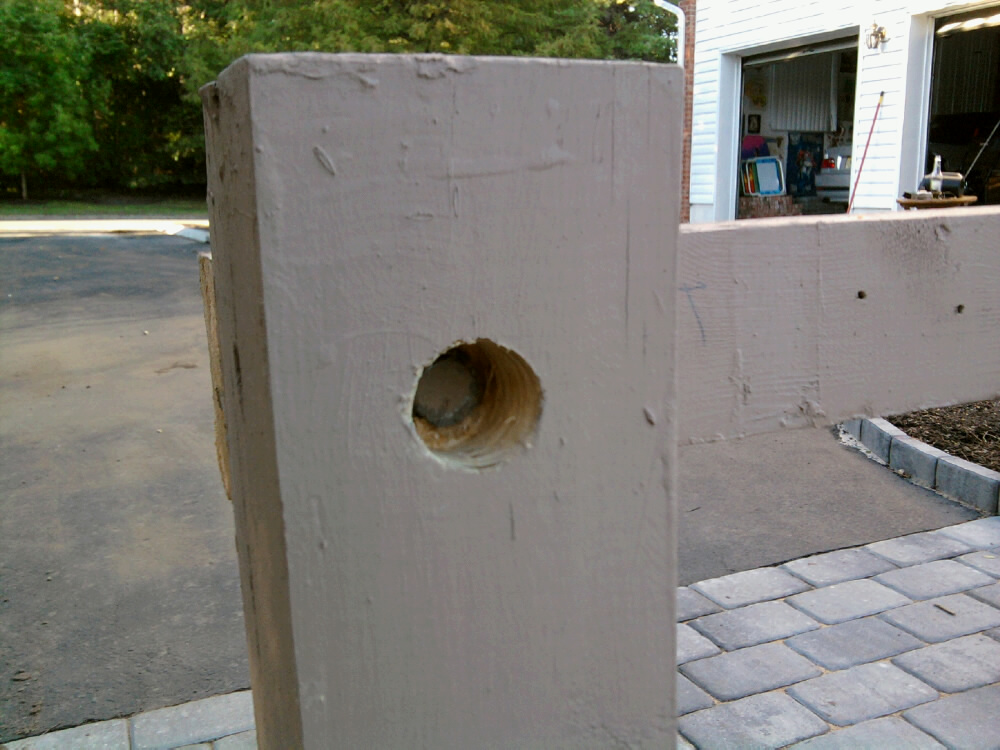
It’s time now to turn the “removable backers” into a removable fence section.
The main trick here has to do with managing the spacing. Fence sections tend to be manufactured in standard lengths, such as 8-feet. This allows for uniform picket spacing. But we now have a section of custom length that surely does not need to accommodate the picket spacing used by the original fence. We’re going to need to get a little creative here.
First, I measured the width of the pickets along with the spacing used on the original fence sections. I had 3.5 inch pickets, each with about 1.5 inches in between. This means the beginning of each new picket started every 5.0 inches.
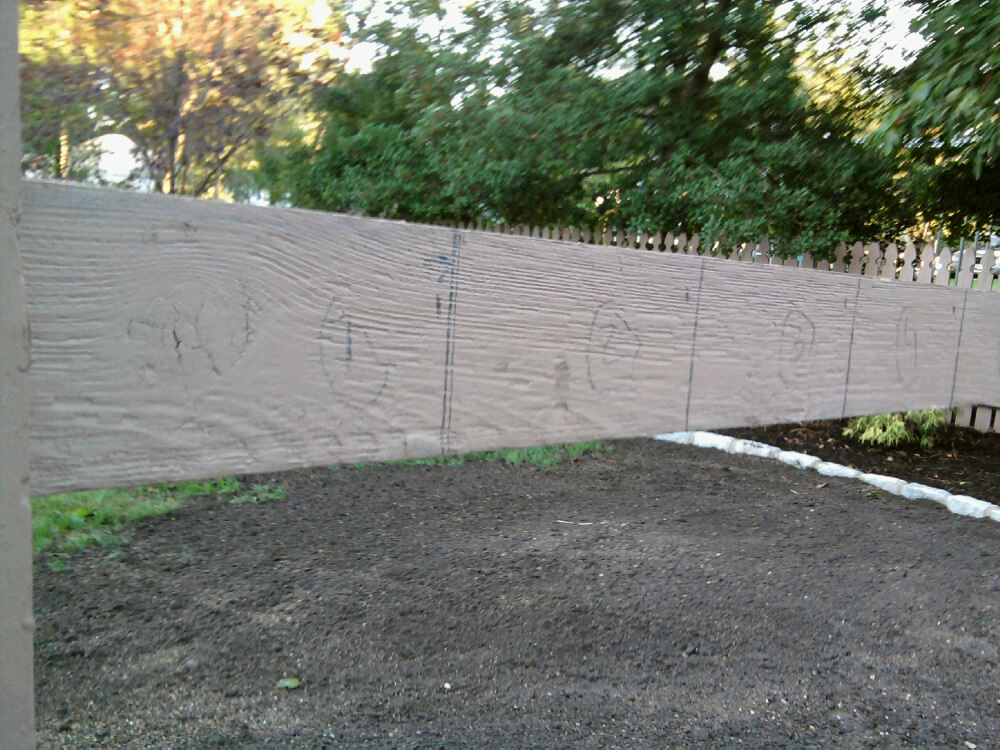
From the beginning of this project, we determined our gate would be 68 inches, and our removable fence section would be 90 inches, plus or minus. We can now measure with confidence the precise length of the removable fence section by simply measuring one of the backers that were just custom-cut into place. Let’s say this was actually 92.25 inches.
Take a close look at the picture above which shows some markings I made on the top removable backer. If our backer was exactly 90 inches, we would need 90/5 = 18 pickets, spaced precisely 1.5 inches apart. That would have been an amazing stroke of luck! And you can see very small vertical markings indicating this ideal.
But alas, we didn’t end up with a 90-inch backer – we ended up with 92.25 inches. That means we need to add a little bit of additional space in between. How much? 2.25 inches divided by 18 pickets gives exactly one-eighth of an inch extra spacing per picket.
I marked this additional spacing with the full vertical lines (drawn with a level), and you can see how the spacing accumulates over each interval.
Once I have this is all marked out, the fun begins because all I have to do is nail pickets to the backers one-by-one, being sure to keep them all vertically true (with my torpedo level again), and ensuring the bottoms of the pickets don’t touch the ground if it can be avoided… they will last longer if they’re not in the water when it rains.
Hey – this is just easy now! Plus, you see progress with every picket you add. And since everything is all marked out, there cannot be any surprises – the homework has been done in advance. All pickets get nailed into place and it ends right where it’s supposed to, completing the removable fence section.
You can see below, I used old wood where I could (the painted pickets), but I had to cut into some of the new material as well. I wanted to save the newer wood for the gate, which would have to handle much more stress on a daily basis.
Building the Wooden Gate
At this point, I had a very well defined opening between two posts – and it measure 68 inches. I cut two backer sections from the new wood at about 67.5 inches because, again, I wanted to leave some possibility for wood swelling. I carefully measured the backer spacing on the existing fence (to the right) and on removable section (to the left) – these two measurements should be pretty close to identical. I then laid my newly-cut “gate backers” on the driveway spaced according to the measurements I just took on each side, and using four new pickets I built what you might consider a “skeleton” of the gate on the driveway.
Do note that I pre-painted some areas where the hinge and latch hardware would eventually be attached. I find it’s always easier to pre-paint these areas than try to paint around the hardware later. This keeps everything nice and clean, and it saves me time as well.
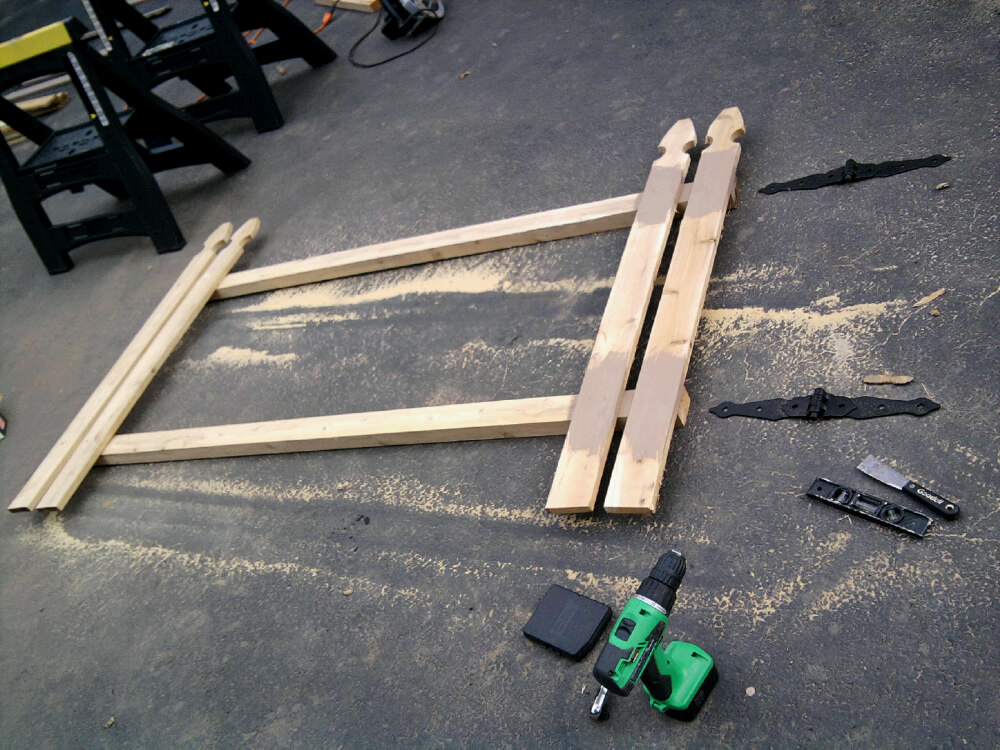
Once I had this gate skeleton, I attached the hinges (with lag screws again), and connected the entire assembly, very carefully, to the fence. I tested the swing. Due to the pitch of the driveway, I found I had to custom cut the bottom of some of the initial pickets to accommodate the swing and also stay about half an inch off the ground.
To continue with the construction, spacing for all remaining pickets needs to be given the same advance planning as done for the removable section and marked out explicitly. Furthermore, every time a new picket is added – it will need to be tested for a clear swing and trimmed at the bottom accordingly.
One thing to keep in mind: Even though this is clearly the home stretch of this project, you cannot rush this part. The gate *really* has to be constructed carefully.
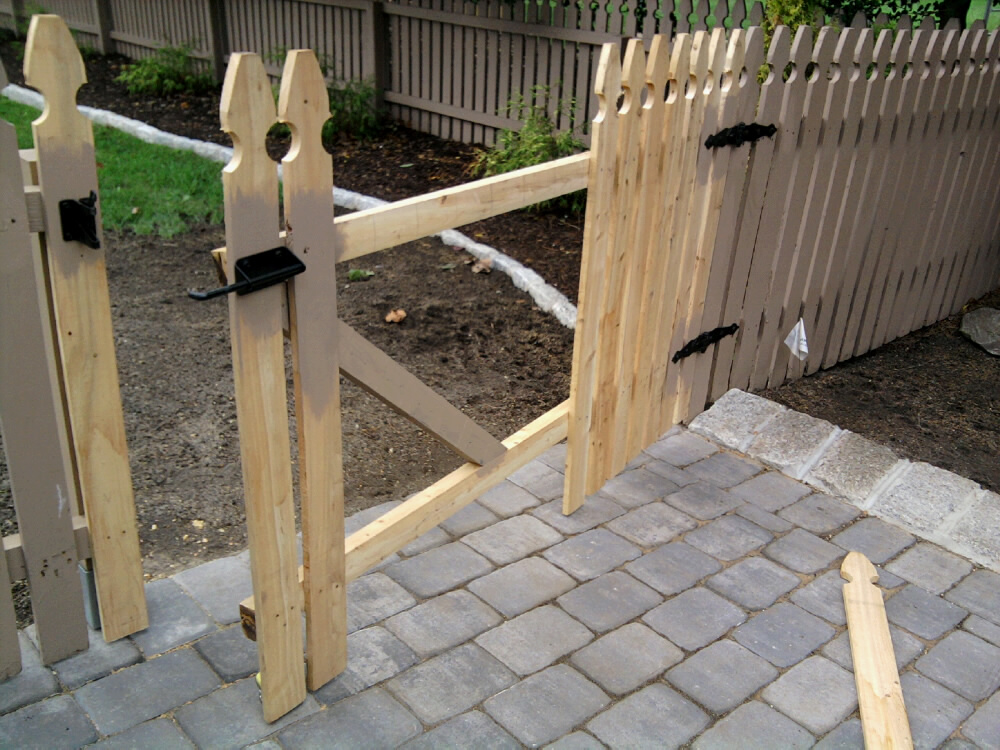
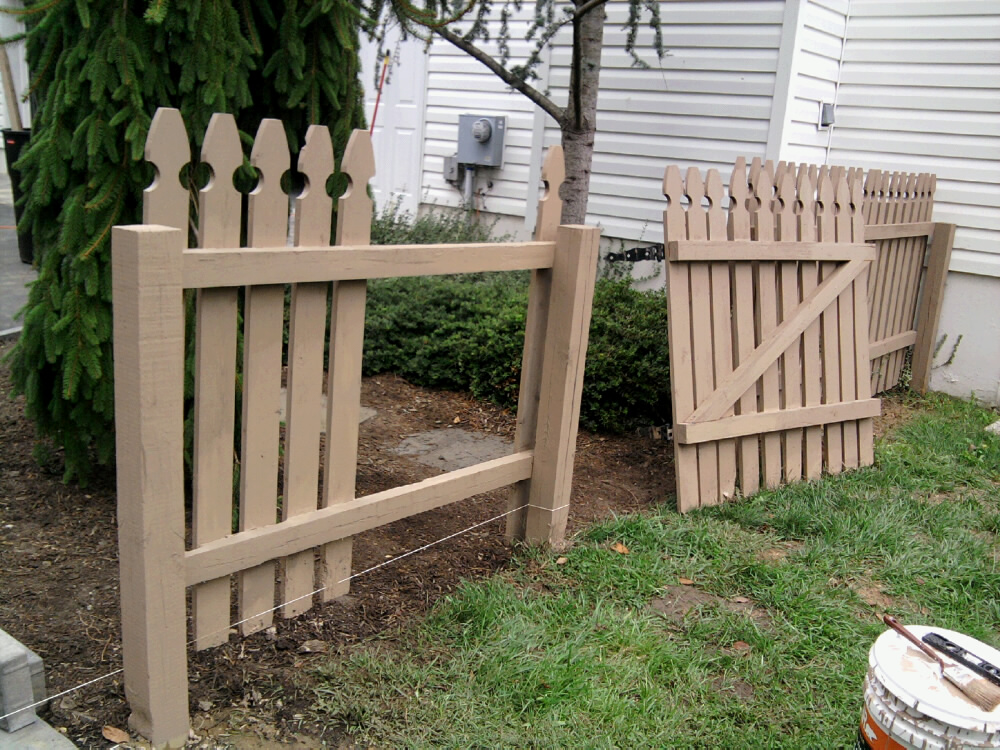
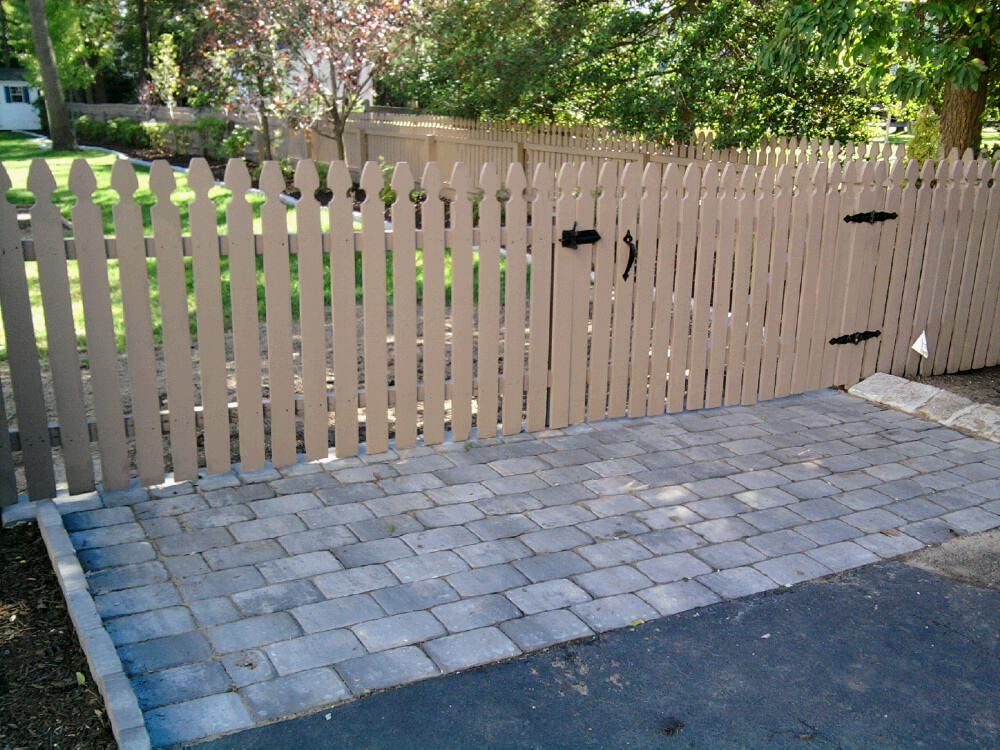
I also added two cross braces for additional support, one of which is clearly shown above. The hardware gets added in total, and when all is done you end up with a finished gate which a nice clearance and an easy swing.
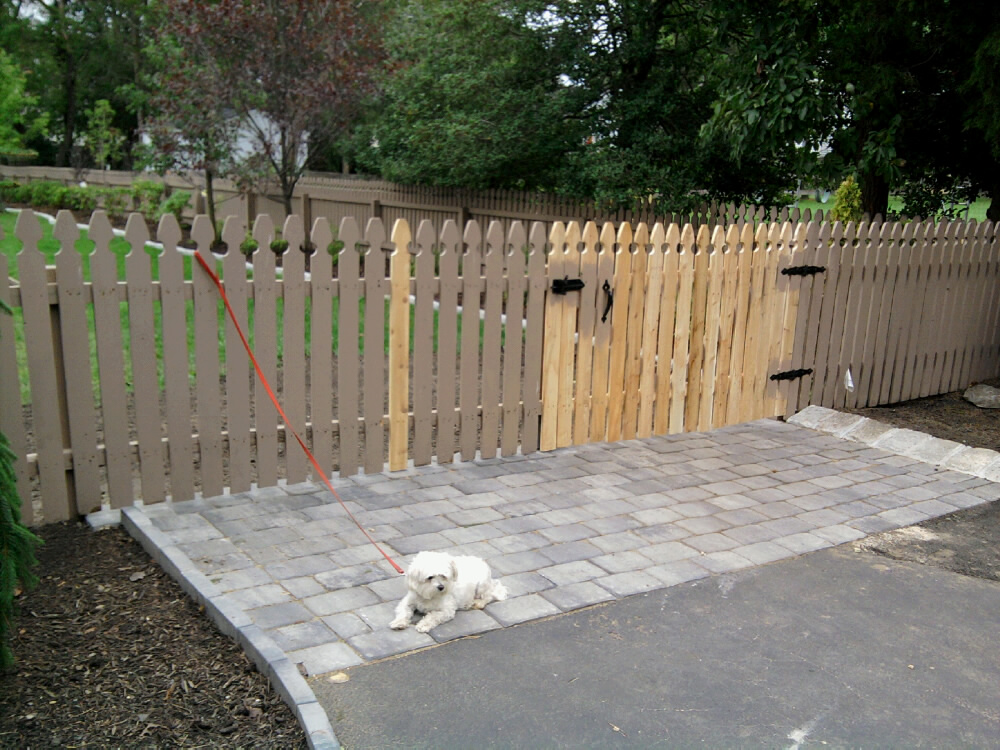
When everything is painted (below) – this really looks simple and clean, as if it took no effort at all.
In reality, this took me the better part of two full days. An entire weekend.
Follow-On Maintenance and Breaking-It-Down
I found (both times I did this) that the gate required a little tuning after a couple of weeks. Since this is large compared to a standard gate, it can (and will) surely sag a little bit after some time. I had to trim a few pickets further on the left side of my gate and even adjust the latch to regain the clean swing.
And as for breaking-this-down (opening it up), it’s a three step 10-minute process:
1. Open the gate
2. Remove the 4 lag screws and detach the removable fence section
3. Loosen the two sleeve bolts and pull out the removable post
You, of course, reverse this little procedure to reassemble it all again.
Just be careful nobody runs over the fence post sleeve, which I can tell you from experience, will indeed be destroyed if it’s hit square-on by a cement truck!
Need Professional Help from a Local Contractor?
Related Posts
- Designing the Perfect Deck
- How to Fix a Door that Won’t Latch
- How to Visualize Deck and Landscape Design Ideas
- 7 Tips for Working with Contractors
- 7 Tips for Maintaining a Redwood Swing Set
- Hall and Stairway Trim Work – Low Maintenance Shadow Boxes
- Trim Work Design Tips: From Casing to Crown Molding

More spring maintenance this week – bringing my cedar fence now to 21 years old. A few pickets need to be created and replaced. That’s easy and mainly for aesthetics, of course. (And always looking for a reason to use my band saw!) 2 Photos just below…
For the first year in a long time – all fence posts were solid, so I [surprisingly] didn’t need to replace any of those. Nice! Both gates needed work, though. Added a section of runner behind the original to fortify the latch on one – leading to the need for much longer lag screws and hole-widening in the metal hardware to accommodate. 2 Photos just below…
And finally – one picket replacement that was more than aesthetic – to fortify the latch on my second gate. As shown below. In total, maybe 3.5 hours work for everything. And, of course, every year this fence is maintained saves a LOT of expense and work for a tear down and/or replacement. So, as I see it, this is all EXCEPTIONALLY worth the time and effort!
Hi Mark, thanks for posting this. I’ve been a fencing professional for over 20 years and sometimes it can be really useful for me to sit back, take off my experienced head and review the different approaches other DIY and fencing professionals approach fencing around perimeters. I found this to be a great approach and I’m going to be borrowing an element or two of your fencing methods :) so thank you for sharing this!
I’ll be honest, I didn’t even know that you could make part of a fence removable. However, I really like the idea, especially if you have a driveway leading up to your fence like you do. Being able to remove part of the fence to allow larger vehicles through would be super convenient. Plus, it looks great as well! Thanks for sharing.
I had this same idea to use a post anchor with concrete, but hadn’t found anyone else doing this until your post here. Everyone used them to make it easier without concrete, but I thought I could get the strength of concrete post support with ease of removal/replacement. If it weren’t so expensive, I thought about doing it for every post to prevent eventual rot and digging up the concrete to replace. For now I’m just going with the ones I want to be able to remove.
Glad to see it works for someone before I did it. I was planning on putting mine flush with the ground to avoid the problem of it sticking up when post is removed. Do you see any problems with this type of setup? Also, do you mind sharing what brand/type of post sleeve/anchor did you use?
Hey Phil – The only concern that comes to mind with putting the collar flush to the ground is maintaining access to the nut you need to loosen to remove the post. Mine is raised, of course, as it sits above pavers as you can see. As for the specifics of the post, I honestly don’t recall any more – but it was a stock item at a large, local hardware store… and I’m sure there’s one right by you as well. What I will say, though, is that I bought (at that time) the heaviest and deepest one they had. I think it was 36″ below ground.
Last year, I had a professional install a wood fence around backyard and the neighbors through a fit like children. In order to keep the peace I sawed off the posts and took down fence. Even after performing this noble deed…the neighbors are still cry babies about everything and I’ve learned their true nature. I want to put the fence back up and I want to reuse the existing concrete base for new post. I can still see two to three inch section of the wood post sticking out of the concrete. How can I reuse what’s currently in the ground? I prefer not to have to pour new concrete because of my back. Any suggestions?
Hi Joseph – Hmm… This is tricky. As much as I’d love to say you can get some type of collar to connect the exposed portion of your existing concrete-set 4×4 post “stubs” to a new post, I really don’t know that will give you enough strength for a new fence installation. It might… but it certainly won’t be as strong as setting new posts. If it were me, I’d set new posts – but this is strictly my opinion, of course. My best suggestion would be to contact a credible fence company and ask their opinion. The very first comment on this article (at the very bottom) is from a fence professional I’ve used multiple times – you might want to try Gene for his opinion as well. I’m sure you can get good advice on the fence situation from him, and if it differs from my thoughts here – would you mind posting what you learn? Best of luck to you!
Oh my goodness, in the second-to-last picture, I don’t know whether to look at your beautiful fence, or that adorable little white furry dog! Lets say that both are pleasant to look at. Honestly, from looking at these pictures, this fence really has come together to transform your yard in an amazing way! I mean, the fence works perfectly with the little brick pavement leading up to the fence too. This whole scene just cohesively works together. I’m trying to harmonize my yard with a fence like this and you gave a perfect example of how it can be done. Thanks so much for sharing such detailed insights and instructions on how to get working on your fence!
It’s time for spring maintenance on the fence once more…
And as we’re currently well-into 2015, this cedar fence is now 16 years old. So, staying on top of everything is critically important to get the most out of the initial investment.
In photo 1 – you can see that the removable wood fence section and gate still are in great shape, though I added a little more reinforcement. (I tightened the gate up with some additional screws for more stability – it’s a big gate.)
The fence, overall, needed some additional general work as well. In photo 2 – the second gate was reinforced (as it pretty-much fell apart over the extensively brutal winter this year), and in Photo 3, we’re now going to need to replace a post or two – as one has rotted out at the bottom.
In the scheme of things, this is only a few hours of work in total – and I feel pretty good about it. The fence is still in very nice shape!
Hello – I am interested in learning more about sleeves and removable posts, because when the post needs to be replaced, it would be great to simply remove it and insert a new post, without digging up the post. However, there is no information about it in the books I have and the internet is sparse.
Do you think it is practical to build an entire fence using sleeves, or post spikes? Are the posts put in a sleeve less secure, do they wobble? Thank you.
This is a great question, and I’m going to give my opinion here – even though it may sound a little bit strong: Personally, I wouldn’t build an entire fence with removable posts. I’m not saying you cannot do it, because I’m certain that you can. But I’d be very concerned with overall strength.
The sleeves I’ve used only secure the post with about ~4 inches of depth. (Even though the sleeve, itself, goes much deeper into the ground.) In contrast, when a post is set in the traditional fashion, it could easily be secured by 2-3 feet of stone, concrete and dirt – and is thus much, much more stable. It’s true that the posts will eventually rot. But as a sample point – the fence I currently have is now approaching 12 years old and it’s huge: about 50 posts. In that time, I’ve had to replace one post.
So – can you do it? Yes. But I think you’ll have much more stability (and likely a longer overall fence life as well) with the more traditional post settings.
If you find out anything else on this (or if anyone reading has more thoughts to share), please do post here. This is really an interesting topic you’ve raised. Thanks and best of luck to you!
Thank you Mark!
The stability makes sense.
I do think removable posts should be covered more in books, one or two removable posts seem to make sense in most situations.
Thanks, Erich
Hi Dan – I used a Behr Solid Color House & Wood stain. It took me three tries to get to that color, which I wanted to come really close to matching the natural wood tone. The specific color must be custom-mixed, and it’s called “Dusky Brown.” Uses tint base No. 20. The “solid color” stain makes everything nice and uniform. I’ve used this on decking as well. Thanks for reading!
just wondering what color paint you used/matched on the fence? it looks great!
thanks
-dan
I like the detailed instructions you have provided. Very informative, and really makes you consider the ramifications of choosing certain lengths before you start the project. I don’t know if this would have been possible with your project, maybe not strong enough for the weight of your removable section, but I have seen gate latches used in the past on all four interior corners of the post. It would take two people to unhinge them, but may cut down on the wear and tear of repeatedly removing the lag bolts. Nice work, overall.
As a fencing professional for more than 37 years, I found this article to be informative & creative. These step-by-step instructions will help any homeowner or contractor create a long-lasting and quality removable fence panel. I look forward to reading the other articles on your site.
Gene Dente
http://www.fencesbydente.com