2024 Update: My home’s HVAC (Heating, Ventilation and Air Conditioning) system died. It was 21 years old.
Replacing your home’s central air conditioning and heating system requires a Local HVAC Professional, of course. Actually, it’s even more likely you’ll have a team of two at your home – and the project will span most of the day. Twenty-one years is a respectable lifespan for an HVAC system, and in the project summary that follows, I’ll showcase the entire replacement with construction photos and a bit of background & commentary to weave things together.
Because, even with a team of professionals, it’s critical to know the major HVAC system components and the basics of the replacement process – to be best prepared for all facets of this project in your own home. (This is an expensive undertaking and your new HVAC system will be with you for many years. So, “once and right” is always the way to go, as I see it!)
One other thing I’ll do during the progression of the project is point out some low-cost additional items that, I think, matter a LOT. And that you can easily do yourself.
Things like:
• Installing inexpensive Water Detectors to have a near-immediate warning of small [water leak] problems before they can become BIG problems: carpet damage, flooring damage, drywall damage, mold growth, etc.
• The true criticality of changing those HVAC Filters every ~3 months.
• Having a Carbon Monoxide Detector near your HVAC system’s gas furnace.
• And I’ll even say a few words about replacing worn-out Floor Registers and Air Vent Covers for a nice aesthetic throughout your home.
This project summary will be in 2 Parts, and where I can – I’ll include highly rated Amazon links to the DIY items, as I just did above. Several will be to the specific items I’ve used myself.
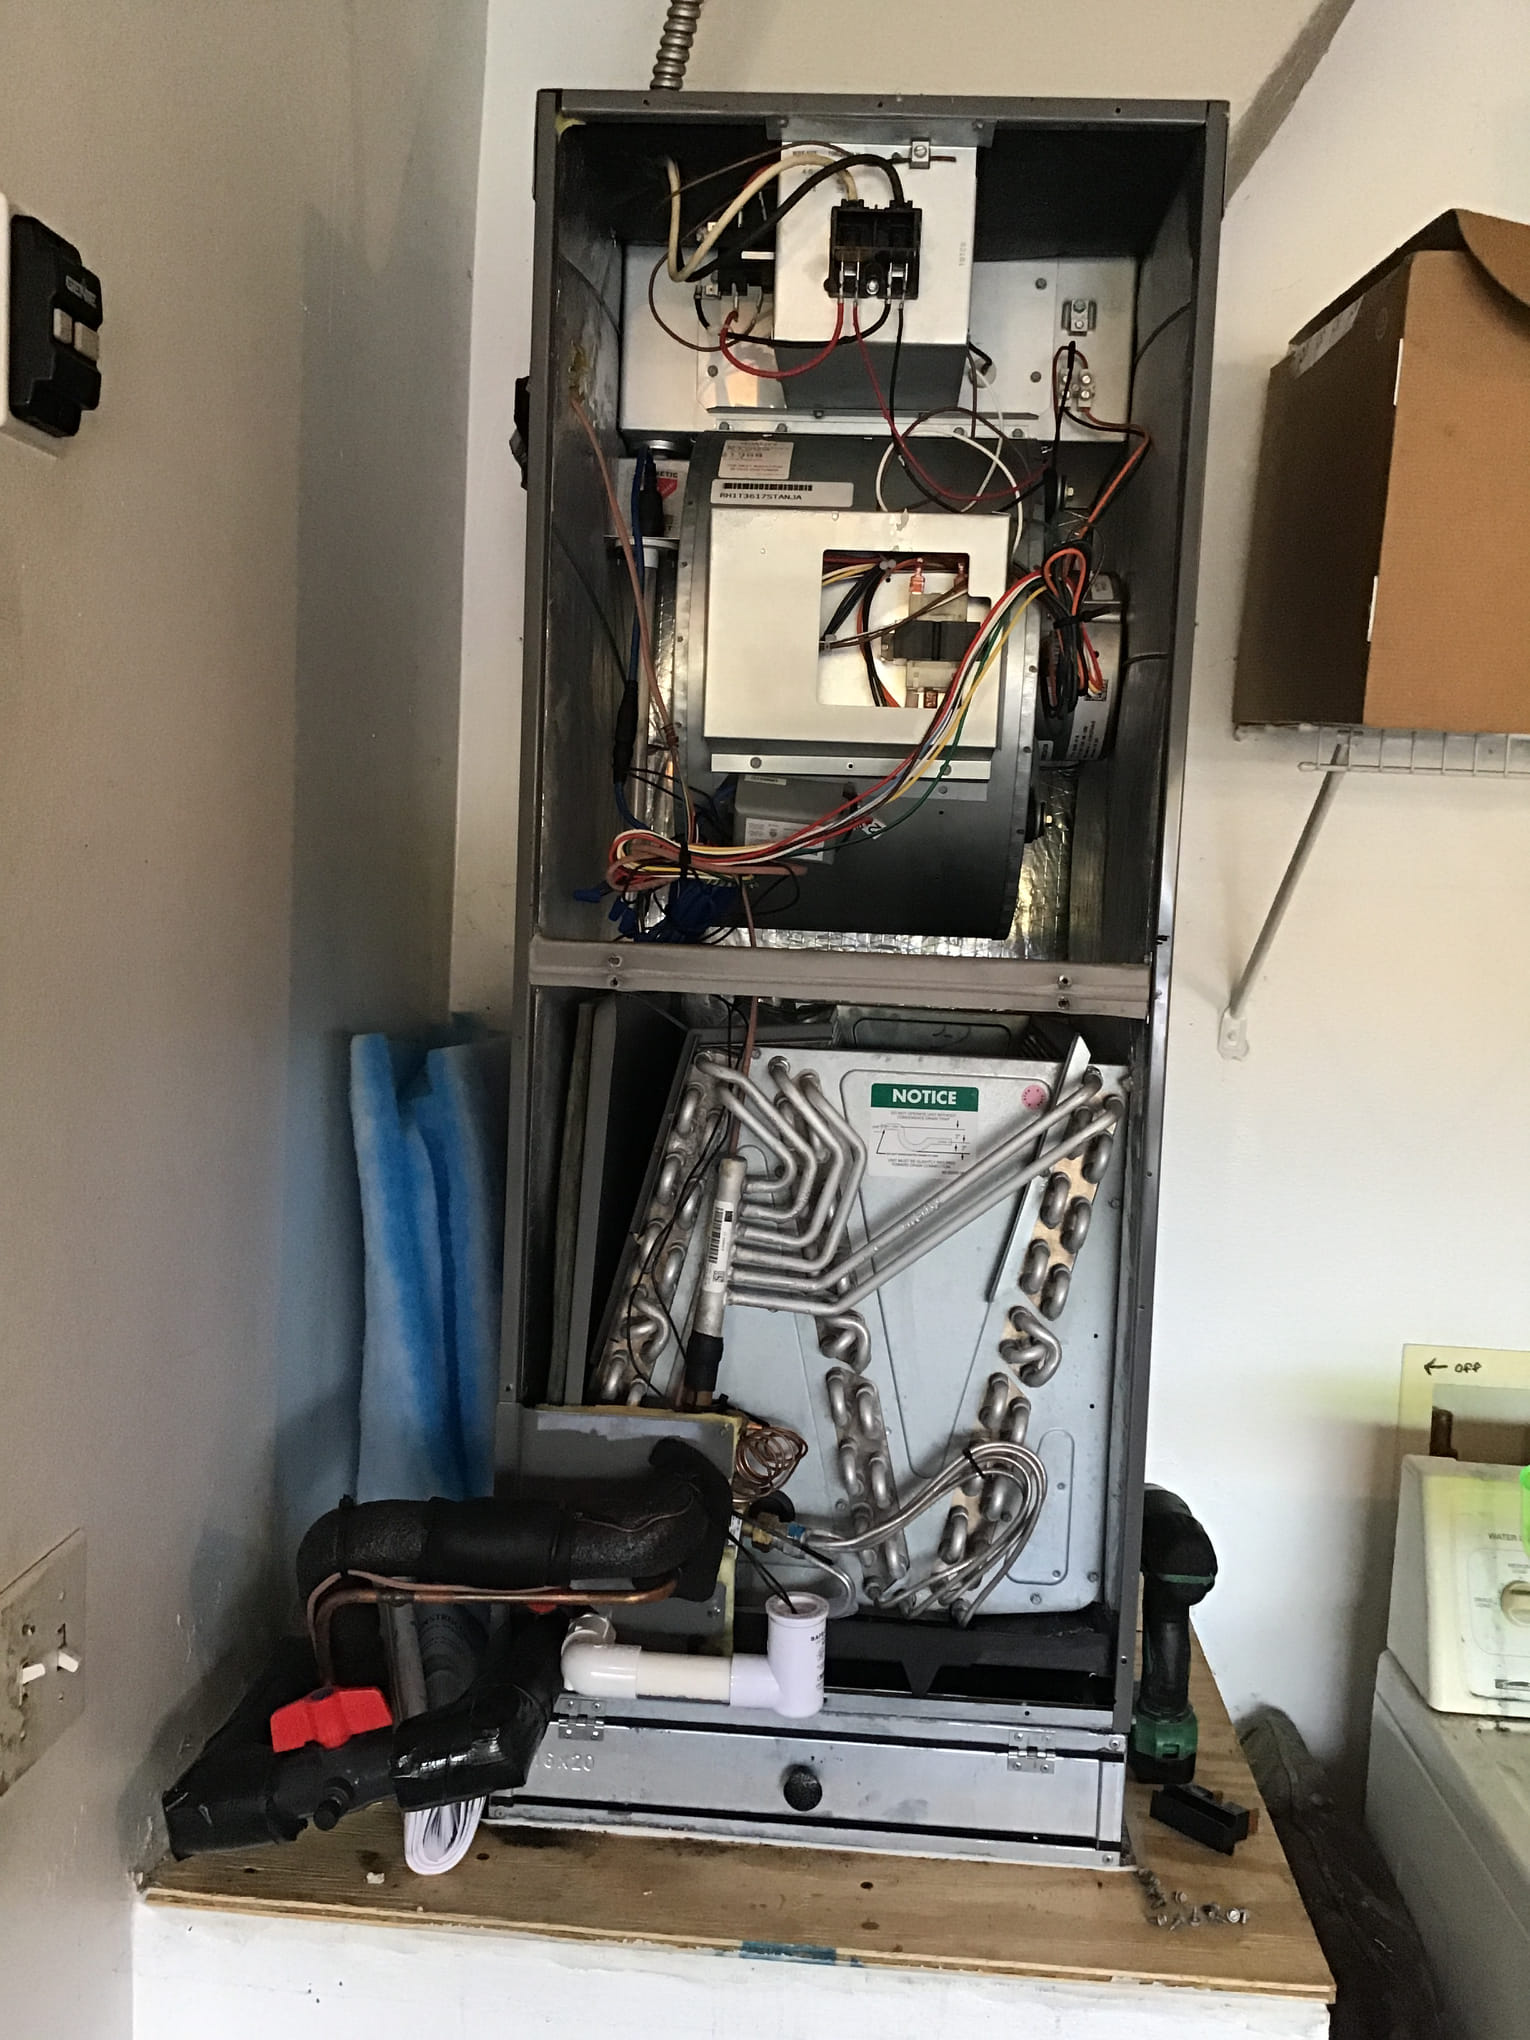
This first part will cover the basic HVAC components and the death & removal of my system…
Your HVAC System: The Key Pieces
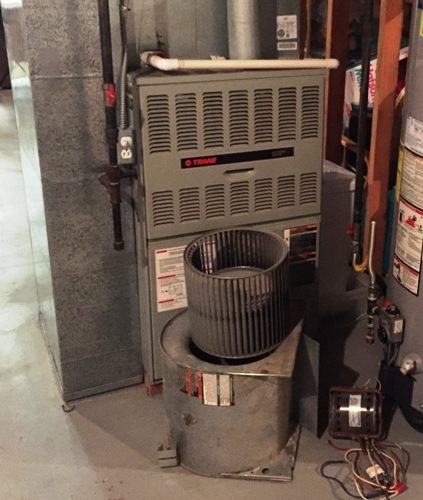
In the very first photo above, what you see is the blower motor removed from my HVAC’s Air Handler. Jargon already, I know. This won’t be a technical summary – but let me share the basic system components and the essence of what they do, with the help of some personal photos that I’ll annotate.
It’s best you have a basic understand of each of these when dealing with your HVAC Contractor.
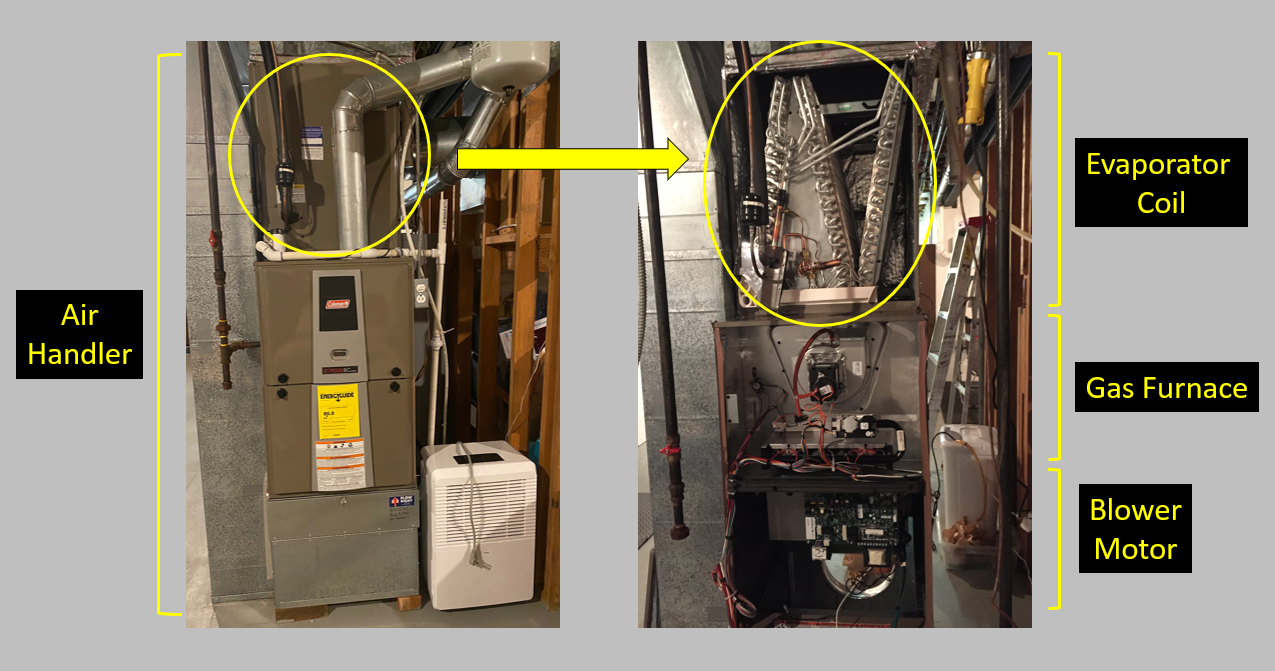
The shot above is my basement Air Handler – and I’m foreshadowing a bit, as this is the new one. On the left, it’s closed. (It’s fully assembled.) On the right though, I’m calling out three major components within: 1) The Evaporator Coil, 2) The Gas Furnace and 3) the Blower Motor.
The blower motor is what forces air through the system – for both heating and cooling.
And this was what died hard on me – the blower wheel, actually, mechanically separated from the system. Seized up. While my wife and I were hundreds of miles away, we received a panicked phone call from our daughter about the terrible sounds coming from the basement. It wasn’t fun. Plus, it also happened to be the hottest month of the summer when this crashed. We had her power down the system in total and told her where to find a fan.
The Gas Furnace is for heating, of course. Some HVAC systems may not have a gas furnace, but alternatively a Heat Strip (close-up picture at Amazon link), which is electric.
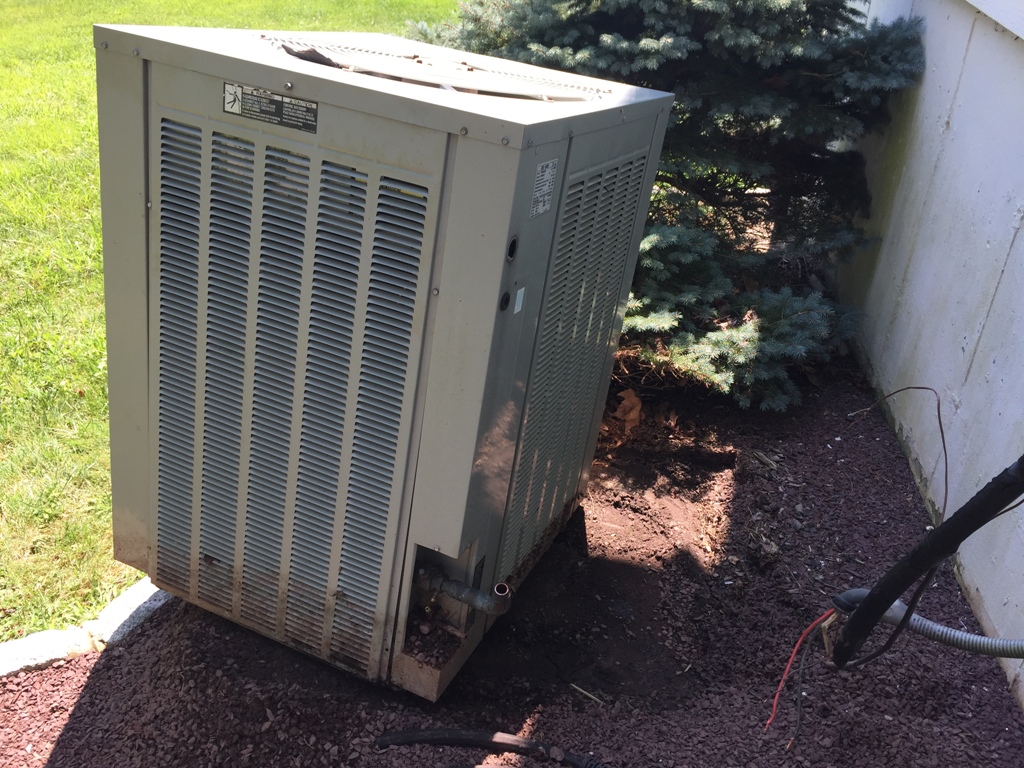
The Evaporator Coil is a critical element of your Central AC – used together with a Condenser Coil and Compressor. While the Evaporator Coil resides in the Air Handler (inside the house), the Condenser Coil and Compressor are both outside – in what’s generally called the “Condenser Unit” as depicted in my next annotated photo…
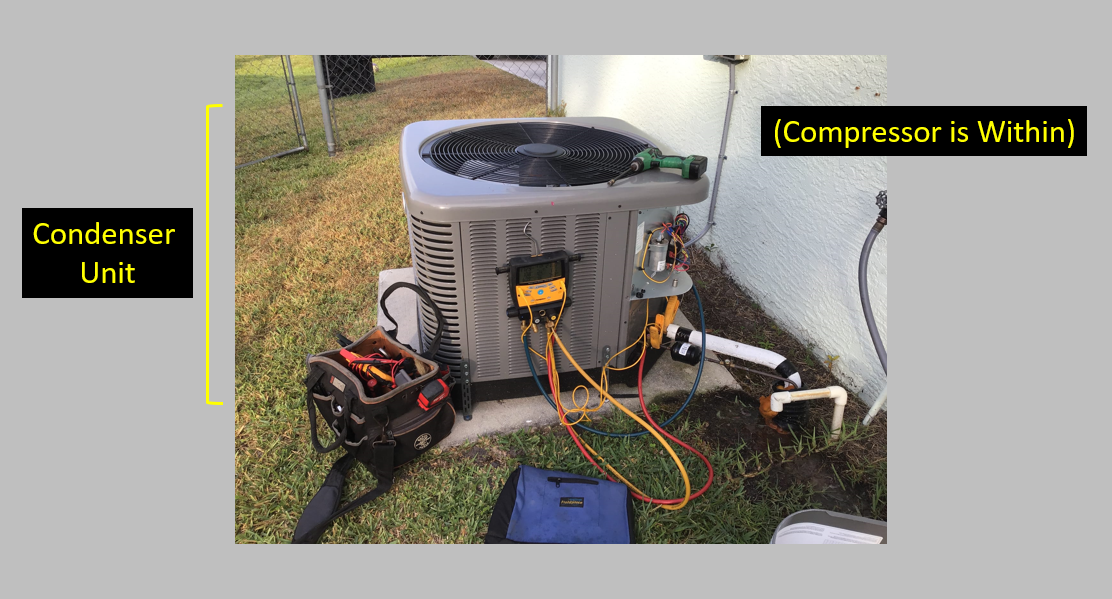
So, in summary, the Evaporator Coil (inside your house) works with the Condenser Coil and Compressor (both outside your house in the “Condenser Unit”) for cooling your home. The Gas Furnace or Heat Strip (inside) are for heating your home. And the blower motor is used for circulating air within your home – for both cooling and heating.
Removing my HVAC System
While it’s generally possible to replace pieces of a complex system to extend its life, sometimes you need to step back and consider a full replacement. And at 21 years of service, coupled with advances in heating/cooling efficiencies with the newer systems – this was the decision I made: full replacement.
And this is surely part of the discussion you’ll want to have with your HVAC Professional.
Air Handler, Condensate Pump & Central Humidifier
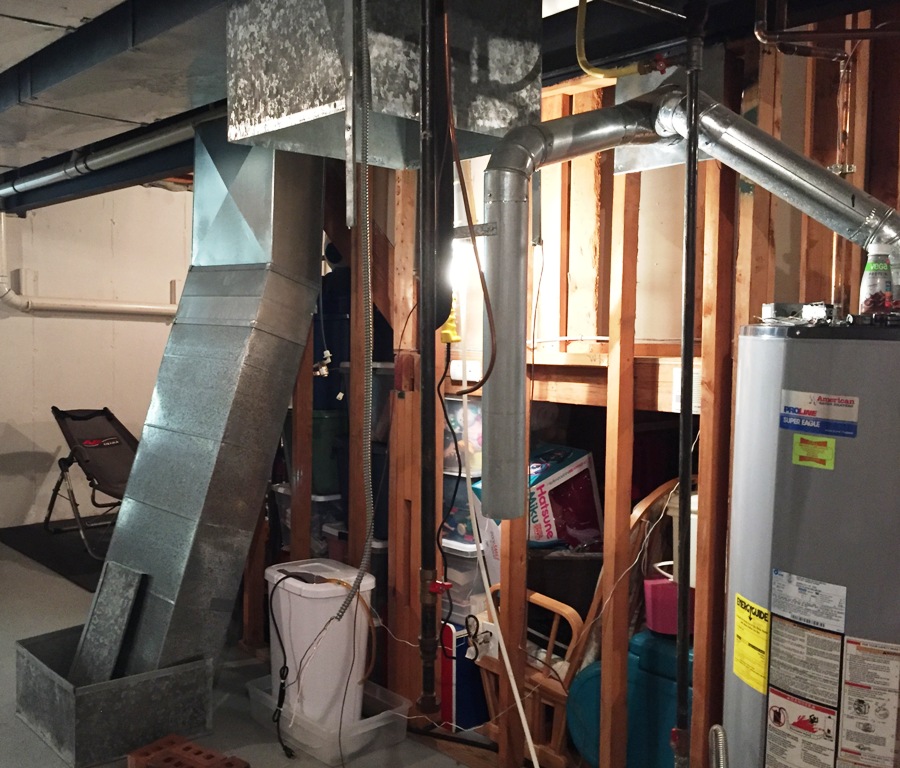
The Air Handler gets dismantled first. In the next photo, though, note the Central Humidifier installed into the duct work – and also the small white basin to the bottom left…
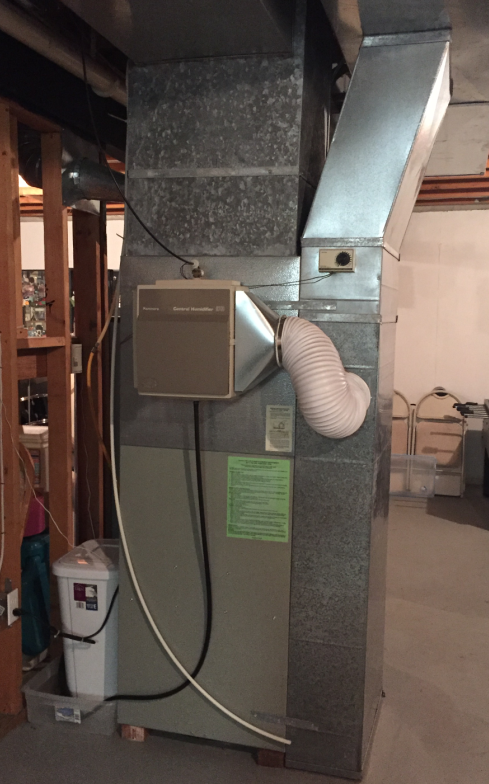
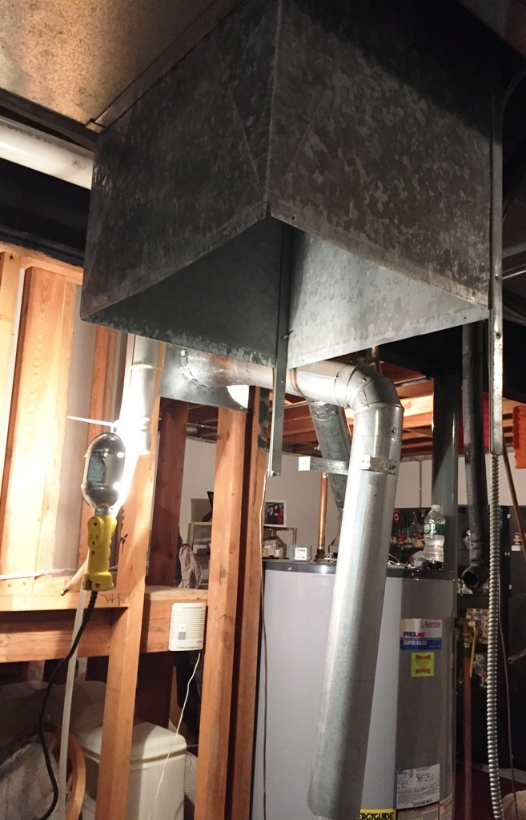
I installed a Central Humidifier (shown more clearly below) when we first moved into this house, as we found the air to be too dry during the winter months. It worked great for us, but we don’t use it anymore, and so I’m just going to trash it with the remainder of the old HVAC system.
But if you have something comparable installed, be sure to make it clear to your HVAC installer before they begin – that you’ll want to transfer it to the new system.
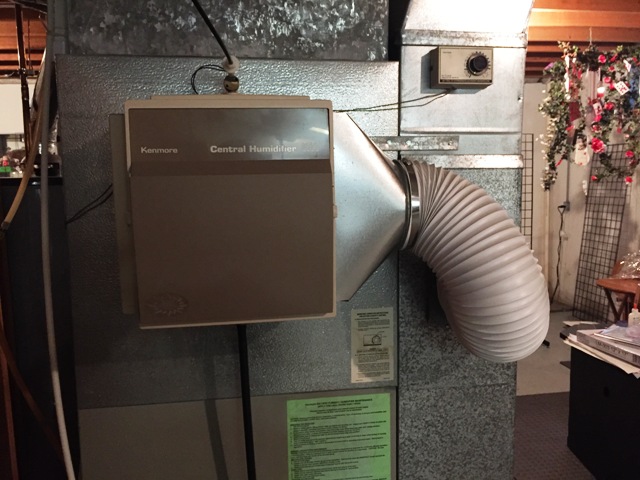
Installing my Central Humidifier required not only the physical connections to the system that you can see, but I also had to interface with the wiring in the furnace & blower motor and tap into my plumbing for a water supply as well.
So, it’s more complex than it may appear.
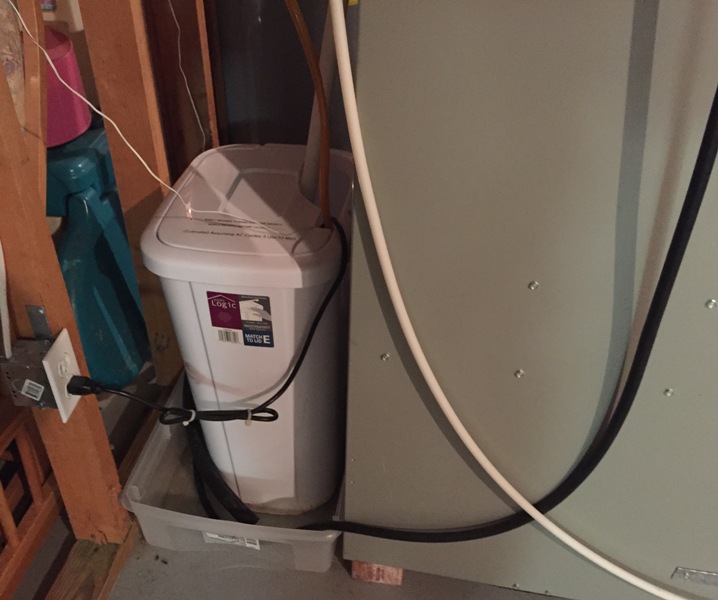
And the small white basin above… is for what, exactly?
I don’t have a passive drain in my house for liquid water that builds up from air conditioning operations, unfortunately. (Water that’s condensed from vapor via the process of cooling the indoor humid air.)
So, I need to use a pump to catch this water – and get it safely outside.
This pump is called a Condensate Pump and it’s pictured at the bottom of that white basin below.
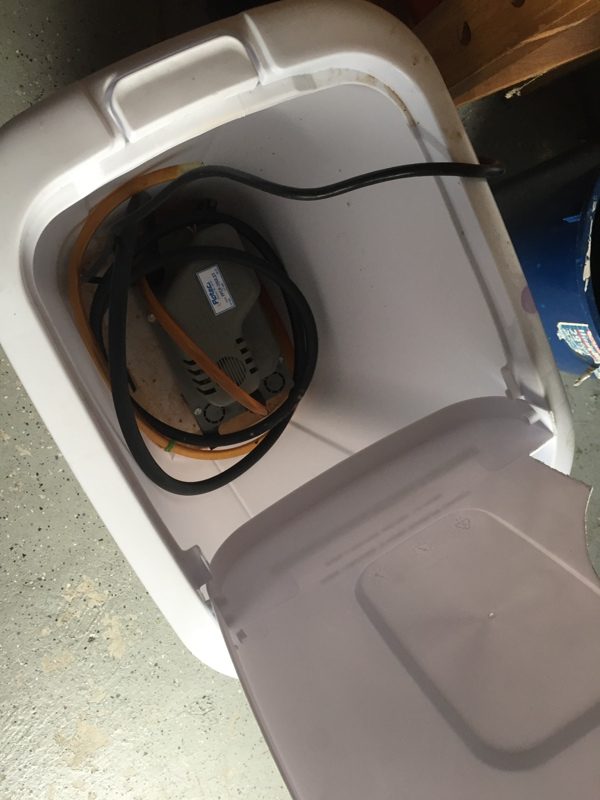
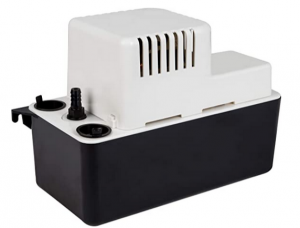
Why not just put this pump on the floor, you ask?
Because it will one-day fail. It simply – will. As all things do. And when it fails… I want something in place to catch the overflow (the white plastic basin), and I also want to know about that failure IMMEDIATELY.
Not Fun Real-Life Short Story: I once had such a failure that I didn’t know about – causing water to slowly seep under a laminate floor for weeks in another house. This not only destroyed the floor, but also caused mold growth in the floor and adjacent walls. This turned into a multi-thousand-dollar mold remediation and reconstruction effort that I will never have happen again!
So, a cheap plastic basin from Walmart or Target or Amazon. Here’s one. I cut it up a bit at the top, as you can see in the following photo. But it has one purpose: keep water that’s leaking (or overflowing from a dead Condensate Pump), and that I don’t yet know about – off of my floor and away from my walls.
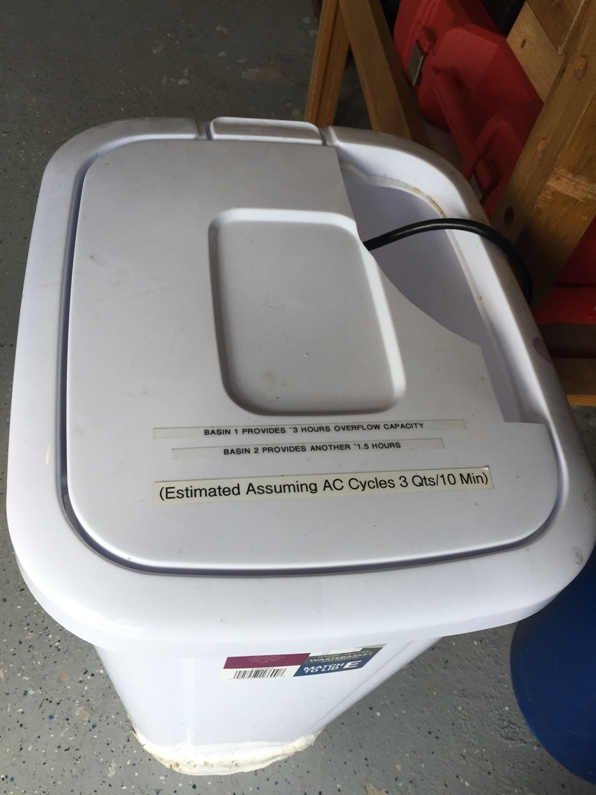
Is this basin going to be used with the new Condensate Pump with my brand-new HVAC system?
Most definitely.
Water Detectors, Kill Switches & Carbon Monoxide Detectors
Having read the above, you’ll understand why I feel that inexpensive Water Detectors are also an absolute must-have. I use two by the output of my HVAC’s water line, feeding into my Condensate Pump – and one of these has its sensor sitting in the very bottom of that white basin.
You can use these water detectors by basement windows, by your washing machine, etc. Anywhere you think there may be a risk of water entry and damage. They’re wonderful.
(Well, until someone’s doing laundry at 1AM and sets one off moving drippy clothes into the downstairs dryer… or when you get home from work at 6PM, to the sound of the basement water detector beeping, and your 14-year-old casually says, “Yeah… the basement’s been beeping since I got home from school, Dad.” Ugh… Really??)
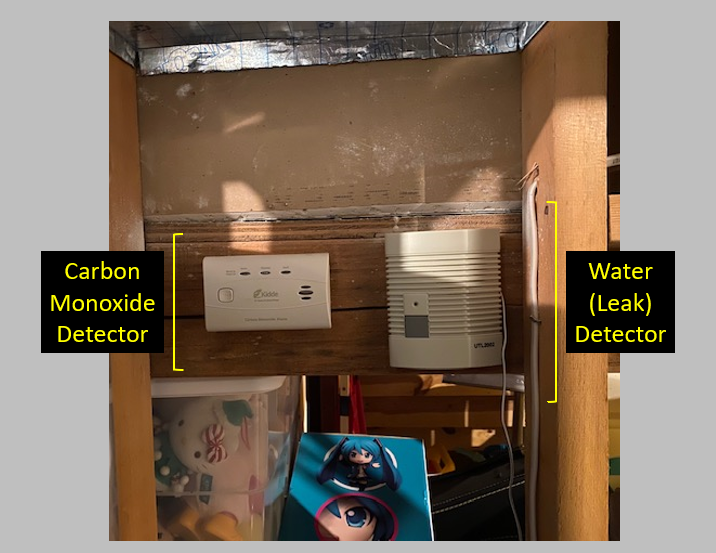
The above shot focuses on one of my two Condensate Pump [area] Water Detectors that I bought from Amazon. They’re powered by a 9-Volt battery that I replace every year or so, and they have a test button as you can see. Low-tech, cheap and perfectly functional.
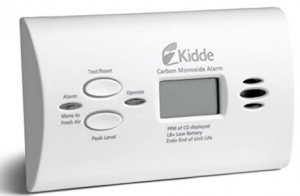
The other item in that photo above is my Carbon Monoxide detector. In my house, I have one mounted by the gas furnace (by the Air Handler) and another upstairs by the bedrooms. It goes without saying that everyone needs these if your burning fuel in your home – as gas furnace does for our project here.
I had to call 911 years ago, when one of these went off in a previous house in the middle of the night; it was pretty scary. We had just brought our new-born home from the hospital a few weeks prior. The photo just below is an Amazon link to several options. Please be sure you have these in your home if you need them…
And one last consideration before we move onto the next topic: Are there “Kill Switches” that can be installed within your Air Handler to detect water leaks and automatically shut down your Central Air Conditioning?
There are, yes.
You need to ask your HVAC Professional about this, though – as, in my experience, this is not a default capability you can expect.
I once bought one separately and had it installed. Here’s an example HVAC (water detection) Kill Switch, but again – this needs to be wired into your Air Handler. The installation may not be trivial. And once it gets set off, it will need to be reset before you can use your Central Air Conditioning once more.
The Evaporator Coil & Blower Motor
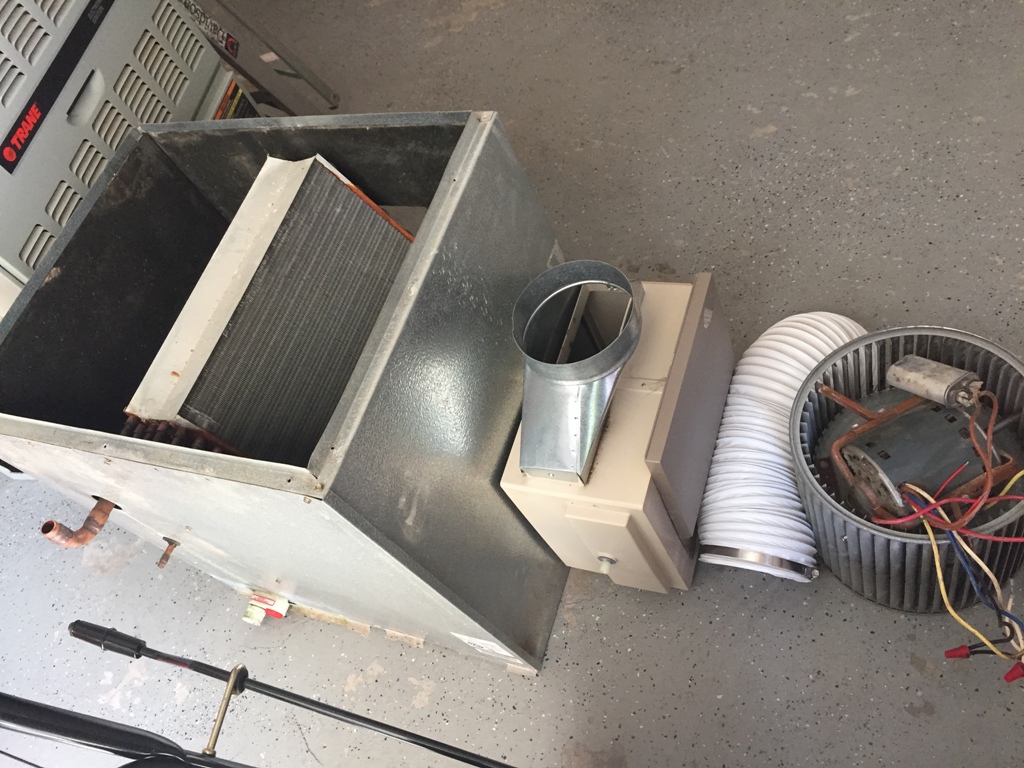
Both removed – as you can see in the following 2 photos, with the Evaporator Coil first right here…
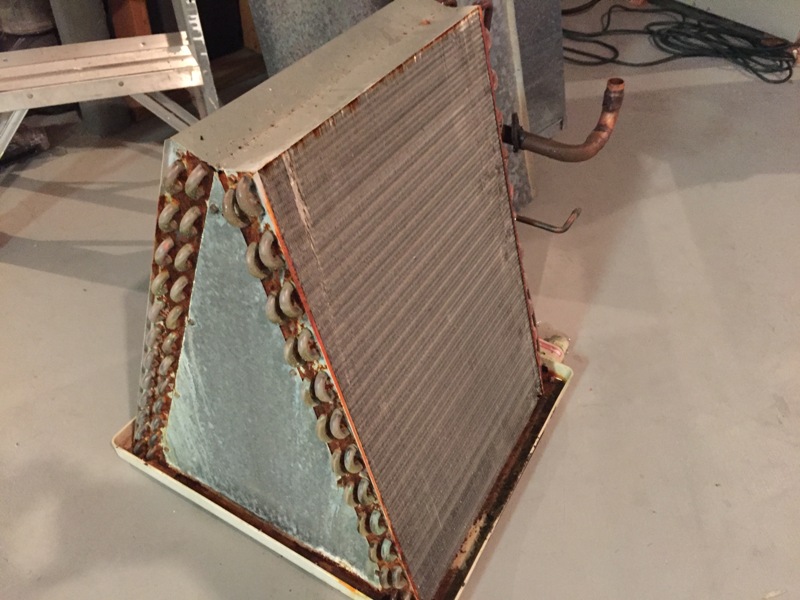
There’s a nice article on Evaporator Coil maintenance on this site that’s well-worth a read. You can clearly see signs of corrosion on my 21-year-old coil above, but it looks pretty decently clean, frankly. And this is very important for achieving the best indoor air quality for your home.
How dirty can an Evaporator Coil get without proper maintenance?
Have at least a skim of the article linked above. You’ll see in ~10 seconds.
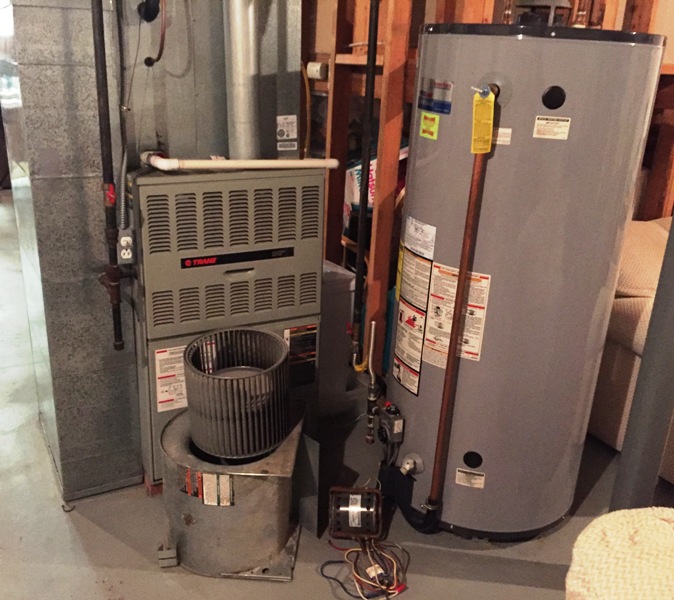
In the next two shots, the entire Air Handler is gone – leaving a gaping hole into the duct work of my basement. It’s quite safe to say, I’m totally out of “HVAC commission” right now…
The Condenser Unit
Now we move outside, and you can see my Condenser Unit prepped for the hand truck that’s coming to move it to the “garbage area” as I was taking this photo…
HVAC Staging [Garbage] Area: My Garage
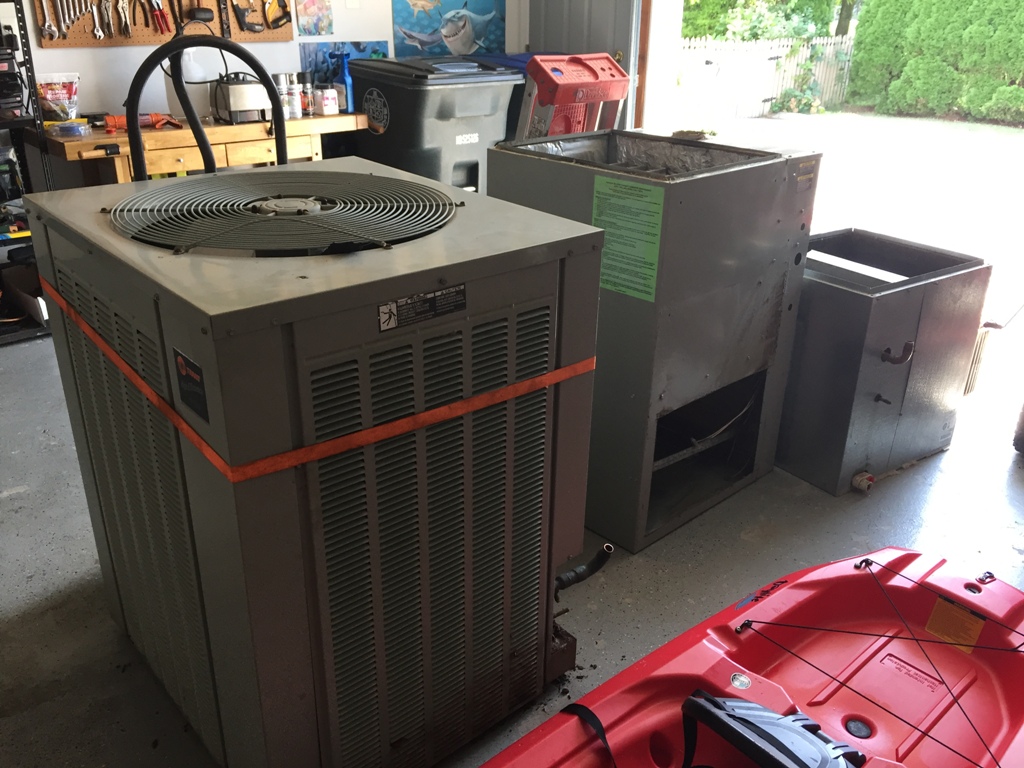
Another two photos below. My garage was turned into a staging area for the garbage (much of which can be recycled), as you can see. But also, in my garage, is the new equipment to be installed!
Only shots of the garbage, today though…
Floor Registers and Air Vent Covers
I’m not going to say much about these items here; we’ll keep these for next time.
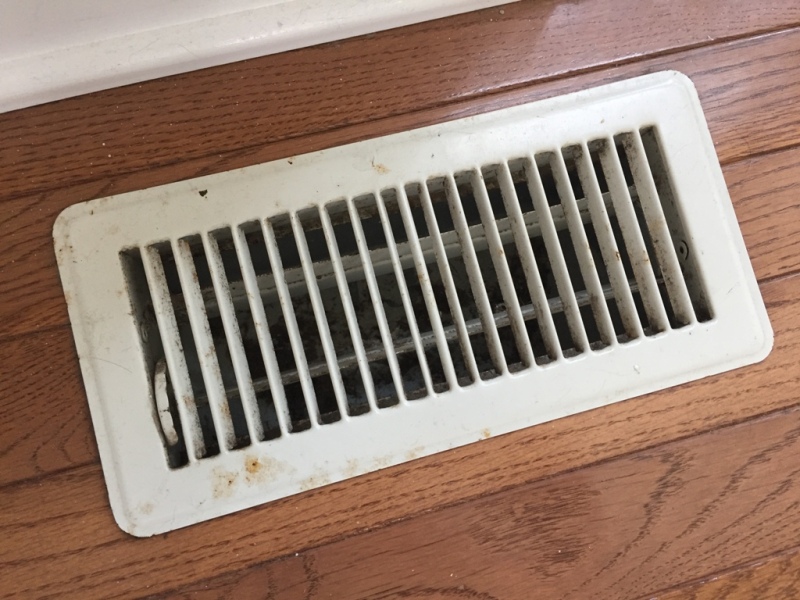
But for now, have a quick walk through your house. Do any of your floor registers (one last photo below) look particularly ratty? Or any your air vent covers??
Make an inventory – as it might be time to start thinking about swapping some of these out. They’re not expensive [you’re about to spend thousands on a new HVAC system], and new and stylish replacements can make your house look so truly nice. Almost upgraded. And with very little DIY effort.
Part 2 of this article will follow in the coming weeks.
But even when it exists – and before we leave the topics covered here: Any additional comments, experiences or insights anyone can share below?
Need Professional Help from a Local HVAC Contractor?
• Visit Our Find a Contractor Page
Related Posts
• Replacing a Central Air Conditioner Return Vent Cover
• Inspecting and Cleaning your HVAC Evaporator Coil
• How to Clean your Outdoor A/C Unit for Better Cooling
• How to Repair a Leaky Basement Wall
• How to Use a Submersible Pump to Remove Excess Pool Water
• How to Replace a Dead GFCI Outlet

Hey Mark,
First class summary. Nice suggestion on the water detectors, I’ll add that to my to-do list for the cellar.
A couple of thoughts to add:
1) My condensate pump outflows to a sump from which the water is pumped outside by the sump pump. When I questioned the efficiency of this, I got strong push-back that you do not want to have the condensate pump go directly outside – the line will freeze and then you will have no heat because your furnace will sense it could stop working. I know someone who had this happen.
2) Furnaces and water heaters should be installed raised off of the cellar floor by at least a couple of inches. You don’t want them wet if you have an otherwise minor amount of cellar flooding.
Thanks Bill! On your 2 follow-on points, let me take them in reverse order…
On the second – absolutely. Below is a photo of the very bottom of my Air Handler, which I didn’t photograph above… but as you can see here, we’re well off the ground. In fact, the door you see in the open position is where I install and maintain my HVAC filters. But the unit, in total, is well above my basement floor – far more than even the bricks would imply.
On the first – I run the output of my Condensate Pump into my basement sump pump well, too. I don’t take it directly outside. A passive run to that well, without any Condensate Pump, would be so much better (as I see it) – but I don’t have that option in my current home.
And to your point about a direct drain line to the outside potentially freezing: it can clog with other material, beyond ice, as well. And in both cases, ‘bad things’ can then happen. Hence, the need for ongoing HVAC maintenance in total.
In more year-round temperate states (like Florida, for example) – having the drain line cleaned every 6 months or so (blown out with Nitrogen) is a common practice for the very reason you state above!
Wow – Thank you so much for this comprehensive article! It seems that I discovered your website just in the nick of time: After many “patch” repairs, my home’s HVAC system is on its last leg, and I’m looking at a major overhaul (complete replacement) this summer. It’s nice to see all the phases of the project presented in one place, in one straightforward, easy-to-follow article. Even though I’ll be using a licensed HVAC professional, it is still important for me to understand each of the steps involved. Thanks again!
Glad you found it helpful, Tom! One suggestion, though… I definitely wouldn’t try to tackle something like this in the heat of the summer if it can be avoided. I’d target the Fall or Spring – when the demand for heating and cooling service professionals was a bit lower. You might be able negotiate better deals during the non-peak months, too. Best of luck!