My house has been called “lived-in.”
And what that phrase seems to really mean is that we’re always breaking stuff. The kids, the dog, the ferret — but probably the biggest breaker-of-things? That would be me. (And my wife will surely attest to this!)
Certain pieces of furniture tend to take a beating far more than others though – the kitchen table, the kitchen chairs and casual coffee tables all come right to mind. Wooden railings take a lot of abuse as well. It’s very easy to get scratches on items like these, simply from the ongoing heavy usage.
Over the years, I’ve found just a couple of tips can help minimize the appearance of such annoying scratches without having to refinish completely, which can take hours – and frankly often just isn’t worth it, in my opinion.
[Plus, refinishing furniture is a meticulous talent that I have come to equate with an art form; some people are incredibly gifted with this. I am not one of those people.]
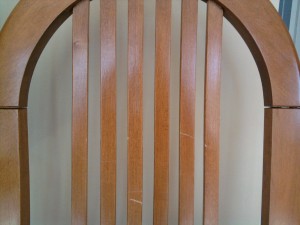
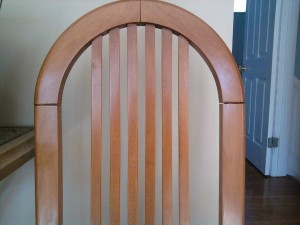
The photo below will give a good idea what I’m talking about: this is one of our kitchen chairs. You can see the surface scratches in the finish. It’s not gouged – but has been clearly damaged.
I’ve found two approaches can help (often significantly) the appearance of this surface without too much investment of time, energy or money.
Approach 1:
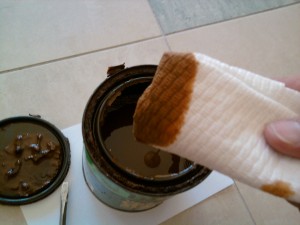
Get a small can of wood stain at your local hardware store that matches your furniture. Wood stains are applied to a surface and subsequently removed. The longer you leave them on – the more will absorb into the wood and the darker it will get. Wood stain is very different from paint; you do not just apply it – you need to remove it!
(It’s a good idea to test the stain on a piece of scrap wood to ensure the color if you can – and to get a feel for this application/removal process as well.)
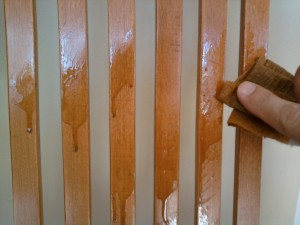
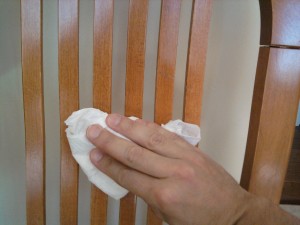
You can see in the pictures below – this needs to be applied very carefully with some paper towel. It’s very thin, so don’t let it drip onto anything but the intended surface. It will stain what it touches. After you leave it on for an appropriate amount of time (determined from your scrap wood testing), get a clean piece of paper towel and wipe everything down thoroughly – remove all excess stain.
This may be all that you need; the scratches may become significantly “invisible.” (The areas that take the stain will never have the shimmer of the finished wood as there’s no finish-coat of varnish or-the-like on top.)
But if this doesn’t completely do the trick for you and you want to take it further, you can also try…
Approach 2:
If you’ve never heard of this before, it may actually sound somewhat surprising.
I learned this from folks working in a furniture store several years ago. It turns out that delivering furniture quite often results in small scratches and sometimes even tiny chips. So, it’s imperative that quick-fix techniques be readily available.
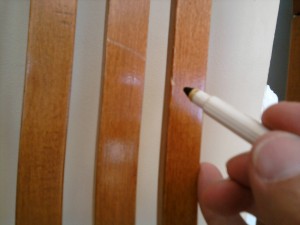
If you go to the cabinetry section of your hardware store, ask them about touch-up markers and have a photo of your furniture with you. In essence, you’re going to use a marker to “color” the damaged section of furniture striving, again, to minimize the appearance of the damage.
(Sometimes, you’ll even receive such markers with furniture kits that you self-assemble.)
In the photos that follow, you’ll see some of the more prominent scratches are still pretty visible and I used a marker to mask even further.
You want to be particularly careful with this as you could easily make the wood too dark. Apply lightly and in several passes. If you find you’ve gone too dark, quickly and intensely rub the area with a finger – this might remove some of the marker before it sets, but it might not. You really want to approach this gently, lightly and with multiple passes.
When done, again get a clean paper towel and rub everything down thoroughly.
Now, when all is completed – will your furniture be brand-new and perfect? It will not.
However, you will almost surely find it to be much improved.
You’ll always know where the damaged spots are, but most people frankly won’t.
And… you didn’t spend a lot of cash on an expensive repair that, well, might need to be done again the next time your kids’ friends are over and someone sits down wearing a metal-studded leather jacket!

I generally stain when I can – and use a marker as a back-up, but the marker is easier. I find you get a better result with the stain, even though it takes a little longer. And, of course, none of this applies to high-luster finishes – this is just a “quick fix” you can try for high-traffic items like stairway rails, kitchen tables, wood chairs and the like. Thanks for reading!
Good read and even better advice in your article. After performing both fixes, which method do you recommend? Does one approach turn out better, or is one easier to do than the other?